Nourish the Planet: Pumpkin, Tahini and Miso Soup


We’d like to introduce you to your new go-to soup for a chilly autumn day. This recipe can be pulled together in a flash with only a handful of ingredients, yet it’s depth of flavor suggests something much more complicated – win! The tahini adds a creamy texture while the miso gives a jazzy umami counterpoint to the sweet pumpkin. The whole thing comes together in less than 30 minutes, and most of that is inactive time on the stovetop. In the photo we served the soup with a cashew cream (quick recipe below) and toasted hazelnuts but it works equally well as a simple soup on its own.

Nourish notes : As COP26 wraps up this week, many of us have climate change on our minds, and our food system and what we choose to eat is as much a part of a climate solution as it is the problem. Reducing how much meat/animal products we consume is a great place to start and this soup is completely plant-based, getting all its creaminess from the tahini. This is a great trick to use for any blended soup actually – we haven’t found one yet where it doesn’t work. Try sourcing your vegetables from a local farmer or think about signing up to a CSA (community supported agriculture) box. Why? Because it supports and strengthens your local food system, reduces transport costs and food waste, and connect you to where your food comes from and the people that grow it.

Pumpkin, Tahini and Miso Soup

Serves 4 as a starter | Equipment: A large casserole or saucepan with a lid; a blender

Ingredients

1 tablespoon extra-virgin olive oil
1 large onion, roughly chopped
¾ teaspoon sea salt
1 pound (1 kg) raw pumpkin, such as Red Kuri or butternut, trimmed, peeled and cubed
1 tablespoon tahini (sesame paste)
¾ teaspoon yellow miso paste

Method

In a large casserole combine the oil, onions, and ½ teaspoon on the salt and sweat – cook, covered, over low heat until soft – 3 to 4 minutes. Add the pumpkin and 3 cups (750 ml) water. Cook, covered, over moderate heat until the pumpkin is soft, about 15 to 20 minutes. Transfer the mixture to the blender or food processor, and blend until smooth (you may not need all the liquid depending on how thick a soup you like). Add the tahini, miso and remaining ¼ teaspoon salt and blend again. Taste for seasoning and serve warm with a slice of crusty sourdough.


To make cashew cream soak ½ cup raw cashews in water for 4 hours (or simmered for 15-20 minutes if you’re short on time). Drain and blend with ½ cup water until smooth. Season with sea salt.

Note: Make sure to buy fair trade cashews. Cashew production has been linked to horrific working conditions. In addition cashew nut shells contain caustic chemicals that burn on contact with skin during the shelling process so it’s important to support companies that provide protective gear to their employees and a safe working environment.


This is an original Nourish the Planet recipe, part of a collaborative series by Patricia Wells and Emily Buchanan. © 2021 – All rights reserved. Please do not reproduce without permission.

Nourish the Planet: An Autumn Apple Cake


This perfectly autumnal apple cake has been a firm favorite for years, ever since I managed to coax the recipe from apple grower Evelyne Nochet at Le Nouveau Verger. When you make this cake you will be surprised by the small amount of batter compared to the quantity of apples. It is just enough batter to hold the apples together, allowing the apples to really shine through, without losing the comforting element of cake. This is an updated version – the original included a topping of egg, honey and lemon zest, but this time simplicity won out – with a mixture you can throw together in  less than 15 minutes. Because there is so little batter, there is a lot of flexibility with the type of flour you can use. Below we suggest buckwheat and oat flour because we like the earthier more complex flavours and because supporting diverity in agriculture is good for biodiversity. We have also had great success with a mix of rice, coconut and spelt flours, as well as all-purpose wheat flour from the original recipe, so try it with what ever you have in your pantry. 

We prefer using more acidic apples, such as Cox’s Orange Pippin or the French variety Boskoop or Reine de Reinettes. If you prefer sweeter apples go for Golden Delicious or Jonagold, or a mixture of different varieties.

An Autumn Apple Cake

8 servings   |   Equipment: One 10-inch (25 cm) springform pan, lined with parchment paper

Ingredients

¼ cup (25 g) buckwheat flour
¼ cup (25 g) oat flour
1 teaspoon baking powder
1/8 teaspoon fine sea salt
1/3 cup (80 ml) maple syrup or honey
1/2 teaspoon pure vanilla extract
2 large eggs, lightly beaten
2 tablespoons extra virgin olive oil
1/3 cup (80 ml) sheep’s milk or non-dairy yogurt
Grated zest of 1 organic lemon
4 large apples (about 1 pound; 500 g), cored and cut into eighths

Method

1. Preheat the oven to 400°F (200°C).

2. In a large bowl, combine the flours, baking powder and salt and stir to blend. Add the maple syrup, vanilla extract, eggs, oil, yogurt, and lemon zest, and stir until well-blended. Add the apples and stir to thoroughly coat the apples with the batter.

3. Spoon the mixture into the prepared cake pan. Place the pan in the center of the oven and bake until fairly firm and golden, about 30-35 minutes.

4. Remove to a rack to cool. After 10 minutes, remove from the springform pan and peel off the baking parchment. Serve at room temperature, cutting into thin wedges.


This is an original Nourish the Planet recipe, part of a collaborative series by Patricia Wells and Emily Buchanan. © 2021 – All rights reserved. Please do not reproduce without permission.

Nourish the Planet: Gooseberry and Red Fruit Clafoutis


We’re closing out the summer berry season with this comforting goosberry clafoutis. It’s hard to pass up this irresistible fruit in its natural paper lantern-like packaging, whenever it’s available in the market – and it’s unusual tang is the perfect match for the soft, sweet cake-like batter of a clafoutis.

A classic clafoutis is made with cherries, heavy cream and white flour, but today we’re giving it a Nourish makeover, replacing the heavy cream with coconut and almond milk, the flour for ground almonds, and the cherries which are now long gone, for those tart and tangy gooseberries and the last of season red fruits. You can of course make this with any seasonal fruit you like: apples, pears or clementines in winter, cherries, peaches and plums in the summer. If you’re keen to try a vegan version, replace the eggs with 120g of silken tofu and if you prefer something more local than coconut milk, use an almond or oat cream instead.

Gooseberry and Red Fruit Clafoutis

4 servings | Equipment : Four 6-inch (15 cm) individual gratin dishes; a baking sheet

Ingredients

½ cup (125 ml) coconut milk (from a certified sustainable farm)
¼ cup unsweetened almond or oat milk
½ cup  (45 g) ground almonds (almond meal)
1 tablespoon arrowroot powder or cornstarch
6 tablespoons (75 g) raw organic sugar
2 large eggs, free-range and organic, lightly beaten
1 teaspoon pure vanilla extract
1 ¾ tablespoons (15 g) butter or vegan butter
½ pound (250 g) gooseberries and red fruits (fresh or frozen)
Powdered sugar for garnish (optional)

Method

1.   Center a rack in the oven. Preheat the oven to 375°F (190°C).

2.   In a large bowl, whisk together the coconut milk, milk, ground almonds, arrowroot, sugar, eggs, vanilla extract and butter until smooth and well combined.

3.   Arrange the gratin dishes side by side on the baking sheet. Evenly distribute the batter between the gratin dishes. Divide the gooseberries and red fruits into four and arrange on top of the batter. Place in the oven and bake until the clafoutis is golden and the berry juices are bubbling, 40 to 45 minutes. Serve warm with a sprinkling of powdered sugar.


This is an original Nourish the Planet recipe, part of a collaborative series by Patricia Wells and Emily Buchanan.
© 2021 – All rights reserved. Please do not reproduce without permission.

Nourish the Planet: Plum, Cardamom and Rose Compote

 
Plum, Cardamom and Rose Compote.jpg
 

This week is the official start of autumn and with these new chilly mornings come thoughts of stone fruits warmed gently with spices, for serving over morning oats, with a thick Greek-style yogurt or a soothing vanilla ice cream. If you’re lucky enough to have access to an abundance at this time of year, cook up a large batch of compote to preserve in glass jars so that you can enjoy the last of the summer sun fruits right through the cold winter months.

Plum, Cardamom and Rose Compote

Makes about 1 ½ cups (375 ml) compote

Ingredients

500 g plums, halved and pitted
1 tablespoon honey
Zest of 1 organic lemon
1 tablespoon freshly squeezed lemon juice
4 whole cardamom pods
1 tablespoon organic dried rose petals or 1 teaspoon rose water
1 plump, fresh vanilla bean, split lengthwise and seeds gently scraped out
1/16 teaspoon sea salt

Method

1.     In a medium-sized saucepan, combine all the ingredients with ⅓ cup (80 ml) water and stir together. Simmer over medium heat until the plums are soft and the juices have released to create a luxurious sauce. Remove from the heat and allow to cool. Serve warm or store in the refrigerator for up to 3 days.  


This is an original Nourish the Planet recipe, part of a collaborative series by Patricia Wells and Emily Buchanan.
© 2021 – All rights reserved. Please do not reproduce without permission.

Nourish the Planet: Eggplant, Chickpea and Tomato Stew

 
Aubergine chickpea and tomato stew 2.jpg
 

Life has been pretty busy for both of us lately, between reopening Chanteduc to cooking class students for the first time since January 2020, and for Emily moving house and with that everything that a new life in a new town brings. It’s at times like these you need those go-to recipes that are nourishing and comforting, and don’t require too many hard-to-get ingredients. This eggplant, chickpea and tomato stew delivers on all fronts – you can throw this together from staple from your pantry store cupboard, eggplant being the only essential fresh ingredient. This is inspired by a recipe for Ruz eb Maya (chickpeas and rice) from The Gaza Kitchen, a beautiful and essential cookbook filled with recipes and stories from home cooks across the Gaza Strip. Our version adds eggplant, making the most of it before it disappears from the market stalls in late autumn and wild Sardinian oregano. We like to serve it with a think dollop of yogurt-tahini sauce, but it is equally satisfying served as a simple stew with no garnish at all.  

NOURISH NOTES : Chickpeas have a small carbon and land-use footprint but a rich nutrient profile – high in fibre, protein, vitamins and minerals as well as antioxidant polyphenols which protect us against disease – making them a favorite Nourish ingredient. When we cook with a diverse range of unprocessed ingredients like whole grains, pulses and local seasonal vegetables, we support a healthier food system as well as our own gut health and digestion (our microbiome loves all that fibre and diversity).

Eggplant, Chickpea and Tomato Stew

4 servings

Ingredients

3 tablespoons extra virgin olive oil
1 red onion, finely chopped
½ teaspoon sea salt
2 large fresh garlic cloves, halved, green germ removed if present, and thinly sliced
1 teaspoon of dried oregano (preferably wild Sardinian oregano), plus more for garnish
1 large aubergine, sliced in half lengthways then cut into cubes
1 tablespoon tomato concentrate
4 large tomatoes (about 650g), roughly chopped (making about 3 cups) or 2 cups (500 ml) tomato passata
3 cups (750 ml) vegetable stock
1/3 cup basmati rice (preferably semi-wholegrain)
1 ½ cups (275 g) cooked chickpeas

Yogurt-tahini sauce

½ cup (125 ml) thick sheep’s milk yogurt
2 tablespoons tahini (sesame paste)
2 teaspoons freshly squeezed lemon juice
¼ teaspoon sea salt 

Method

1.  In a large, heavy-bottomed pot, warm 1 tablespoon of olive oil of low-medium heat. Add the onion and sea salt and sweat — cook, covered, over low heat—until soft and translucent but not browned, about 5-6 minutes. Add the garlic and oregano and sweat for a further 2–3 minutes.

2.     Add the aubergine and the remaining 2 tablespoons of olive oil and toss to coat. Turn the heat up to medium and fry the aubergine until golden and beginning to soften, stirring often to avoid burning the onions and garlic.

3.     Add the tomato paste, toss to cover the vegetables and cook for a further 30 seconds. Add the chopped tomatoes, stir to combine and cook for a further 2-3 minutes until thick and jammy. Add the stock, rice and chickpeas, stir to combine, cover and leave to simmer until the stew has thickened and the aubergine is soft and on the cusp of falling apart – about 25 minutes.

4.     To make the yogurt tahini sauce, combine all the ingredients in a small bowl and stir to combine. Thin out with a tablespoon of vegetable stock or water.

5.     Serve the stew with a generous dollop of Yogurt-Tahini sauce and a dusting of dried oregano.


This is an original Nourish the Planet recipe, part of a collaborative series by Patricia Wells and Emily Buchanan.
© 2021 – All rights reserved. Please do not reproduce without permission.

Nourish the Planet: Fig and Almond Tart


Figs, rightly so, have a kind of mythical quality to them. Perhaps it’s their heady perfume when they are plump and properly ripe or the fact that they are the oldest known plants to be cultivated by humans. In France they are in season from as early as June sometimes through to October, but September is our favorite time to indulge in these beautiful tear drop-shaped beauties, as the weather starts to cool. This tart leaves the figs to roast whole in all their glory, crowned atop a base of soft sweet almonds. If you’re intimidated by making pastry, look for a store-bought variety that uses wholefood ingredients and try and avoid those with dubious fats and preservatives.

Fig and Almond Tart

8 servings | Equipment:  A 10-inch (25 cm) tart pan with a removable bottom; a rolling pin; a baking sheet lined with baking parchment; a food processor.

Ingredients

A 14-ounce (400 g) sheet of Blitz Puff Pastry (recipe below) or purchased all-butter puff pastry, thawed if frozen
1 cup (80 g) almond flour (almond meal)
5 tablespoons (2 1/2 ounces; 75 g) unsalted butter, at room temperature
1/3 cup (65 g) unrefined cane sugar, preferably organic
2 tablespoons (20 g) unbleached, all-purpose flour or spelt flour
1 egg yolk, preferably organic and free-range
1 tablespoon fig jam
35 to 40 (1 3/4 pounds; 875 g) small purple figs, stems trimmed
Confectioners’ sugar, for dusting

Method

1.     Fold the pastry in half, transfer it to the tart pan and unfold it. Without stretching the dough, lift it up at the edges so that it naturally falls against the rim of the pan. With your fingertips, very delicately coax the dough onto the rim. There should be a generous overhang. With the rolling pin, roll over the top of the tin, trimming off the overhanging pastry to create a smooth, well-trimmed shell.

2.     Center a rack in the oven. Preheat the oven to 400°F (200°C). Place the tart shell on the baking sheet.

3.     In the food processor, combine the almond meal, butter, sugar, flour, egg yolk, and fig jam and process to blend. Transfer the almond mixture to the pastry shell. Smooth out the top with a spatula. Place in the oven and bake just until the pastry firms up and begins to brown, and the almond mixture browns, about 10 minutes. Remove from the oven.

4.     Cut an X in the top of each fig and gently squeeze from the bottom to open the fruit like a flower. Arrange the figs, cut side up, side by side on top of the almond mixture.

5.     Return the tart pan to the oven and bake until the figs and the filling are dark and bubbly, 20 to 25 minutes. Remove from the oven and transfer to a rack to cool. While the tart is still warm, sprinkle with confectioners’ sugar. After about 10 minutes, carefully remove the tart from the sides of the pan, leaving it on the pan base. Serve warm or at room temperature, cut into wedges, with Roasted Fig Sorbet. This tart is best served the day it is baked.

NOTE: Ripe, but not overly ripe figs, which tend to give up too much liquid and turn the pastry soggy.

TIP: Figs freeze beautifully. Treat them as you would berries: Arrange the whole fruit stem side up, side by side on a baking sheet, and place in the freezer. Once frozen, transfer to a zippered plastic bag and freeze for up to 3 months. For use, thaw at room temperature.

Blitz Puff Pastry

Makes 400g pastry, enough for one tart | Equipment: A heavy-duty mixer fitted with a flat paddle.

Ingredients

1 1/4 cups (180 g) unbleached, all-purpose flour or spelt flour
8 tablespoons (125 g) unsalted butter, cubed and chilled
1 teaspoons fine sea salt
1 teaspoons malt powder or malt flakes
1/3 cup (80 ml) plus 1 tablespoon ice water
1 teaspoons lemon juice

Method

1.     In the bowl of the mixer, combine the flour, butter, salt, and malt powder. Mix at low speed until the butter is evenly distributed but large chunks are still visible, about 30 seconds.  

2.     Combine the ice water and lemon juice. Add the lemon water to the flour mixture all at once, mixing at low speed just until the dough forms a ball,  about 10 seconds. Do not over mix. The dough will be wet and shaggy.

3.     Transfer the dough to generously floured, clean work surface. Gather the dough into a ball. Flatten it into a 6-inch (15 cm) square. Wrap the dough in foil. Refrigerate it for at least 20 minutes.  

4.     Lightly flour a clean work surface. Remove the dough from the refrigerator and roll it into a 6 x 18-inch (15 x 45 cm) rectangle. Fold the dough in thirds, resulting in a square. Repeat 1 more time, rolling the dough into a rectangle, folding it in thirds. Wrap the dough in foil and refrigerate it for at least 20 minutes.  

5.     Remove the dough from the refrigerator and roll and fold the dough a 3rd time. Wrap the dough in foil and refrigerate at least for 20 minutes.  

6.     Remove the dough from the refrigerator and roll and fold the dough a 4th time. Wrap the dough in the foil and refrigerate for at least 20 minutes.

7.     Remove the dough from the refrigerator and roll and fold the dough a 5th and final time. Cover and refrigerate for 1 hour.


This is a Nourish the Planet recipe (first published in Salad as a Meal), part of a collaborative series by Patricia Wells and Emily Buchanan.
© 2021 – All rights reserved. Please do not reproduce without permission.

Nourish the Planet: Molded Pappa al Pomodoro with Burrata and Pesto

 
Pappa al Pomodoro-2.jpg
 

This colorful tomato creation was inspired by a dish served at the wonderful Italian restaurant, Come a Casa in Paris’s 20th arrondissement. Chef-owner Flavia Federici reimagined the humble Tuscan pappa al pomodoro tomato and bread soup into an elegant tower of vibrant Italian flavors. This is our version with a few tweaks, something we’ll be sharing with friends all summer long.

Nourish notes: As with any cheese, Burrata and mozzarella do come with a higher carbon load than their veggie friends so it’s important to be vigilant about your sources – buy from a local, sustainable producer if possible, and if not, seek it out from an Italian deli that sources their produce from small scale farms that respect the environment.

Using stale bread, finely ground into breadcrumbs makes this a great zero-waste recipe too.

Molded Pappa al Pomodoro with Burrata and Pesto

6 servings   |   A large covered skillet; a strainer; a 3 ½-inch (8 cm) pastry cutter

Ingredients

2 tablespoons extra virgin olive oil, plus more for garnish
4 plump, moist, cloves garlic, minced
½ teaspoon fine sea salt
Two 14-ounce/400g canned tomato pulp (preferably Mutti brand), or 400g fresh garden tomatoes, cored and diced
¼ teaspoon red pepper flakes
2 tablespoon tomato paste
A bunch of fresh basil leaves, finely chopped
½ cup (125 ml) finely ground bread crumbs
½ pound (250 g) burrata cheese (or use fresh buffalo mozzarella)
½ cup (125 ml) homemade basil pesto
Extra-virgin olive oil, for garnish

Method

In a large, covered skillet, combine the oil, garlic, and salt, and sweat – cooked covered, over low heat – until the garlic is golden. Add the tomatoes, red pepper flakes, tomato paste, and basil, and bread crumbs, and simmer, uncovered, over moderate heat until the mixture is thick, 5 to 10 minutes. Taste for seasoning. Transfer to a strainer set over a bowl to drain off any liquid. Cover and refrigerate until well chilled. At serving time, place the pastry cutter on a plate and spoon the strained mixture into the mold, pressing down lightly to even it out. Remove the pastry cutter. Garnish with the burrata or buffalo mozzarella. Top with pesto and a drizzle of olive oil. Repeat with the remaining portions.

Variations: In season, place a thick slice of fresh tomato, cut to size with the pastry cutter, on the plate, then add the cooked tomatoes and proceed with recipe.


This is a Nourish the Planet recipe, part of a collaborative series by Patricia Wells and Emily Buchanan.
© 2021 – All rights reserved. Please do not reproduce without permission.

Nourish the Planet: Curried Crab and Avocado Galette

 
Crab galette 2-2.jpg
 

This beautiful summery recipe is recreation of a dish from Le Chardenoux, a small and popular bistro in Paris’s 11th arrondissement. A thin crispy round of pastry is the anchor for a delicious mixture of fresh crab seasoned with curry powder, paired with cubes of Granny Smith apple and lime zest, all held together with homemade mayonnaise. This is topped with the thinnest slices of ripe avocado, seasoned with lime juice, lime zest, salt, pepper, and herbs.

Nourish notes: As with so many beautiful ingredients that find their way to our plate, it’s not so much what the ingredient is but how it is produced, farmed or fished and transported that determines whether it is a sustainable choice. Crab and avocado are both great examples of this. For some avocados may be a local product, for others they have been flown half way around the world to get to us, in which case you may want to find an alternative or seek out an avocado producer closer to home (we like to make sure our avocados come from neighboring Spain rather than air-freighted from South America for example). When sourcing crab, look out for the Marine Stewardship Council label which guarantees they come from a sustainable fishery that preserves the marine ecosystem using pots or trotlines. Be wary of imported crab from Asia that doesn’t have a sustainable certification and may be fished in an unregulated, unsustainable way.

Making your own mayonnaise means that you can make sure the eggs used are from a truly free range source, since most industrial mayonnaise is made with eggs from battery-raised hens.

Curried Crab and Avocado Galette

Serves 4 | Equipment: A 3 ½-inch (8 cm) pastry cutter; a toaster

Ingredients

3 ounces (100 g) fresh cooked crab meat (MSC label)
2 tablespoons homemade mayonnaise
1 teaspoon homemade curry powder
Half a Granny Smith apple, cut into small cubes
Coarsely grated zest of 2 organic limes, divided   
4 corn tortillas, or thin crepes, or blinis
1 large, ripe avocado
Freshly squeezed lime juice
Freshly ground pepper
4 fresh lemon thyme sprigs, with flowers if possible
Fleur de sel

Method

1. In a bowl, combine the crab, mayonnaise, curry powder, apple, and zest of 1 lime and toss with a fork. Taste for seasoning and adjust accordingly.

2. With the pastry cutter, cut the tortillas, crêpes or blini into rounds. Toast them lightly. To construct each salad, place the pastry cutter on top of the toast and carefully arrange the crab mixture on top of the toast, pressing down to even it out. Halve the avocado, slice very thinly, and arrange five overlapping slices on half of the crab salad. Drizzle the avocado with lime juice and the remaining lime zest. Season with salt, pepper, and thyme sprigs. Serve.


This is a Nourish the Planet recipe, part of a collaborative series by Patricia Wells and Emily Buchanan.
© 2021 – All rights reserved. Please do not reproduce without permission.

Nourish the Planet: Simmered Cherries with Vanilla, Star Anise and Tarragon

 
simmered cherries with vanilla sorbet-2.jpg
 

Cherries are now in full season in France and market stalls everywhere are bursting with the many varieties of these jewel-like treasures. They have a relatively short season, just 3 months long from June to August in the northern hemisphere, so we’re making the most of them while they are here. A bag of fresh cherries accompanied by some aged local goat’s cheese makes for a perfect simple summer picnic. Simmering them with red wine, and herbs and spices like star anise, vanilla and tarragon transforms them into something completely different, bringing out a deeper, velvety, more intense personality. Served with some homemade vanilla sorbet or a dollop of thick, creamy sheep’s milk yogurt, and you have an altogether seductive dessert.

Simmered Cherries with Vanilla,

Star Anise and Tarragon

Equipment: 4 warmed, shallow soup bowls.

Ingredients

1 pound (500 g) fresh cherries, pitted
1 plump, moist vanilla bean
1/2 cup (100 g) organic honey
1 tablespoon cherry eau-de-vie (kirsch)
1 teaspoon Homemade Vanilla Extract or pure vanilla extract
1 bunch fresh tarragon
2 pieces star anise
2 cups (250 ml) red wine
1/8 teaspoon fine sea salt

Method

1. Flatten the vanilla bean and cut it lengthwise in half. With a small spoon, scrape out the seeds. (Reserve the pod to make vanilla sugar.)

2. In a large saucepan, combine the cherries, vanilla bean seeds, split vanilla bean, honey, vanilla extract, tarragon, star anise, wine, and salt. Bring to a simmer over moderate heat and simmer for 20 minutes. Taste for seasoning. Remove the vanilla bean, let it dry, then add to a sugar jar to make vanilla sugar. Serve warm, with homemade vanilla sorbet or sheep’s milk yogurt.


This is a Nourish the Planet recipe, part of a collaborative series by Patricia Wells and Emily Buchanan.
© 2021 – All rights reserved. Please do not reproduce without permission.

27 Ways to Go Greener in the Kitchen

 
Green Kitchen.png
 

How “green” is your kitchen? Over the years, we have made swaps and changes to our kitchen habits and tools to minimize the environmental impact of the way we cook. It turns out a lot of these habits are better for our health, and most actually save us money, which offsets any extra expense we might have to make in other areas. Here are some of our favorite ways to lessen your footprint in the kitchen.

Save water

For many of us easy access to fresh running water can lead us to take it for granted, yet it is a precious finite resource. Every time we turn on the tap, it’s helpful to remember that only 1.2% of earth’s water is drinkable, to be shared among 7 billion inhabitants, so use it sparingly.

  • Use a bowl or tub when washing dishes to catch the water, and don’t run the water continuously as you wash. Collect the water you use to rinse vegetables, leafy greens, salad and fruit, and use it again to water your plants

  • Don’t throw away the starchy water from rinsing rice. It can be used to wash dishes or as a face wash, toner or rinse to strengthen your hair. Fermenting the water has extra nutritional benefits for skin and hair.

  • When boiling food on the stove top, consider what else you may be able to add to the pot – for example when making pasta, blanch vegetables in the water for the last couple of minutes of cooking time, or add a steamer basket above to make use of the evaporating water. This will also help save on energy.

Conserve energy

Being conscious of our energy consumption in the kitchen will not only save on your energy bill, it will help to lower you carbon footprint too.

  • When bringing water to the boil, always cover the pot with a lid which will help the water come to a boil faster, and prevent too much evaporation.

  • When using your oven, cook multiple things while the oven is hot. For example when baking a dish for dinner, chop up any vegetables that need to be eaten quickly, toss them in extra virgin olive oil and roast them. As a bonus you will have effortlessly partially prepped a future meal as well as avoiding food waste.

  • Consider investing in a pressure cooker. Not only will a pressure cooker cook your food faster (and hands-free), it is highly energy efficient (up to 70% over stove-top cooking). It is a simple and efficient way to cook chickpeas and dried beans too, which makes it much easier to get more plant-based foods into your diet (and tastes far better than the canned versions!).

  • If you’re looking to renovate your kitchen, consider the carbon-implications of your choice of cooker. While gas is wonderful to cook with, the process of extracting natural gas and piping it into private homes leaks huge amounts of methane into the atmosphere, a powerful greenhouse gas. Induction hobs are much more efficient, and if you have a renewable green energy provider, they have almost zero associated pollution.

  • A freezer is most efficient when at capacity, so make good use of the space you have. Having frozen foods on hand can help you pull a satisfying and healthy meal together quickly too, while helping to reduce food waste at the same time. Some foods that freeze well are:

–  Precooked grains and legumes
– Nuts and seeds (which quickly go rancid at room temperature because of the oils)
– Fruit such as berries and bananas (peel bananas before freezing) and vegetables like cauliflower, spinach, peas and artichoke hearts
– Sauces, stocks and soups
– Parmesan rinds, which you can throw into soups and sauces to add an umami depth of flavor


Reduce your food waste

30-50% of all food produced globally is wasted, much of it ending up in landfill where it produces large amounts of the potent greenhouse gas methane. Research has suggested that if food waste were a country, it would be the third biggest greenhouse gas emitter after the US and China. Reducing your food waste will save you lots of money as well.

  • Plan your meals in advance and shop to a list so you don’t end up filling your shopping trolley with impulse buys that will go to waste

  • Get creative with using up leftovers. Take inspiration from the Italians who are masters at turning leftovers into entirely new dishes, like left over risotto into arancini balls or a risotto frittata.

  • Label your fridge well and keep it tidy. One huge cause of food waste is half-eaten jars that make their way to the back of the fridge and then are promptly forgotten. Label your shelves using washi tape and a sharpie so you can keep track of what you have. Designate one shelf for leftovers and food that needs to be eaten in the next few days. And label your jars of leftovers so you know what’s in them (particularly if your food is not in a transparent container). Adding the date can also be helpful.

  • Keep your vegetable peelings to make veggie scrap stock.

  • Start collecting zero-waste recipes and educate yourself about how to use all of the plants and animal products you buy. Did you know that pineapple skins can be transformed into a delicious infusion by soaking them, refrigerated for a few days in water? Or that strawberry tops are edible, nutritious and can be thrown into a smoothie? Pea and fava bean pods are completely edible when cooked the right way.

  • Start composting. These days there are composting systems that let you compost no matter whether you have a garden or not. You will be astounded by how much less trash you’ll be sending to landfill too.

 
Go plastic free

The plastic free movement has been gaining momentum for several years now, meaning it’s really easy to find good-quality plastic-free choices. As you wear out items in the kitchen, consider replacing them with biodegradable or less damaging alternatives:

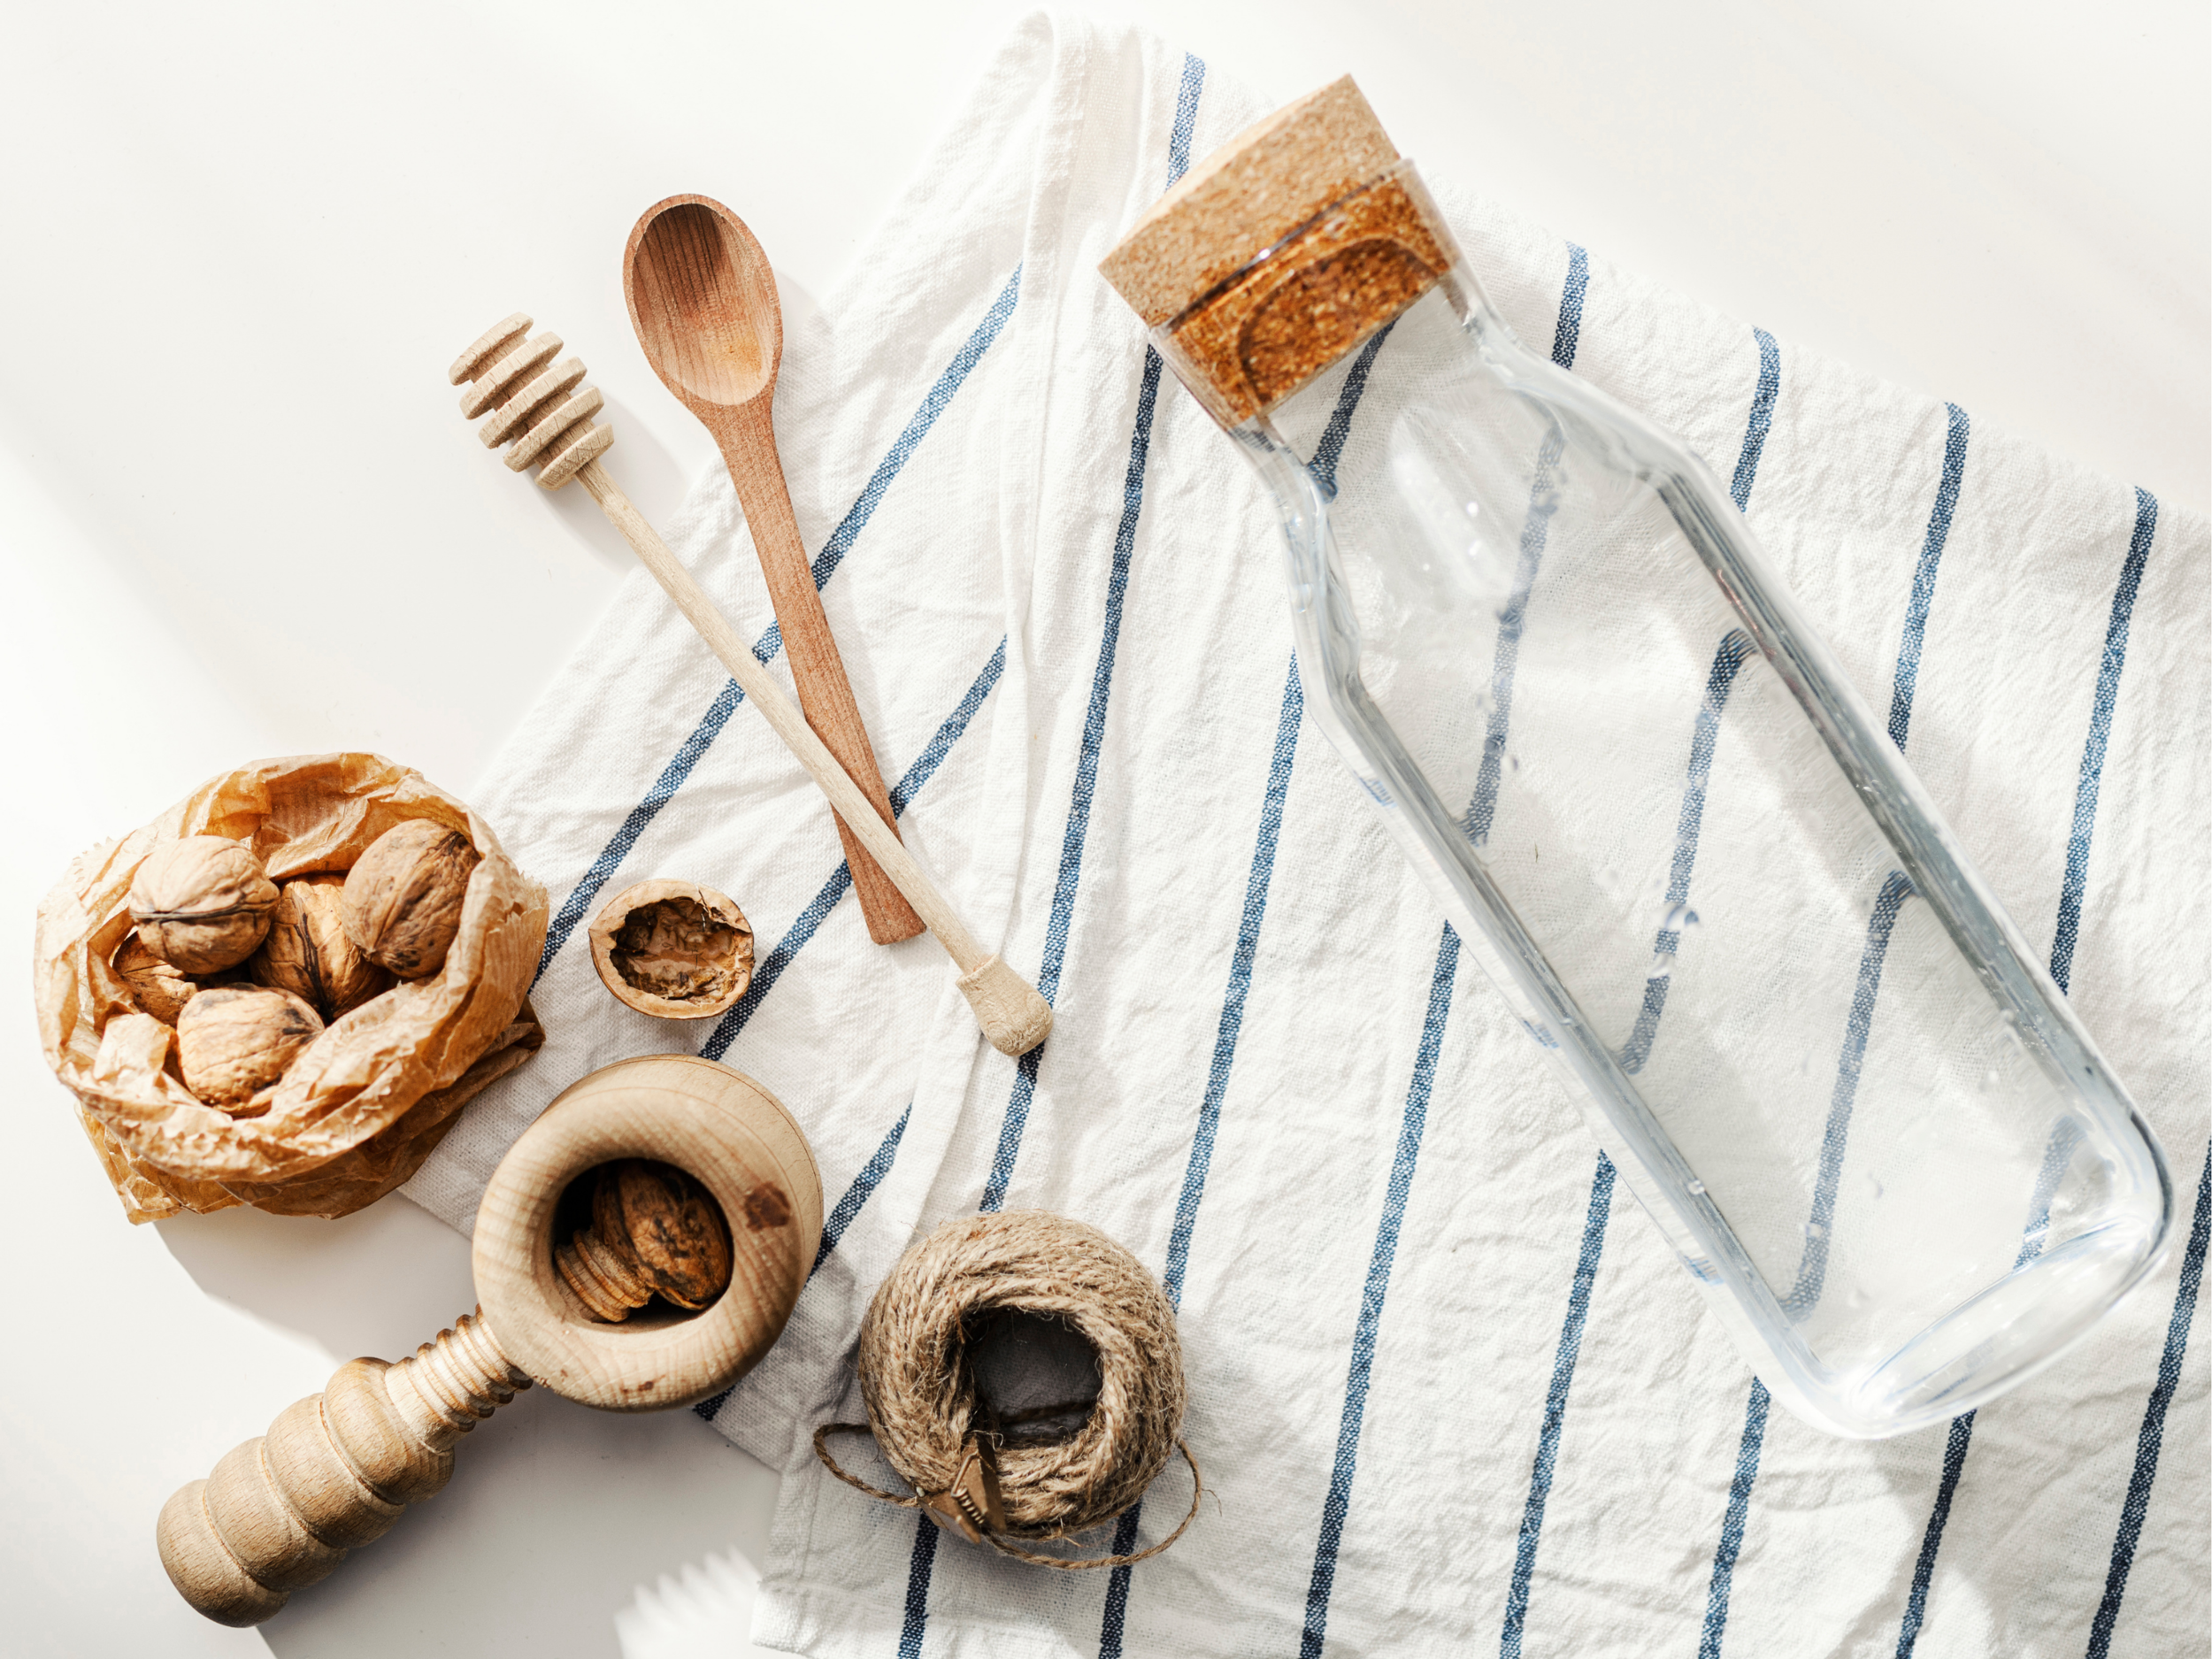
  • Up-cycle glass jars to use as food storage containers for the fridge, pantry and freezer.

  • Invest in silicone zip-lock bags

  • Find alternatives for plastic wrap, such as using beeswax wraps or simply using a plate to cover leftovers like our grandmothers used to.

  • Kitchen sponges are made from oil-based plastics. Swap them out for cellulose sponges or wooden and natural fiber scrubbers. Coconut fiber scrubbers are long-lasting and combined with baking soda are really effective at cleaning hard-to-remove food from pots and plates.

  • Buy your dish washing liquid at a bulk bin store and transfer to a glass soap dispenser

  • Have a set of bamboo or metal cutlery and reusable plates reserved for picnics instead of single-use plastic cutlery.

Make recycling your last option

Less than 90% of plastic is actually recycled. So instead of seeing recycling as our environmental savior, think of it as the last possible option:

  • Avoid food that comes in disposable plastic packaging (bulk buy stores are now becoming more and more popular)

  • Repurpose your old packaging creatively by turning it into art projects for your kids

  • Buy biodegradable non-toxic baking paper and don’t throw it away after the first use. Just rinse it carefully, dry it and store it for next time.

  • Get rid of paper towel (it doesn’t recycle anyway) and replace it with reusable cloths – you can cut up an old sheet or get preloved napkins at a second-hand store


Avoid harsh chemical cleaners

Remember whatever goes down your sink goes into the water system, so be mindful of using harsh chemical cleaning products that will eventually become part of the water cycle. Just a handful of natural products are all that are needed to keep a green kitchen clean and healthy, and they can all be purchased package-free at a bulk bin store:

  • Baking soda can be used for everything to cleaning out your kitchen pipes to being used as a non-abrasive cleaner on surfaces.

  • Coarse salt is excellent for removing baked on food for non-delicate surfaces such as cast iron pans and the inside of glass bottles.

  • Create your own kitchen spray using a 1:1 white vinegar (14%) and water solution. Add a few drops of lemon or orange essential oil, or macerate lemon or orange peel in the solution for a few weeks to give it a fresh natural fragrance.


This post is part of Nourish the Planet, a collaborative series by Patricia Wells and Emily Buchanan.
© 2021 – All rights reserved. Please do not reproduce without permission.

Nourish the Planet: Yellow Zucchini, Cucumber and Lime Soup with Basil Oil

 
Yellow Zucchini Cucumber and Lime Soup with Basil Oil.jpg
 

As the days become hotter we are always looking for recipes where we don’t have to switch on the oven or cook over a stove. This zucchini and cucumber soup couldn’t be simpler and more refreshing and requires zero cooking. This soup is beautiful all on its own, but a swirl of basil-infused oil will give it a swift restaurant-quality make-over, and is a great zero-waste way to use up wilting basil.

Yellow Zucchini, Cucumber and Lime Soup with Basil Oil

Makes 2 servings | Equipment : a blender

Ingredients

1 large yellow zucchini (about 10 ounces, 300 g), sliced into thick coins
1/3 European cucumber (about 6 ounces, 180 g), peeled and sliced into thick coins
2 tablespoons tahini (sesame paste)
3 tablespoons extra virgin olive oil
2 tablespoons freshly-squeezed lime juice
1 cup vegetable stock or water
3/4 teaspoon sea salt

For the garnish (optional)

Basil oil (recipe below)
Basil leaves
Sheep’s milk yogurt

Method

Combine all the ingredients in the blender and process on high to a smooth, frothy emulsion. Garnish with basil oil, sheep’s milk yogurt and basil leaves. Serve immediately or if you prefer a chilled soup, transfer to a bowl, cover and refrigerate for at least an hour and up to 24 hours.


Basil Oil

Makes 1/2 cup (125 ml) | Equipment: A 5-quart pasta pot fitted with a colander; a fine-mesh sieve; a food processor or a blender; a small jar with a lid.

This all-purpose oil has endless uses: drizzled on grilled eggplant or sliced fresh tomatoes, in place of mayonnaise in a sandwich, or as above as a garnish for soups.  Briefly blanching and refreshing the basil in cold water will help it keep its brilliant green color. Make a large batch in summer when basil is abundant and then freeze it and infuse your meals with summertime vibes during the winter months.

Ingredients

3 tablespoons coarse sea salt
2 cups loosely packed fresh basil leaves
1/2  cup extra-virgin olive oil
1/2 teaspoon fine sea salt

Method

1. Prepare a large bowl of ice water.

2. In the pasta pot, bring 3 quarts of water to a rolling boil over high heat. Add the coarse salt and the basil leaves and blanch for 15 seconds. Drain the basil and transfer the leaves to a fine-mesh sieve. Dip the sieve into the ice water to refresh the basil and help it keep its bright green color. Transfer the basil leaves to a thick clean towel. Roll the towel and squeeze to dry the leaves.

3. In a food processor or a blender, combine the drained leaves, oil and fine salt and process until pureed and well blended. The oil should be tinged with green, with tiny green flecks of herbs floating in it. Transfer the oil to the jar. The oil can be used immediately. (Store in the refrigerator for up to 10 days. Remove from the refrigerator at least 10 minutes before using if the oil has congealed. Shake to blend again before using. Store in the freezer for up to 3 months.)


This is a Nourish the Planet recipe, part of a collaborative series by Patricia Wells and Emily Buchanan. The Basil Oil recipe was first published in My Master Recipes.

© 2021 – All rights reserved. Please do not reproduce without permission.

Nourish the Planet: Smashed Potato and Cauliflower with Lemon, Feta and Zucchini

 
Smashed Potato and Cauliflower with Lemon, feta and zucchini.jpg
 

This recipe was inspired by a recipe from the beautiful and noteworthy cookbook Falastin by Sami Tamimi and Tara Wigley. Their Turnip Mash with Greens is described as a fridge-raid-of-leftovers recipe, and staying true to the original concept, this is our version, using what we had lying around, needing to be used up.

 Making vegetables the centre of the plate can often leave people scratching their heads, wondering how to make a vegetable-only dish feel like a satisfying, fully rounded meal. One way is to layer several vegetables into a single dish, making use of different textures, cooking methods, spices and garnishes to make the meal feel complete. Here mashed potato is transformed into a whole new concept with the soothing bite of steamed cauliflower folded in and brightened up with yogurt, lemon zest and the sharp notes of feta. Cumin, sumac and lemon juice give the zucchini an extra kick, accompanied by a herbaceous garnish of dill, pea shoots and flowers and basil. Simple yet effective!

Smashed Potato and Cauliflower with Lemon, Feta and Zucchini

Serves 2 | Equipment: A medium saucepan, with a lid; a steamer; a potato ricer or masher

ingredients

For the potato and cauliflower
mash

1 tablespoon coarse sea salt
1 pound (500 g ) potatoes, peeled and cut in half
¼ head of cauliflower (about 7 ounces, 200 g), cut into small florets
Zest of 1 organic lemon
3 tablespoons milk or plant-based alternative such as oat milk
2 tablespoons sheep’s milk yogurt
1 tablespoon extra virgin olive oil
Sea Salt
Freshly ground black pepper
2 ½ ounces (75 g) sheep’s milk feta, crumbled

For the Zucchini
2 tablespoons extra virgin olive oil
½ teaspoon cumin, roughly ground
½ teaspoon sumac
1 large yellow or green zucchini (about 8 ounces, 250 g), thinly sliced into coins
1 tablespoon lemon juice
¼ teaspoon sea salt

For the garnish
A handful of fresh herbs such as dill, basil, parsley, chives, thyme or oregano

method

1. For the smashed potatoes and cauliflower: Bring 2.5 quart (2.5 l) of water to a boil in a medium saucepan covered with the lid (this will help the water to boil faster and save on energy). Add the coarse salt and the potatoes.

2. Place the cauliflower florets in the steamer, cover with the lid and set over the potatoes to steam until both are tender and are easily pierced with a knife, about 15-20 minutes.

3. Removed the steamer basket and set aside the cauliflower to cool. Drain the potatoes. In a medium bowl, mash the pototes with the ricer or masher. Add the lemon zest, milk, yogurt and oil and mix vigorously until well incorporated and the mash is smooth. Season with salt and pepper.

4. Roughly chop the cauliflower florets into small bite-size pieces and fold into the mash along with 2 ounces (60 g) of the crumbled feta, reserving the rest for garnish.

5. For the zucchini: In a medium frying pan, heat the oil in a frying pan over medium heat until shimmering but not smoking. Add the ground cumin and sumac and fry for 30 seconds. Add the zucchini coins, lemon juice and salt and toss to cover with the spices. Reduce the heat to low, cover, and cook until the zucchini is tender and beginning to color, about 5 minutes.

6. To assemble: Transfer the smashed potato and cauliflower to a large serving plate, flattening an area in the middle for the zucchini. Place the zucchini in the centre, scatter with the remaining crumbled feta and garnish with the fresh herbs.


This is a Nourish the Planet recipe, part of a collaborative series by Patricia Wells and Emily Buchanan.
© 2021 – All rights reserved. Please do not reproduce without permission.

Nourish the Planet: Chickpea Grissini

 
Chickpea breadsticks-3.jpg
 

There are some pantry items that we don’t really ever consider making, opting for the simple and cheap store-bought versions. Grissini or breadsticks (invented sometime in the 17th century near Turin in Italy) tend to be one of those items. But on closer inspection of the ingredients, many commercial breadsticks seem like less of a bargain.  They are made with palm oil or dubious vegetable oils, emulsifiers and additives, and almost universally made with industrial white refined wheat flour, that has been largely stripped of its nutritional value. Industrial wheat is farmed as a monocrop, often heavily sprayed with pesticides and fertilizers and this has serious implications for long term biodiversity and soil health. This is so often the case with cheap industrial food, the pricetag on the item in the supermarket so rarely shows the true cost of the food.

So when my good friend Suzanne recently shared with me her fantastic grissini recipe made with nutrient-dense chickpea flour and ground almonds, we were hooked. Her method is simple and only asks you to rest the dough for two hours before backing, requiring just a little forward planning. But the results golden, flavourful batons that are well worth the small extra effort.

These also happen to be gluten free, for those who are bothered by wheat-based products. Just made sure that the flours and yeast you buy are labelled gluten-free, to avoid contamination.

Chickpea Grissini

Makes ten 8-inch (20 cm) grissini |   Equipment:  A baking sheet lined with parchment paper


Ingredients

1/2 cup (125 ml) lukewarm water
1 tablespoons active dry yeast
1 teaspoon sugar
1 tablespoon plus 1 teaspoon extra-virgin olive oil
1/2 cup chickpea flour
1/4 cup (30 g) corn flour
2 tablespoons (20 g) potato starch
2 tablespoons (20 g) sesame seeds
2 tablespoons (15 g) ground almonds
2 tablespoons (10 g) psyllium
1 teaspoon fine sea salt

Method
1. In a small bowl, combine the water, yeast, and sugar. Stir and set aside until the mixture bubbles and has a fragrant yeast aroma, about 10 minutes. Stir in the olive oil.

2. In a large bowl, combine the remaining dry ingredients. Stir well to combine. Add the yeast mixture to the dry mixture and stir until well-combined. The dough will be soft. Cover the bowl and set aside in a warm place for at least 2 hours.

3. While the dough is rising, center a rack in the oven. Preheat the oven to 375°F (180°C).

4. Divide the dough into even portions, each weighing just under 1 ounce (30 grams). Roll each portion into a ball. You should have about 10 balls. Using your fingers and the palm of your hand, roll each ball into sticks about 3/8-inch (1 cm) in diameter and about 8 inches (20 cm) long. Place each on the prepared baking sheet.

5. Place the baking sheet in the oven and bake for 15 minutes. Remove the baking sheet from the oven and turn the breadsticks. Reduce the oven temperature to 250°F (120°C), return the baking sheet to the oven and bake for 30 minutes more. Remove from the oven and allow the grissini to cool. Store at room temperature for up to 1 week.


This is a Nourish the Planet recipe, part of a collaborative series by Patricia Wells and Emily Buchanan.
© 2021 – All rights reserved. Please do not reproduce without permission.

Nourish the Planet: Zucchini Galettes with Dill-Yogurt Sauce

 
zucchini galettes.jpg
 

These golden, airy, feather-like vegetable galettes or fritters are inspired by New York City chef Eric Ripert of Le Bernardin. His cookbook Vegetable Simple is a treasure-trove of uncomplicated, healthy vegetable creations and the perfect addition to your cookbook collection if you are trying to get more vegetables into your diet. The nutrient-rich zucchini is just coming into season in France and makes for an ideal Nourish candidate, since it is so versatile, healthy and one of the best no-waste vegetables around. Here, you can grate the entire vegetable, without even trimming it! Serve the galettes as a main dish at lunch or as a side dish to a main meal. One can play around with herbs and seasoning, making a curry-seasoned yogurt sauce and adding curry to the galette batter, or swapping fresh oregano, chives, mint, or cilantro for the dill.

Zucchini Galettes

Makes 8 galettes | Equipment: A box grater; an 11-inch (28 cm) nonstick skillet; a 1/4 cup (60 ml) measure

Ingredients

Sauce
1/2 cup (125 ml) organic sheep’s milk yogurt
2 tablespoons finely chopped fresh dill
1/8 teaspoon fine sea salt

Galettes
2 medium zucchini (about 1 pound; 500g total)
1  1/8 teaspoon fine sea salt
2 tablespoons finely chopped fresh dill
1/4 small red onion, diced
2 large organic and free-range eggs
1/2 cup (80 g) instant polenta
1 teaspoon baking powder

2  tablespoons extra-virgin olive oil  

Method

1. In a small bowl, combine the yogurt, dill, and salt, and blend with a fork. Cover and refrigerate until ready to serve the galettes.

2. On the large holes of the box grater, grate the zucchini into a large bowl. Combine the grated zucchini, onion, and 1/8 teaspoon fine sea salt and toss gently. Set aside for 5 minutes. Transfer the zucchini mixture to the center of a clean kitchen towel and, over a sink, squeeze out as much liquid as possible.

3. In a large bowl, whisk the eggs together. Add the zucchini mixture, polenta, baking powder, and 1 teaspoon of salt and mix thoroughly.

4. In the skillet, heat 1 tablespoon of oil over medium heat. Fill the 1/4 cup (60 ml) measure with the galette batter and pour into the pan, pressing down to form a galette about 4 inches (10 cm) in diameter. Continue with 3 more galettes. Cook until golden brown on both sides, about 2 minutes per side. Transfer to a plate and keep warm. Repeat with the remaining oil and batter. Serve warm with the yogurt-dill sauce.


This is adapted from a recipe by Eric Ripert for Nourish the Planet, part of a collaborative series by Patricia Wells and Emily Buchanan.
© 2021 – All rights reserved. Please do not reproduce without permission.

Find our more here about why we created this series.

Nourish the Planet: Gluten-free batter bread

 
Gluten free bread slices-2.jpg
 

Any cook looking for a golden, cake-like gluten-free bread recipe need look no further. This healthy wholegrain bread requires no special equipment and couldn’t be simpler to throw together. Each ingredient plays a role here: The brown rice flour is full of fiber and helps provide the bread with a grainy texture and a fine, dry crumb. The cornstarch helps create a tender, dessert-like texture and can also be swapped out for nutrient-dense arrowroot which is known to be good for the gut. The psyllium (also a very gut-friendly ingredient) helps bind the bread and retain moisture, keeping it from becoming too crumbly. Finally, the baking powder increases the volume and lightens the texture of this new star of our kitchen.

Gluten-free batter bread

Makes 2 loaves   |   Equipment:  Two 1-quart (1 l) nonstick rectangular loaf pans; a baking sheet; a cooling rack

Ingredients

Butter or extra virgin olive oil, for greasing the pans
1 ½ cups (375 ml) lukewarm water, divided
2 tablespoons active dry yeast
2 tablespoons honey
2 tablespoons (30 g) melted butter or extra virgin olive oil plus more for garnish
3 organic, free-range egg whites, at room temperature
1 teaspoon apple cider vinegar
2 cups (260 g) organic, gluten-free brown rice flour
1 cup (70 g) organic, gluten-free cornstarch
2 tablespoons psyllium husk powder
1 1/2 teaspoons fine sea salt
2 teaspoons gluten-free baking powder

Method

1.  Center a rack in the oven. Preheat the oven to 400°F (200°C). Butter the bottoms and sides of the pans.

2.  In a measuring cup, combine ½ cup (125 ml) lukewarm water, the yeast and honey. Stir and set aside until the mixture bubbles and has a fragrant yeast aroma, about 10 minutes.

3.  In a small bowl, combine the 2 tablespoons (30 g) melted butter, the egg whites, and vinegar and stir to blend.

4.  In a large bowl, combine the rice flour, cornstarch, psyllium, salt, and baking powder, and stir to blend. Add the yeast mixture and stir to blend. Add the remaining 1 cup (125 ml) of lukewarm water and the butter mixture and stir to blend. The mixture should be thin, like a cake batter.

5. Pour the batter into the pans, evenly dividing the batter. Place the pans on the baking sheet, cover with a cloth, and let rise until doubled, about 20 minutes. Place the baking sheet in the oven and bake for 20 minutes. Remove the baking sheet from the oven, turn the breads out onto the sheet, turn upright, and return the baking sheet to the oven. Bake until the breads are deep golden and firm, about 20 minutes more. Transfer the breads to a cooling rack and brush with butter or olive oil. Wait until the bread is completely cooled to slice. The bread is best when toasted. Store in a cloth bag for up to three days.


This is a Nourish the Planet recipe, part of a collaborative series by Patricia Wells and Emily Buchanan.
© 2021 – All rights reserved. Please do not reproduce without permission.

Find our more here about why we created this series.

Nourish the Planet: Orange, Almond and Rhubarb Cake

 
Orange+Almond+and+Rhubarb+Cake.jpg
 

The orange and almond base of this cake could happily exist all on its own, with its deep caramel flavors and moist crumb. But the layer of bright sour rhubarb and lick of coconut sugar to finish really makes you sit up and notice. Simple to throw together and moist enough to stay fresh for up to 3 days (if it lasts that long), this recipe is sure to become a family classic. What’s more, it’s packed full of healthful whole food ingredients – oat and coconut flour that are high in fibre (good for gut health and stabilizing blood sugar), healthy fats from the olive oil and almonds, and just a modest amount of unrefined sugars. An all-round winner!

Nourish notes: Coconut flour is a biproduct of making coconut milk, where the residual coconut flesh is dehydrated and then ground into flour. So why seek out alternative flours like oat and coconut when white flour is so cheap, easy to find and so commonly used in cake recipes? We don’t always consider the lifecycle of common food products like flour, but on closer inspection it turns out that the production, processing and transportation of refined wheat flour grown as a monoculture has a rather hefty carbon footprint. This is made worse by the heavy use of pesticides and herbicides needed to perpetuate monocrop culture which has been linked to the steep decline in biodiversity we are currently seeing. By diversifying our pantries to include alternative grains and flours means that we are supporting a more diverse food system that embraces all the varieties of plants and grains available to us.

Orange, Almond and Rhubarb Cake

8–12 servings | Equipment : An electric mixer fitted with a paddle or a hand-held mixer, an 8-inch (20-cm) nonstick springform cake tin, baking parchment

Ingredients

1/3 cup (80 ml) extra virgin olive oil
1/4 cup (60 ml) maple syrup
2 eggs, free range and organic
Zest and juice of 1 organic orange, topped up with coconut milk or plant-based milk to make. 1/3 cup (80 ml)
1 cup (90 g) oat flour
1/3 cup (30 g) coconut flour
1/4 cup coconut sugar, plus 1 tablespoon (for the topping)
1/3 cup (30 g) ground almonds
1 teaspoon baking soda
1/2 teaspoon salt
1 cup (150 g) rhubarb, cut crossways into thin slices

Method

 1.    Preheat the oven to 180°C. Line the spring form tin with baking parchment or rub the inside of the tin with olive oil.

2.     In the bowl of the stand mixer, beat the olive oil, maple syrup  and eggs on high until light and fluffy. Add the orange juice, zest and milk and beat again until well incorporated.

3.    In a separate bowl combine the dry ingredients: oat flour, coconut flour, ¼ cup coconut sugar, ground almonds, baking soda and salt. Stir to combine and then add the dry ingredients to the wet mixture and gently fold in until well combined.

4. Pour the mixture into the prepared cake tin. Place the rhubarb slices in a spiral covering the top of the mixture and sprinkle with the remaining tablespoon of coconut sugar. Bake for 45 minutes, or until a test skewer comes out clean. Allow to cool in the pan for at least 10 minutes, then remove the springform pan and place on a rack to cool.


This is a Nourish the Planet recipe, part of a collaborative series by Patricia Wells and Emily Buchanan.
© 2021 – All rights reserved. Please do not reproduce without permission.

Find our more here about why we created this series.

Nourish the Planet: Spinach, Ricotta and Feta Frittata


We hear a lot about reducing the amount of meat in our diet for environmental reasons, but what about cheese? Living in a country with over a thousand different kinds of cheese, it’s a subject that’s hard to ignore. Cheese produced from cow, sheep and goat’s milk can have relatively high emissions tags, but not all cheeses are created equal, since different types of cheese require more milk, longer aging periods etc. Here are some tips to follow for environmentally minded cheese lovers who are not quite ready to switch to vegan alternatives:

Support small-scale sustainable farms (organic if possible) either by buying direct from them or from the cheesemongers that support them, rather than from large industrial operations (i.e avoid supermarket cheese). They are more likely to have fewer environmental impacts and promote soil health and biodiversity through their land management systems.

Opt for fresh cheeses over aged ones, such as ricotta, feta or fresh mozzarella, because less processing equals less impact on the planet.

The jury still seems to be out on the exact methane emissions from cows, goats and sheep, however sheep’s milk contains double the amount of solids as other milk, meaning it requires half as much milk to produce the same quantity of cheese.

This simple spring frittata pairs fresh sheep’s milk ricotta and feta with the classic partner of spinach, but you could use any nutrient-rich greens, such as a mix of arugula, New Zealand spinach (tetragone), Swiss chard, or sorrel. Serve it alongside salad greens or pack it up for an effortless but impressive spring picnic lunch.

Spinach, Ricotta and Feta Frittata

Makes one frittata, serving 8 | Equipment: A 10-quart (10 l) pasta pot fitted with a colander; a 9-inch (23 cm) spring-form pan, seasoned with oil

Ingredients

3 tablespoons coarse sea salt
1 pound (500 g) fresh spinach, washed
3 organic, free-range eggs
8 ounces (250 g) organic sheep’s milk ricotta cheese
4 ounces (125 g) organic sheep’s milk feta cheese, crumbled
¼ teaspoon fine sea salt
½ teaspoon freshly grated nutmeg
Fresh herbs for garnish: minced summer savory, chives, basil, dill, or thyme

Method

1. Center a rack in the oven. the oven. Preheat the oven to 350°F (175°C).

2. Fill the pasta pot with 8 quarts (8 l) of water and bring to a boil over high heat. Once boiling, add the coarse sea salt and the spinach and cook just until the spinach is wilted, about 2 minutes. Drain and, with the spinach still in the colander, refresh it with cold running water. This will help the spinach maintain its bright green color. Transfer it to a large, clean kitchen towel and fold the towel over the spinach, wringing it out to remove as much liquid as possible from the spinach.

3. In a bowl, whisk the eggs. Add the ricotta and, with a fork, mix to blend. Add half of the feta, the salt, and nutmeg and mix to blend. Coarsely chop the spinach and add it to the bowl. Mix to blend.

4. Transfer the mixture to the prepared pan. Shower with the remaining feta cheese. Place in the oven and bake until firm and golden, about 30 minutes. Remove from the oven to cool before unmolding. Serve warm or at room temperature, showered with fresh herbs.


This is a Nourish the Planet recipe, part of a collaborative series by Patricia Wells and Emily Buchanan.
© 2021 – All rights reserved. Please do not reproduce without permission.

Find our more here about why we created this series.

Nourish the Planet: Socca

 
Socca.jpg
 

These golden brown chickpea flour crêpes – known as socca in Nice and farinata in Liguria – are served deliciously warm from the oven, seasoned generously with coarsely ground black pepper, then torn into raggedy shards and eaten out of hand.

This is a simple, gluten free preparation – made from just 4 ingredients – but can be frustrating to get “just right.” The batter (which should contain oil, but the end result shouldn’t be oily) can be made several hours ahead, with the socca baked at the very last moment. Once baked, it should be just thick enough to fold into torn portions, not break up into dry handkerchiefs. This beauty was baked in a tin-lined copper socca pan, much like a flat paella pan, but any large, round, flat oven-proof pan, such as a cast iron skillet would do just fine.

Nourish notes: Chickpeas have some of the lowest carbon emissions of any plant foods, and ground into flour make a healthy, creative alternative to wheat flour. There are 6,000 plant species available to us for cultivation for food, yet the ubiquity of monocultures in industrial farming mean that only 9 of them make up 66% of total crop production. Filling our pantries with a wide variety of grains, legumes and flours is not only good for our health but is a way to support biodiversity in our food system.

Socca

Chickpea Flour Crêpes

8 servings   |    Equipment: a  2-cup (500 ml) measuring cup, with a pouring spout; a 12- inch (30 cm) round ovenproof socca pan, paella pan, or cast-iron skillet; a pastry brush

Ingredients

1 cup (100 g) chickpea (garbanzo) flour
1 cup (250ml) water
1 teaspoon fine sea salt
4 tablespoons fruity, extra-virgin olive oil, divided
Coarse, freshly ground black pepper (Timut by preference)

Method

1.     In the measuring cup, whisk together the flour, water, salt, and 2 tablespoons of oil. The batter should be thin and crepe-like. It will be a bit lumpy. (The batter can be prepared up to 24 hours in advance, stored and covered at room temperature.)

2.     About 25 minutes before baking the socca, place a rack in the bottom shelf of the oven. Place the empty pan or skillet on the shelf. Preheat the oven to maximum, ideally at least 450°F (230°C) to 500°F (260°C).

 3.     To bake the the socca, carefully remove the hot pan or skillet from the oven. Pour the remaining 2 tablespoons of oil into the pan and brush to evenly distribute the oil. Pour the batter into the pan, swirling to evenly distribute the batter. Return the pan to the oven and bake until the socca is bubbly, colored a deep golden brown and evenly dotted with little crater-like holes, 12 to 15 minutes. Remove from the oven, and season generously with the pepper. Use a scraper to scrape the socca into raggedy shards.  Serve warm.


This is a Nourish the Planet recipe, part of a collaborative series by Patricia Wells and Emily Buchanan.
© 2021 – All rights reserved. Please do not reproduce without permission.

Find our more here about why we created this series.

Nourish the Planet: Berry, Rose and Lemon "Cheesecake"

 
Berry Rose and Lemon Cheesecake.jpg
 

It’s no secret anymore that our food system is contributing to climate change, more than a quarter of all greenhouse gas emissions in fact. An article earlier this month in the Atlantic “Your Diet is Cooking the Planet. But two simple changes can help”, names eating less meat and dairy and reducing food waste as by far the most impactful ways that individuals can make a difference.

One of the hardest things about changing the way you eat, for environmental or other reasons, is that sense you’ll have to give up the foods you love. Cheesecake is a perfect example. How could you possibly reproduce the luxurious creaminess of this iconic dessert (that dates back to ancient Greece) without using some sort of cheese? (The giveaway is in the name after all!) The answer, happily is quite easily, and with fantastically satisfying results. This recipe was inspired by a dairy-free cheesecake created by chef and cookbook author Emma Galloway of My Darling Lemon-Thyme, who uses coconut oil to set a cashew cream base. Our version combines of cashews, almonds and coconut milk as the base for the cream filling, set on a light oat and almond crust. Lemon juice serves as a bright replacement for the lactic tang of cream cheese, with the zest giving an extra hit of citrus fragrance.

A few notes on ingredients and process:  

  • Ground almonds (almond flour) can be used instead of whole soaked almonds, if that’s what you have on hand or if time is limited.

  • When sourcing coconut products, make sure to look out for a brand that uses sustainably farmed coconuts, that are not grown on deforested land.

  • When blending the filling, for a smoother consistency, we recommend using a blender rather than a food processor.

Berry, Rose and Lemon "Cheesecake"

Serves 8 | Equipment : A food processor, an 8-inch (20 cm) springform baking pan, lined with parchment paper; a blender

Ingredients

Base
3/4 cup (105 g) whole or ground almonds
1 cup (100 g) wholegrain (not instant) rolled oats
1/4 cup (30 g) coconut sugar
6 tablespoons (90 ml) extra virgin olive oil
1/8 teaspoon sea salt

Filling
1 cup (145 g) raw whole almonds (soaked overnight, see notes below)
1 3/4 cup (250g) raw cashews (soaked for at least 4 hours, overnight if possible, see notes below)
1/2 cup (125 ml) coconut milk
Zest and juice of 2 large organic lemons (about ½ cup; 125 ml)
10 tablespoons (150 ml) maple syrup
200 ml expeller-pressed coconut oil (melted)
1/8 teaspoon sea salt

Topping
2 cups mixed berries, fresh or frozen
1/4 cup freshly squeezed orange juice (about the juice of 1 orange)
2 teaspoons arrowroot powder
1/4 teaspoon rose water

Method

1. Centre a rack in the oven. Preheat the oven to 350°F (180°C).

2. Place the almonds in the bowl of the food processor and process until they look like fine breadcrumbs. Add the oats, coconut sugar and salt and process again until well combined and the crumb is even in size. Add the extra virgin olive oil and process again until the mixture begins to come together. Turn the mixture out into the prepared baking tin, pressing down on the mixture with the back of a spoon to create a tightly packed, even base. Bake in the oven until beginning to turn golden, about 15-20 minutes. Set aside to cool.

3. While the base is cooking, prepare the filling. Drain and rinse the nuts. Pop the almonds out of their skins and rinse again (or place directly in the blender if using ground almonds). Place the nuts into the blender with the remaining filling ingredients and process until smooth and creamy, about 1 minute (depending on the power of your blender motor).

4. Pour the filling onto the cooled base, evening out the surface with a spatula. Tap the baking pan several times on the countertop to remove any air bubbles, and place in the refrigerator to set for at least 6 hours, preferably overnight.

5. To make the topping, place the berries and orange juice in a small pan over low heat and simmer gently until warmed though. In a small bowl, mix the arrowroot with 1 tablespoon water and stir to blend. Add the arrowroot to the berry mixture and swirl the pan in a circular motion or stir gently to incorporate, being careful to keep the berries intact. Allow to simmer until the sauce begins to thicken. Remove from the heat and add the rose water. Stir carefully to combine. Set aside to cool.

6. To assemble, remove the set cheesecake from the springform pan, carefully removing the parchment paper also. Place on a large plate or serving platter. Top with the berry sauce, allowing the liquid to dribble down the side of the cheesecake for dramatic effect. Serve immediately.

Additional notes

Soaking the nuts overnight will soften them up so they can be blended into a smooth consistency. Soak in a generous amount of water, covered by at least a couple of inches above the nuts, with a teaspoon of salt. Soaking and adding salt will help to break down the hard to digest enzymes in nuts, making them more digestible and the nutrients more bio available. If you don’t have time to soak the nuts, simmer them in water for 30 minutes.

 Arrowroot is a tuber native to tropical climates, high in fiber and nutrients, that is most often dried and processed into a fine powder. It behaves much like cornstarch or corn flour but has a much more interesting nutritional profile, is known to have anti-inflammatory properties and be beneficial to gut health. If you can’t find arrowroot, corn flour will do as a substitute.


This is a Nourish the Planet recipe, part of a collaborative series by Patricia Wells and Emily Buchanan.
© 2021 – All rights reserved. Please do not reproduce without permission.

Find our more here about why we created this series.

Nourish the Planet: Strawberry Yogurt Sorbet and Strawberry Crisp

 
strawberry sorbet and crisp.jpg
 

After many long months of pears and apples, the sight of fresh local strawberries in the markets is cause for celebration. Eaten fresh straight out of the punnet (or even better, picked ripe from the plant if you grow your own!) is proof of nature’s perfection. But if you have a glut of strawberries (lucky you!) or want to create a more elaborate dessert, this strawberry yogurt sorbet paired with strawberry crisp (or crumble) is super light, easy to make, and doesn’t’ loose the bright fragrant flavor of fresh strawberries. The sorbet recipe plays up the strawberry’s best qualities, with its bright pink color, and intense fruity flavor and aroma. Use the best-quality full-fat sheep’s milk yogurt you can find, or a thick, creamy plant-based alternative, and a good vanilla-scented organic cane sugar. (Click the link in my profile for the recipe.)

There are more than 600 varieties of these tiny, healthy, heart-shaped fruits, bursting with life-giving properties: they are known to increase HDL (good) cholesterol, lower blood pressure, guard against cancer, and are packed with vitamins, fiber, and high levels of antioxidants. A single serving – about 8 berries – provides more Vitamin C than an orange! But beyond those positive health notes, embrace their intense fragrance and equally powerful, full-fruit flavors.

Not all strawberries are created equal however. In France, the queen of strawberries is the Gariguette, brilliant shiny red, firm, juicy and highly perfumed. Strawberries were first cultivated in ancient Rome, and in provincial France they were regarded as an aphrodisiac. In the U.S., the best berries for flavor include Earliglow (considered the best-flavored of widely grown commercial varieties) and Fragaria Virginiana, the American wild strawberry. Try and avoid hot house strawberries that are grown out of season that use huge amounts of energy to grow, and are almost always less flavorful.

When buying strawberries, be certain to buy organic too. According to the Environmental Working Group (an American nonprofit group that seeks to help people live healthier lives in a healthier environment), strawberries placed first in their annual listening of the Dirty Dozen, a list that ranks fresh produce according to the amount of pesticides and cancer-causing chemicals residue found on and in the produce. Supporting organic farming where you can also helps to protect biodiversity.

Strawberry Yogurt Sorbet

Makes 1 quart (1 l) | Equipment: A blender; an ice-cream machine; a sieve;  8 chilled ice cream bowls.

Ingredients

1 pound (500 g) organic fresh strawberries, hulled and halved
1/2 cup (100 g) vanilla-scented organic cane sugar
1 tablespoon kirsch (cherry eau-de-vie)
1 teaspoon freshly squeezed organic lemon juice
1/8 teaspoon fine sea salt
1 ½ cups (350 g) organic plain, full-fat sheep’s milk yogurt, or a creamy plant-based alternative

Method

In the blender, combine all the ingredients and puree until smooth. Taste for seasoning and adjust as necessary. Place the sieve over a medium bowl and strain the mixture into the bowl to remove the seeds, using a ladle to push the mixture through the sieve. Discard the seeds. Thoroughly chill the sorbet mixture. At serving time, transfer the mixture to an ice-cream maker and freeze according to the manufacturer’s instructions. For best results, serve the sorbet as soon as it is frozen. Do not re-freeze.

Strawberry Crisp

Makes 16 squares | Equipment: A 10-inch (25 cm) square baking pan

Ingredients

Olive oil spray
1 pound (500 g) organic fresh strawberries, hulled and coarsely chopped
2 tablespoons cornstarch
1 teaspoon almond extract

¾ cup (60 g) organic oats
¼ cup whole wheat or spelt flour
2 tablespoons finely chopped hazelnuts
1/8 teaspoon fine sea salt
2 tablespoon coconut sugar
3 tablespoons extra-virgin olive oil

Method

1. Center a rack in the oven. Preheat the oven to 350 degrees F (175 degrees C.) Spray the baking pan with oil.

2. In a large bowl, toss together the strawberries, cornstarch, and almond extract. Stir to combine, stirring until no white patches of cornstarch are present. Transfer the mixture to the baking pan and even out with the back of a spatula.

3. In a small bowl, stir together the oats, flour, hazelnuts, salt, and sugar. Stir to combine. Add the oil and stir until the mixture forms a crumbly mix. With your fingers, drop the crumble on top of the strawberries in the baking pan, working to even cover the fruit.

4. Place the baking pan in the oven at bake until golden brown, 50 to 60 minutes. Allow the crisp to cool before cutting into squares to serve. Store in the refrigerator or at room temperature for several days. Serve with a bowl of Strawberry Yogurt Sorbet alongside.


This is a Nourish the Planet recipe, part of a collaborative series by Patricia Wells and Emily Buchanan.
© 2021 – All rights reserved. Please do not reproduce without permission.

Find our more here about why we created this series.