Nourish the Planet: Mushroom Bourguignon

 
Mushroom Bourgignon.jpg
 

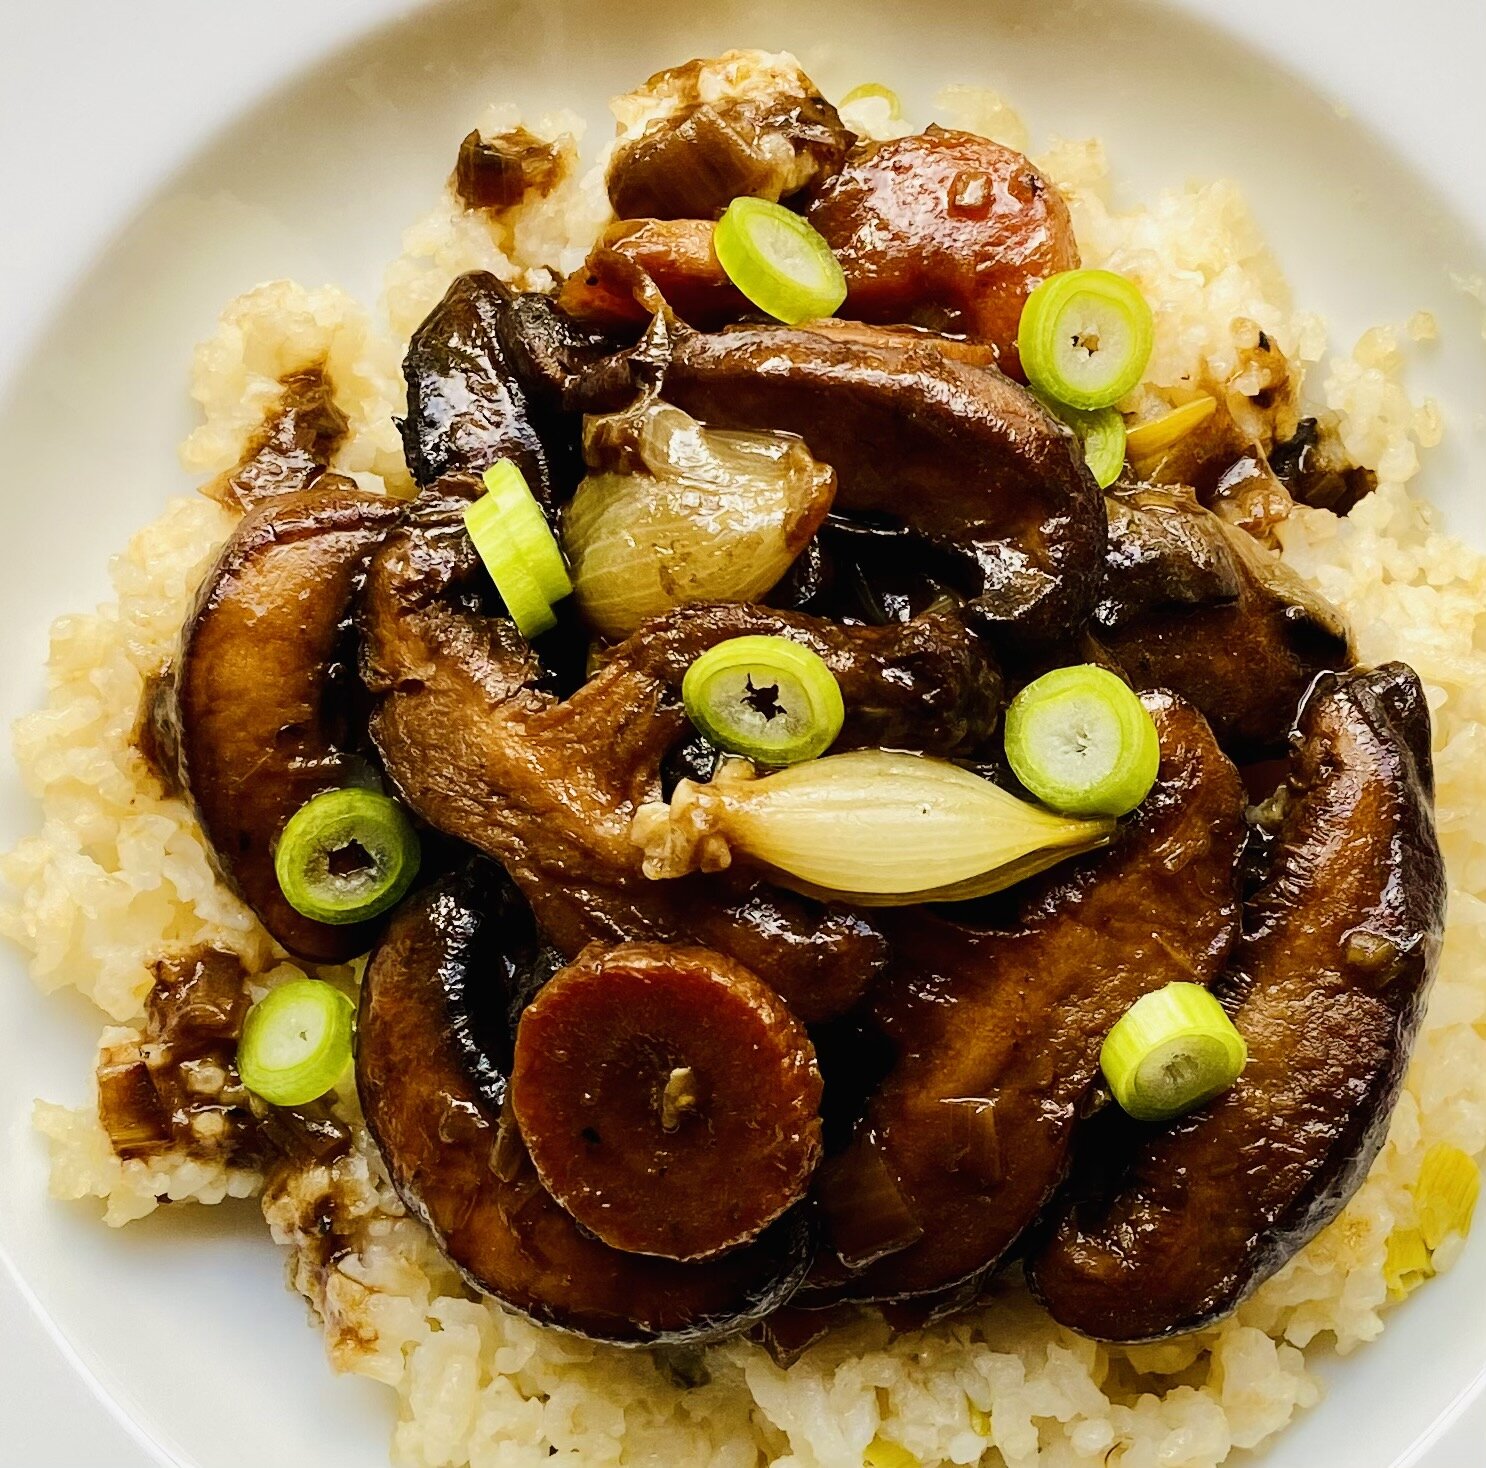
When your dinner guest, a super-accomplished-cook with a discerning palette, announces that your meal is one the best things they have tasted in ages, you know you’re onto a good thing. Inspired by Melissa Clark of The New York Times, this modern taken on France’s traditional boeuf Bourguignon puts mushrooms at centre stage, seared to a rich golden “meaty” brown.

 Some tips to make your version really shine: Be sure to use several varieties of mushrooms to create a greater depth of flavor. Add toasted sesame oil to bring an extra, silky richness to the dish. Finish off with candied citrus for added color, texture and crunch. 

This amazingly rich and luxurious dish is a cold-weather main course that you, your family, and guests will want to savor time and again.

Mushroom Bourguignon

8 servings | Equipment: A large skillet; a 6-quart (6 l) cast-iron pot, with a lid; 8 warmed shallow soup bowls  
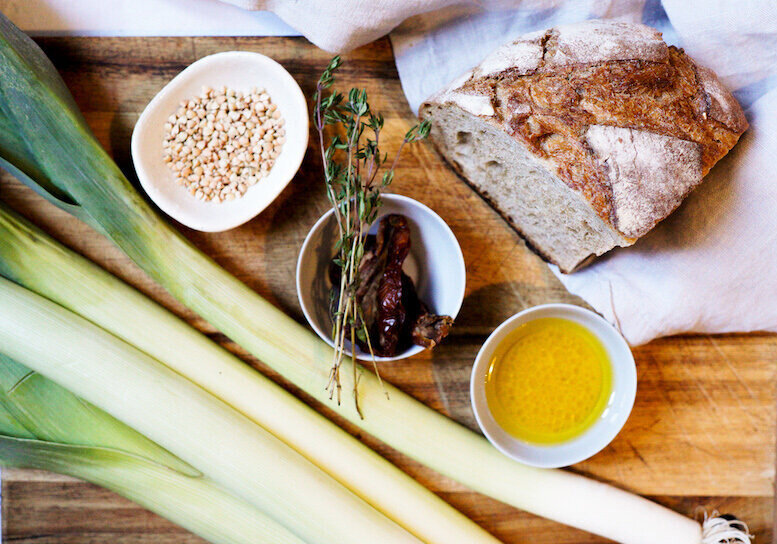
Ingredients

About 8 tablespoons toasted sesame oil or extra-virgin olive oil, plus more as needed
1 pound (500 g) mixed mushrooms, such as cremini, shiitake, and brown button
8 ounces (250 g) pearl onions, peeled
Fine sea salt
Freshly ground black pepper, such as Timut
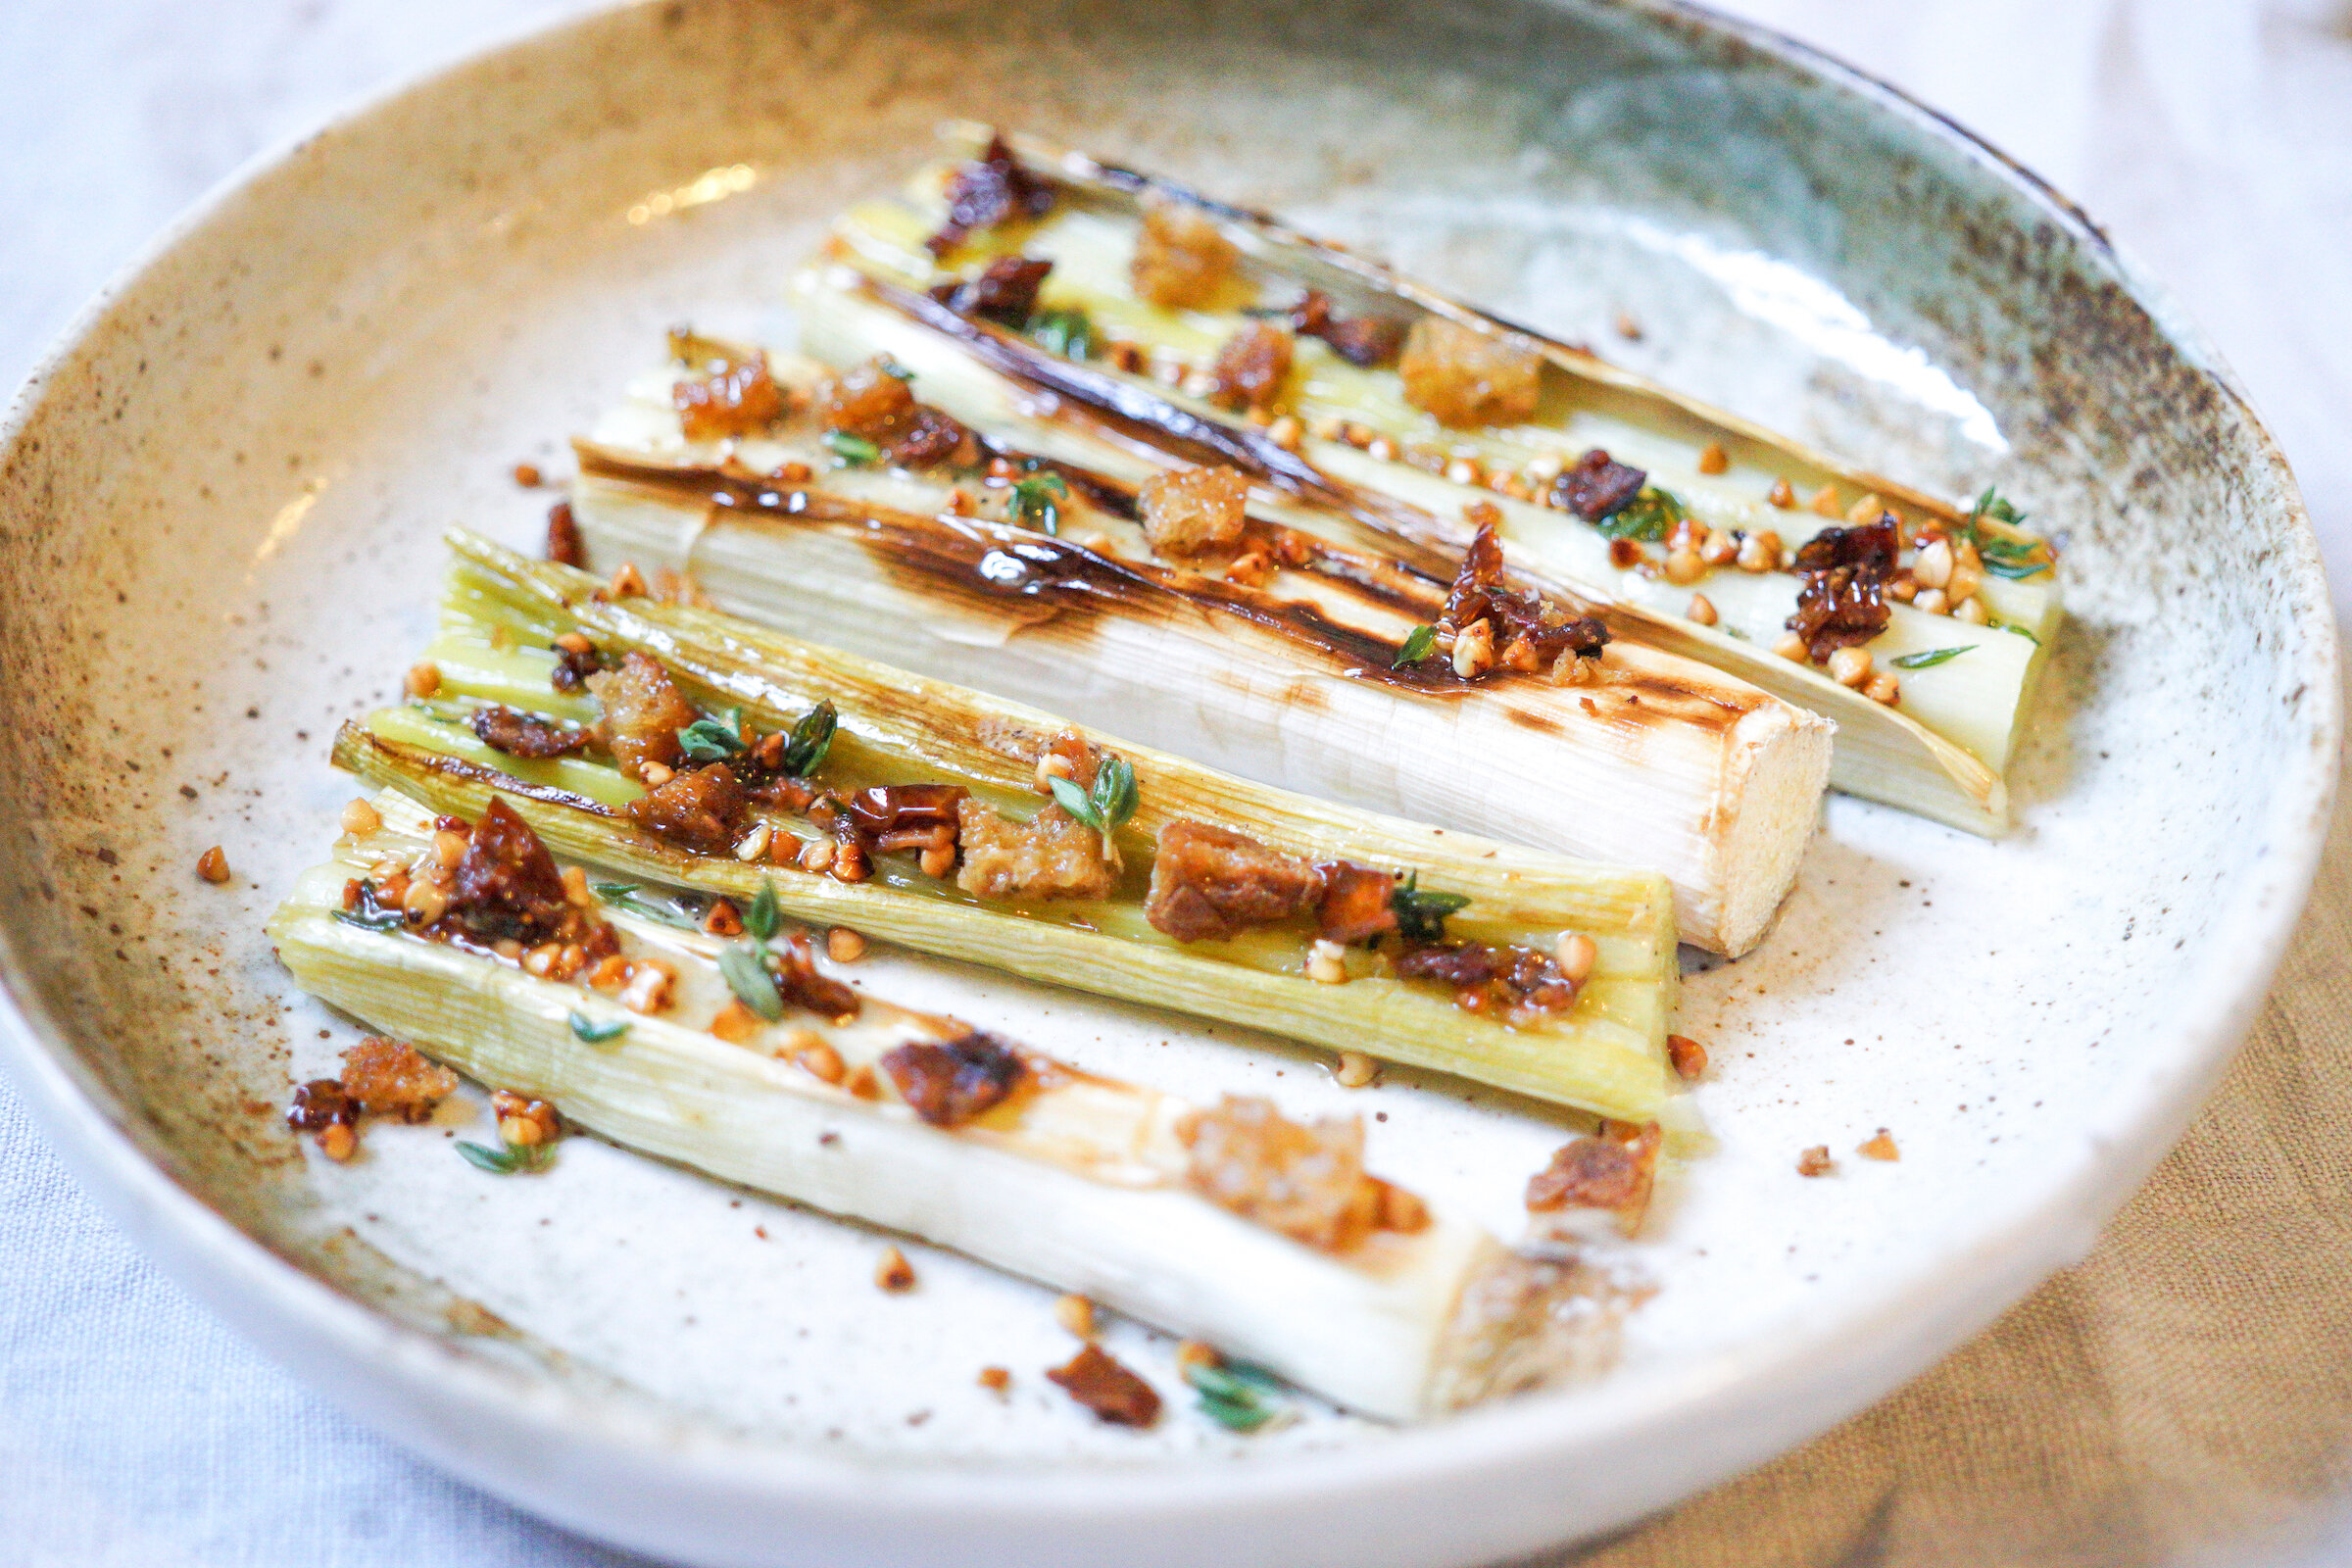
1 large leek, white and light green parts, rinsed and thinly sliced
3 carrots, scrubbed and thinly sliced
1 tablespoon tomato paste
2 tablespoons all-purpose flour
1 cup (250 ml) red wine
3 cups (750 ml) homemade vegetable or chicken stock
2 tablespoons tamari, or to taste
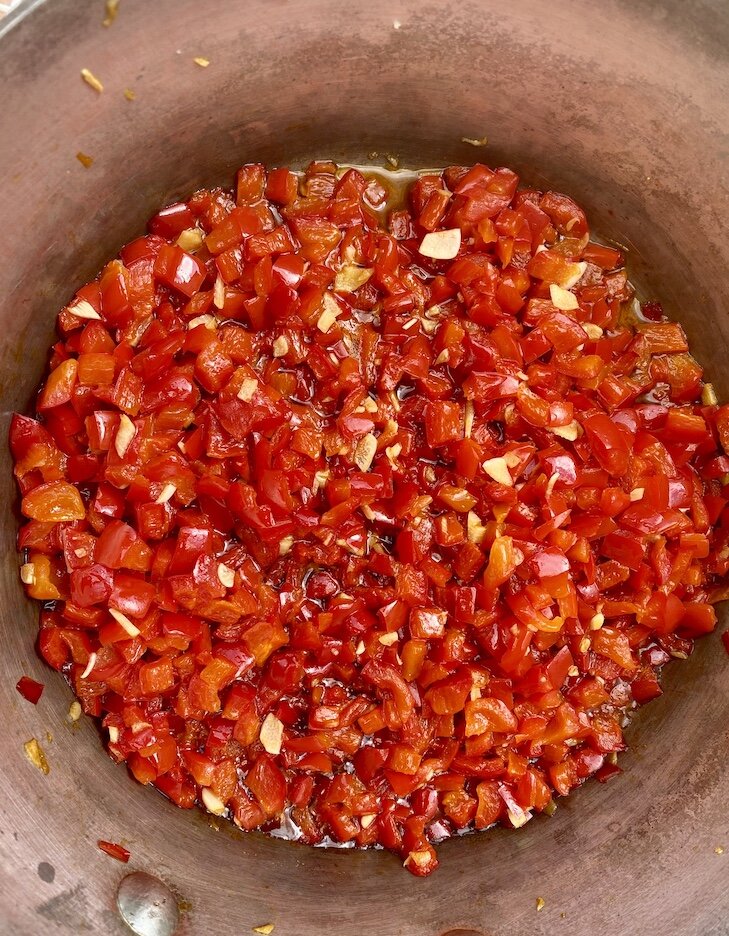
Candied orange or lemon peel, for garnish
Minced chives or scallions, for garnish
Polenta or rice, for serving

Method

1.     In a large skillet, heat 2 tablespoons of the oil over moderate heat until hot but not smoking. Increase heat to high and add the first variety of mushrooms in a single layer, along with about 1/3 of the pearl onions. Fully sear the mushrooms until thoroughly brown on both sides, about 4 minutes total. If the mushrooms become dry before browning, you may need to add additional oil. Be patient, and do not undercook. Use a slotted spoon to transfer the mushrooms and onions to the cast-iron pot. Season with salt and pepper. Repeat with another 2 tablespoons of oil with the remaining onions and two varieties of mushrooms. Add to the other mushrooms and onions in the pot.

2.     In the same skillet, heat 2 tablespoons of oil and sauté the leeks and carrots until the leeks turn lightly golden and begin to soften, about 5 minutes. Stir in the tomato paste and cook for 1 minute. Stir in the flour, cooking for a further 1 minute. Transfer the mixture to the mushrooms and onions in the pot. Add the wine, stock and 1 tablespoon of the tamari. Partly cover the pot and simmer, over low heat, until the carrots and onions are tender and the sauce is thick and shiny, 30 to 40 minutes. Taste for seasoning, adding more salt and tamari if needed. (The dish is even more delicious if prepared a day ahead, chilled then reheated at serving time.)

3.     To serve, arrange the polenta or rice in the warmed shallow soup bowls. Spoon the mushroom Bourguignon on top, and garnish, as desired, with candied citrus, minced chives, or scallions.


This is a Nourish the Planet recipe, part of a collaborative series by Patricia Wells and Emily Buchanan.
© 2020 – All rights reserved. Please do not reproduce without permission.

Find our more here about why we created this series.

Nourish the Planet: Cauliflower and Apple Soup with Homemade Madras Powder

 
Cauliflower+and+Apple+Soup.jpg
 

If you’re looking for the perfect beginning to a small Thanksgiving feast, then this easy yet ingenious cauliflower and apple soup might be just what you are looking – inspired by a dish from New York chef Daniel Boulud.

Cauliflower serves as the backbone for this vibrant, nourishing soup, yet the warming spices from the homemade Madras powder and the apple’s counterpoint of acidity make it difficult to identify this sturdy fall and winter vegetable as the main ingredient.  Not just for festive occasions though, this is an ideal seasonal recipe to be enjoyed all through these colder months.

Nourish note: No need to throw away the leaves or stems of the cauliflower, throw them all in for extra nutrition and zero-waste points.

Cauliflower and Apple Soup

Serves 4 | Equipment: A stock pot; a blender

Ingredients

2 tablespoons extra-virgin olive oil
2 onions, peeled and cut into thin half moons
1 teaspoon homemade Madras powder (recipe follows), plus more for garnish
1 teaspoon fine sea salt
1 quart (1 l) vegetable or chicken stock
1 apple, peeled, cored, and thinly sliced
1 head cauliflower, rough ends trimmed but including greens and stems, broken into small florets
Fresh herbs (cilantro, chives or parsley) plus a shower of curry powder, for garnish

Method

1.   In the stock pot, combine the oil, onions, curry powder and salt, and sweat – cook, covered, over low heat – until the onions are soft, about 3 minutes. Add the stock, cauliflower and apple slices and simmer until the cauliflower is tender, about 20 minutes. Taste for seasoning.

2.   Transfer the mixture to the blender and blend until smooth. Serve warm, garnished with herbs and curry powder.


Homemade Madras Powder

3 tablespoons coriander grains
3 tablespoons cumin seeds
2 tablespoons black peppercorns, such as Kampot
1 tablespoon black mustard seeds
1 tablespoon fenugreek seeds
10 fresh or dried curry leaves
8 cardamon pods
4 small chile peppers
2 teaspoons ground cinnamon
1 tablespoon turmeric powder
1 tablespoon hot chile powder

In a skillet, combine the coriander, cumin, peppercorns, mustard seeds, fenugreek, curry leaves, cardamon pods and chile peppers. Toast over moderate heat until fragrant, 2 to 3 minutes. Transfer to a plate to cool. Once cooled, combine all the curry powder ingredients in a spice mill and grind to a fine powder. Transfer to a small spice jar and store in a cool place up to 6 months.


This is a Nourish the Planet recipe, part of a collaborative series by Patricia Wells and Emily Buchanan.
© 2020 – All rights reserved. Please do not reproduce without permission.

Find our more here about why we created this series.

Nourish the Planet: Spaghetti alle Vongole

 
Spaghetti alle vongole.jpg
 

Spaghetti alle vongole, that classic Italian dish of briny fresh clams cooked in white wine has the wondrous ability to transport you directly to a small Italian coastal village at first bite. It epitomizes the beauty of Italian cuisine – simple yet deeply satisfying created from just a handful of ultra-fresh ingredients. Unlike mussels, clams are extremely easy to prepare, so this dish can be thrown together in under 20 minutes, and you’ll be relaxing in the Bay of Naples in no time at all. 

Nourish notes: Another reason we love clams is that they have numerous positive impacts on the environment. They cleverly convert atmospheric carbon dioxide (co2) dissolved in seawater into calcium carbonate to create their shells, locking the CO2 away indefinitely. They are also known to have a positive impact on water quality around where they are growing, filtering the water as they feed. In addition, farmed clams don’t require any additional feed (as, problematically, farmed fish do) and harvesting generally has very low impacts on the environment. Seafood Watch rates wild clams harvested by hand or farmed clams as ‘best choice’. Make sure to buy clams that are native to their environment (to avoid negative impacts from invasive non-native species). Look for the Marine/Aqua Stewardship Council (MSC / ASC) labels to be sure.

Spaghetti alle Vongole

Serves 4   |   Equipment: A 6-quart pasta pot; a large saucepan

Ingredients

2 pounds (1 kg) fresh, sustainably grown/harvested clams
4 tablespoon coarse sea salt
500 g Italian spaghetti
4 tablespoons extra-virgin olive oil
2 large garlic cloves, minced
6 tablespoons white wine
Fine sea salt to taste
4 tablespoons finely minced parsley leaves
Grated zest of 1 organic lemon
Dried chili flakes, to serve (optional)

 Method

1. Rinse the clams under cold water then place them in a bowl with 1 tablespoon of the coarse sea salt and leave to soak for 10 minutes to allow the clams to rinse themselves of sand. Discard any clams that are open, as they will be dead and no longer fresh.

2. In the pasta pot, bring 5 quarts (5 l) of water to a rolling boil over high heat. Add the remaining coarse sea salt and the pasta, stirring to prevent the pasta from sticking. Cook for 1 minute less than the cooking instructions indicate for al dente, until almost tender but still firm to the bite.

3. While the pasta is cooking, heat 3 tablespoons of the olive oil in the large saucepan over medium heat. Add the garlic and gently fry until just beginning to color. Drain the clams of their saltwater brine, rinse with cold water to wash away any residual sand, then add the shells to the saucepan, stirring for about 30 seconds. Add the wine, cover and steam the clams for 2-4 minutes until they pop wide open. Discard any clams that have not opened. Turn off the heat so as to not overcook the clams.

4. Remove about two thirds of the clams from their shells, adding them to the wine sauce and discarding the empty shells.

5. Drain the pasta and add immediately to the pan containing the clam sauce, tossing to coat the spaghetti. Over medium heat, continue cooking the spaghetti in the sauce for about 1 minute to allow the sauce to absorb into the pasta. To serve, scatter with the minced parsley leaves, lemon zest and chili flakes, if using.


This is a Nourish the Planet recipe, part of a collaborative series by Patricia Wells and Emily Buchanan.
© 2020 – All rights reserved. Please do not reproduce without permission.

Find our more here about why we created this series.

Nourish the Planet: Poireaux à la Vinaigrette


Poireaux (leek) à la vinaigrette is a French bistro menu classic, usually simmered in salted boiling water until tender and served with vinaigrette and scattered with crumbled hard-boiled egg yolk and parsley as a garnish. Here we have slow roasted them until tender on the inside with a chargrilled exterior. For crunch and a bright pop of flavor we created a garnish of golden sourdough croutons, toasted buckwheat groats, sun-dried tomatoes and fresh thyme. Serve it as an appetizer or with “creamy” mashed potatoes for a nod to that other classic flavor combination.

Nourish notes: Buckwheat is a Nourish superstar, considered to be a very sustainable crop that requires low inputs, is known to be good for improving soil quality, and its flowers are a natural food source for beneficial insects, promoting biodiversity. Buckwheat is also high in phytochemicals, plant protein and dietary fiber.

Poireaux à la Vinaigrette

Serves 4

Ingredients

4 medium leeks, rinsed. green ends removed and reserved for another use (such as making veggie scrap stock)

Topping
2 tablespoons extra virgin olive oil
1 slice sourdough bread, cut into small cubes (to make about 1/3 cup)
1 tablespoon buckwheat groats
2 sun-dried tomatoes (if dried, soak in hot water for 5 minutes to rehydrate)
Several sprigs fresh thyme (to give about 1 teaspoon of leaves)

Vinaigrette
2 tablespoons extra virgin olive oil
1 tablespoon apple cider or sherry vinegar
1/8 teaspoon mustard
Sea salt
Freshly grounded black pepper

1.     Center a rack in the oven. Preheat the oven to 320°F (160°C).

2.     Place the leeks on a oven tray, place in the oven and bake until soft and tender, about 45 minutes. Remove from the oven and turn the oven to grill. With a sharp knife, cut the outer skin of the leek lengthwise from root to tip. Brush the leeks with olive oil and return to the oven for 3-4 minutes until golden and beginning to crisp.

3.     In a pan, heat the olive oil over medium-high heat until hot but not smoking. Add the bread cubes and toss until well coated. Add the buckwheat, sun-dried tomatoes and thyme and pan-fry until the bread and buckwheat are golden. Remove from the heat and set aside.

4.     To make the vinaigrette, combine the oil, vinegar, mustard, sea salt and black pepper to taste, and whisk until well emulsified.

5.     To serve, place the leeks on a serving platter, drizzle with the vinaigrette and scatter with the toasted bread, buckwheat and tomato mixture. Garnish with extra fresh thyme if you wish.


This is a Nourish the Planet recipe, part of a collaborative series by Patricia Wells and Emily Buchanan.
© 2020 – All rights reserved. Please do not reproduce without permission.

Find our more here about why we created this series.

Nourish the Planet: Red Pepper Confit

 
Red pepper confit.jpg
 

The versatility of this beautiful red pepper dish has no bounds: serve it as a side dish, with pasta or rice, on pizza, or as a garnish to almost any appetizer. The creator of this dish, Paris-based author Susan Herrmann Loomis (whose new book, Plat du Jour, will be published soon), shared the recipe with us. She notes to be sure to carefully dice the peppers quite small. You can vary the recipe by adding a fresh bay leaf, ground Espelette pepper, or fresh herbs while cooking like thyme, rosemary or oregano.


Red Pepper Confit

ingredients

1/4 cup (60 ml) extra-virgin olive oil
3 large red bell peppers, rinsed, seeds and pith removed, finely diced
2 cloves fresh, plump garlic, green germ removed if present, diced
Coarse sea salt, to taste

method

Place the oil, peppers, and garlic in a heavy-bottomed skillet over medium-high heat and stir until the peppers are coated with the oil. Season with a generous pinch of salt and cook, stirring, until the peppers begin to sizzle. Reduce the heat to low and cook, covered, stirring occasionally, until they are tender, 30 to 40 minutes. Remove from the heat and adjust the seasoning. Serve hot or cold.


This is an original recipe created by Susan Herrmann-Loomis
© 2020 – All rights reserved. Please do not reproduce without permission.

Find our more here about why we created this series.

Nourish the Planet: Niçoise Figs

 
IMG_4109.jpg
 

This simple and fragrant recipe is inspired by a version discovered in a little shop in Nice in the south of France many years ago, and it’s still as appealing as ever. Dried figs are an incredible way to enjoy this sweet and sticky fruit well beyond its relatively short season. Combined with the bright, licorice notes of fennel seeds and the crunch of freshly cracked, earthy walnuts, you have an instant flavor-bomb snack on your hands that you can pair with a glass of wine, add to a cheese tray, or enjoy all on it’s own as a dessert.

Niçoise Figs

Makes 24 stuffed figs

Ingredients

24 dried figs
Several tablespoons fennel seeds
24 freshly cracked walnut halves
Several bay leaves, preferably fresh

Method

Halve each fig, leaving the fruit still attached at the bottom. Stuff each fig with a few fennel seeds and a walnut half. Press each fig closed.

If serving immediately, arrange the figs and bay leaves on a small platter.

To have on-hand as a snack over a week or so,  layer the figs and the bay leaves in a large glass jar. Cover securely and let ripen for several days. Note that bay leaves are only for decoration and should not be consumed!      


This is a Nourish the Planet recipe, part of a collaborative series by Patricia Wells and Emily Buchanan.
© 2020 – All rights reserved. Please do not reproduce without permission.

Find our more here about why we created this series.

Nourish the Planet: Pear and Chocolate Truffle Tart

 
Pear and Chocolate Truffle Tart.jpg
 

This smooth, decadent autumn tart brings together four flavors that love to hang out together: chocolate, pear, cardamom and hazelnut. Earthy, rich and warming, just a thin slice is all you need to feel satisfied, although we are pretty sure you won’t stop at just one. Consider your weekend luxury sorted!

Nourish notes: One of the recommendations for eating a more planet-friendly diet is to try and reduce the amount of dairy products we consume. A classic chocolate ganache recipe relies on heavy cream and butter, so for this planet-forward dairy-free version we swapped them out for coconut milk and unrefined coconut oil. You get the same lush creamy ganache texture that sets perfectly and melts instantly on contact with your tongue. The dark chocolate is rich enough to mask any tropical notes from the coconut milk, meaning that die-hard dairy lovers can not tell the difference.

Make sure that your chocolate, cocoa powder and coconut products come from a sustainable source where the beans and coconuts are not grown on deforested land (which actually has a bigger carbon footprint than low impact beef.) In France we love Kaoka chocolate who have committed to combating deforestation in the countries where their beans are grown (we have no affiliation with the company). A quick web search for products local to you will lead you in the right direction: companies that are doing the right thing really want to tell you about it!

Pear and Chocolate Truffle Tart

Makes 1 28-inch tart | Equipment : a blender or a food processor, a 11-inch (28 cm) pie dish with a removable bottom

Ingredients

Pastry base
2/3 cup (70 g) hazelnuts
2 tablespoons buckwheat groats
A scant 1 1/4 cups (150 g) oat flour
2/3 cup (75 g) sticky rice flour
(or use 225 g spelt flour to replace the oat and rice flour)
5 tablespoons (30 g) unsweetened cocoa powder
10 tablespoons (150 g) unrefined coconut oil plus a teaspoon for greasing the pie dish
2 tablespoons honey

Filling
10 ounces (300 g) dark chocolate (at least 70%), finely chopped
1 cup (250 ml) coconut milk
1 1/2 tablespoons honey
1/8 teaspoon ground cardamom
1 1/2 tablespoons coconut oil
3 small pears, peeled, halved, cores removed and cut into thick slices
1 tablespoon cocoa powder and a pinch of cardamom powder for dusting

Method

1.   Center a rack in the oven and preheat to (350°F) 175°C. With one teaspoon of the coconut oil, grease the bottom and sides of the pie dish.

 2.   To make the base – Place the hazelnuts and buckwheat groats in the food processor, and blend to a fine powder. Add the flours and cocoa powder and process again until combined. Add the coconut oil and honey and pulse until the mixture begins to come together as a dough. It will be soft and slightly wet but shouldn’t stick to your fingers.

 3.    Transfer the dough to the pie dish. With the tips of your fingers gently press the dough across the bottom of the dish and up the sides until evenly covered. Prick the base all over with a fork and place in the refrigerate for 30 minutes to harden up. Once firm, place in the oven and bake for 25-30 minutes.

 4.    To make the filling – Place the chocolate in a large metal bowl. In a small saucepan, combine the cream, honey and cardamom. Whisk to combine and bring just to a boil over low heat. If the pears are not quite ripe, place the slices into the coconut milk mixture and gently simmer until you can easily pierce it with a knife (if ripe, use the slices fresh). Strain the coconut milk setting the cooked pear slices aside.

 5.    Pour one-third of the hot coconut mixture over the chocolate. Working rapidly with a silicone spatula or wooden spoon, mix to obtain a smooth and glossy texture. Gradually add the remaining mixture, making sure to maintain the emulsion, until the chocolate has completely melted and you have reached a uniform texture. Stir in the coconut oil and mix thoroughly one more time.

6.    When the pie crust has completely cooled, arrange the pear slices in concentric circles around the base. Cover with the chocolate ganache mixture, evening out the surface with a spatula. Place in the refrigerator to harden for at least an hour.

7.    To serve, dust with the top of the tart with cocoa power using a tea strainer and sprinkle with a pinch of cardamom. Cut into thin slices and serve.


This is a Nourish the Planet recipe, part of a collaborative series by Patricia Wells and Emily Buchanan.
© 2020 – All rights reserved. Please do not reproduce without permission.

Find our more here about why we created this series.

Nourish the Planet: Cavolo Nero and Walnut Sauce

 
DSC02990.jpg
 

With October comes a lineup of beautiful new seasonal vegetables. A favorite, and a dark horse of the kale and cabbage family is Cavolo Nero (otherwise known as black Tuscan kale) – a bit like the cool older brother to curly kale – more sophisticated and not quite so rough around the edges. Endlessly versatile it can be sauteed, thrown into soups, or as in this recipe, blended to create a velvety, bright green sauce. The obvious choice is to use this as a sauce for pasta or gnocchi, but you can pretty much slather it on/with anything with optimum results – sandwiches, as a sauce to accompany roasted or steamed vegetables, anything really that requires a creamy and full-flavored dressing. And since it keeps in the fridge for up to a week, throwing together a simple weeknight meal couldn’t be easier. And in complicated times like these, we think simple and nourishing is the way forward. When sautéing you may want to remove some of the thicker, fibrous parts of the starts that are hard to chew but are virtually unnoticeable when blended into a sauce.

Cavolo Nero and Walnut Sauce

Makes 1 3/4 cups (400 ml)  | Equipment : a blender or a food processor

Ingredients

8 Cavolo Nero stems, rinsed, stalks trimmed and roughly chopped
1 fresh garlic clove, green germ removed
1 1/2 tablespoons coarse sea salt
1/4 cup (60 g) walnuts
Zest of 1 organic lemon
1 tablespoon (about ½ lemon) freshly squeeze lemon juice
1/4 cup extra virgin olive oil
Sea salt

Method

1. Place 3 quarts (3 l) water, the kosher salt and garlic clove in a medium-sized pot and bring to the boil. Add the Cavolo Nero then bring the water back to ta boil, and cook for 8 minutes.

2. Strain the garlic and Cavolo Nero and place in the blender, reserving ½ cup of the cooking liquid. (If using the sauce for pasta or gnocchi, keep the remaining cooking water to cook your pasta in).

3. Add the walnuts, lemon zest and juice, and the reserved cooking liquid (you may not need it all depending on how thick you want your sauce to be) and blend until smooth. With the motor running, pour the olive oil through the hole in the blender lid or through the food processor feeding tube. Taste for seasoning. Use immediately or store in an airtight container in the refrigerator for up to a week.


This is a Nourish the Planet recipe, part of a collaborative series by Patricia Wells and Emily Buchanan.
© 2020 – All rights reserved. Please do not reproduce without permission.

Find our more here about why we created this series.

Nourish the Planet: Melon, Cucumber and Yogurt Soup

 
Melon and Cumcumber Soup-2.jpg
 

At first guess you might not think that cantaloupe melon and cucumber could be such an alluring soup combination, yet your taste buds are immediately put to work at first sip deciphering this beguiling flavor combination. The sweetness of the melon against the cool cucumber marries idyllically with the creamy richness of sheep’s milk yogurt and the punch of ground hot pepper – the ideal Nourishing soup for a hot late-summer day: healthy, seasonal, quick and delicious.

Nourish note: Although you can easily find cucumbers all year round, out of season they are often grown in heated greenhouses on rockwool (instead of soil) with nutrients added separately. This results in a blander flavor and a much higher environmental footprint. So if possible, source your cucumbers locally and in season, grown in real soil!

Melon, Cucumber and Yogurt Soup

8 servings   |   Equipment: A blender or a food processor; 8 chilled, shallow soup bowls

Ingredients

2 cups (500 ml) organic sheep’s milk yogurt
1 European cucumber, trimmed and thinly sliced (about 1 pound; 500 g) (do not peel)
1 large cantaloupe melon (about 2 pounds; 1 kg), seeded, peeled, and chopped
1/4 teaspoon fine sea salt
1/8 teaspoon ground Espelette, Aleppo, chipotle, or ancho chili pepper (or more to taste)

Method

1.     In the blender or food processor, combine the yogurt, cucumber slices, melon, salt, and pepper. Blend until smooth. Taste for seasoning. Transfer to a bowl and cover securely. Refrigerate for at least 1 hour and up to 24 hours.

 2.     At serving time, reblend the soup to a smooth purée and pour the soup into the soup bowls. If desired, garnish with additional pepper and serve.


This is a Nourish the Planet recipe, part of a collaborative series by Patricia Wells and Emily Buchanan.
© 2020 – All rights reserved. Please do not reproduce without permission.

Find our more here about why we created this series.

Nourish the Planet: Eggplant Caponata

 
Caponata
 

This rustic Sicilian dish is a great example of how easy it is to create satisfying, plant-forward food with just a few simple ingredients. Eggplant is the star player in Caponata, seared in olive oil until golden to intensify and concentrate its dense, smoky, earthy flavor as much as possible. It’s best served at room temperature, garnished with minced fresh oregano leaves.


Eggplant Caponata

Makes 1 quart (1 liter) / 4 to 6 servings

Ingredients

6 to 8 tablespoons extra-virgin olive oil
1 pound (500 g) firm eggplant washed but not peeled, cut into 3-inch (7.5 cm) cubes
1 1/2 teaspoons fine sea salt
2 teaspoons fresh or dried oregano leaves
2 medium onions, peeled, halved lengthwise, and cut into thin half-moons
4 celery ribs with leaves, rinsed and chopped
1 cup (250 ml) tomato sauce
4 tablespoons unrefined raw sugar
4 tablespoons red wine vinegar
2 tablespoons capers in vinegar, drained
Minced fresh oregano, for garnish

Method

1. In a large bowl combine 4 tablespoons of oil, the eggplant, 1 teaspoon of the salt, and oregano, and toss to coat the ingredients with oil. Preheat a large skillet over moderately high heat and add the eggplant, searing and tossing regularly until the flesh is soft and the outside is golden on all sides (about 8 minutes). If the eggplant becomes too dry, add 1 to 2 tablespoons additional oil and continue to sear, about 2 minutes more. Set aside in the bowl.

2. In the same skillet, combine 2 tablespoons of oil, the onions, celery, and 1/2 teaspoon of salt, and toss to coat the vegetables with the oil. Sweat – cook, covered, over low heat until softened – 5 to 7 minutes. Add the seared eggplant, tomato sauce, sugar, vinegar, and capers and simmer, covered, over low heat until very tender, about 15 minutes. Taste for seasoning.

MAKE AHEAD NOTE: Store in an airtight container in the refrigerator for up to 3 days.


This recipe was first published in My Master Recipes and is part of Nourish the Planet, a collaborative series by Patricia Wells and Emily Buchanan. © 2020 – All rights reserved. Please do not reproduce without permission.

Find our more here about why we created this series.

Nourish the Planet: Ginger and Cilantro Chicken Meatballs

 
© David Japy

© David Japy


Without question, one of the most impactful changes we can make towards a more planet-friendly way of eating is to significantly reduce the amount of red meat we consume. Bear with us while we get technical for just a second – to get just 50g of protein from beef, we produce on average 40 lbs (17.7 kg) of C02 – that’s almost twice that of lamb and farmed prawns, and six times as much as poultry. While plant-based options have the lowest impact, if you do eat meat and want to lighten your food related carbon footprint, chicken is the way to go (particularly if you avoid factory farmed chicken, which we don’t recommend at all).

 This recipe is a favorite from the My Master Recipes cookbook, which calls for you to grind the chicken meat yourself, giving you total control over the type of cut and  provenance of the meat as well as avoiding any unwanted fillers that may make their way into industrially prepared grinds. The real secret here though is to steam the meatballs first so they remain tender and succulent on the inside, then briefly sear them in a pan to create a crunchy, caramelized exterior.

 Ginger and Cilantro Chicken Meatballs


Makes 25 to 30 meatballs | Equipment: A food processor; a bamboo steamer


Ingredients

1 pound (500 g) boneless, skinless free-range, organic chicken breast meat
2 tablespoons toasted sesame oil
1 tablespoon soy sauce
3 tablespoons minced fresh ginger, or 1 tablespoon ground ginger
1 teaspoon fine sea salt
1/2 cup (40 g) plain dry bread crumbs
1/2 cup (125 ml) minced scallions, white and green parts
1 large egg, free-range and organic
1/4 cup minced fresh chives
1 cup (250 ml) loosely packed fresh cilantro leaves, plus more for garnish
1 tablespoon Kaffir Lime Powder (optional)
A richly-flavored homemade chicken or vegetable broth, warmed, for serving

Method

1.     Cut the chicken into 1-inch (2 cm) cubes. Spread the meat in a single layer on the baking sheet, cover with plastic wrap, and freeze for 1 hour. The chicken should be stiff. (Freezing will help the food processor blade cut the meat cleanly rather than tearing or smearing it.)

2.     Place the cubes in the food processor and process for about 15 seconds, until the chicken is coarsely ground. Transfer the chicken to a large bowl, add 1 tablespoon of the sesame oil and the remaining ingredients (except the stock), and use your hands to blend the mixture.

 3.     To prevent the mixture sticking, wet your hands with cold water, then shape the mixture into 1 1/2-inch (3 cm) balls, about the size of golf balls.

 4.     In a medium saucepan, bring 1 quart (1 l) water to a boil over high heat.

 5.     Arrange the meatballs side by side in the steamer, cover, and place on top of the saucepan. Steam until cooked through, about 5 minutes In a skillet, heat the remaining 1 tablespoon sesame oil over medium-high heat and sear the meatballs for a few minutes to until golden and caramelized. Serve in the chicken stock or vegetable stock, and garnish with fresh cilantro leaves.


This recipe was first published in My Master Recipes and is part of Nourish the Planet, a collaborative series by Patricia Wells and Emily Buchanan. © 2020 – All rights reserved. Please do not reproduce without permission.

Find our more here about why we created this series.

Nourish the Planet: Broccoli Microgreens

 
Broccoli microgreens.jpg
 

There is nothing quite like the satisfaction of growing your own food. It elicits a deep sense of pride in having created the perfect conditions for a seed to flourish and nurturing it into something that you can actually eat – perhaps one of the reasons why gardening makes us happier.  And yet for those of us with limited access to outdoor spaces to cultivate, this idea can seem overwhelming if not impossible. Enter the humble microgreen – the young tender stalks and leaves of immature vegetables, grains and legumes – that can be grown indoors in a small apartment, with minimal equipment and a bit of water and sunlight. You can go from seed to harvest in as little as a week for some seeds meaning you can have a mini organic farm no matter what your square meter living space is. A favorite is broccoli shoots, the seeds require no pre-soaking, they grow incredibly fast and they are bursting with nutrients. Their mild, grassy flavor makes them a great garnish for soups, or a bright, refreshing addition to sandwiches and salads.

While you can go all-in and buy specialized sprouting trays at a gardening center, an up-cycled tetra-pak works just as well and allows you to start out small when you first begin. Microgreens are best grown on a layer of loose fertile organic soil, organic herb potting mix or coconut coir (coconut fibre).


BROCCOLI MICROGREENS

Equipment: a used 1 quart (1 l) tetra-pak; a pair of sharp scissors or a stanley knife; a corkscrew; organic soil, herb potting mix or coconut coir; a water spray bottle; a small weight

Ingredients

2 teaspoons organic broccoli seeds

 Method

1.    Lay the tetra-pak on its side with the front of the pak facing upwards. With the scisssors or stanley knife, carefully cut along the outer edges of the up-facing panel of the tetra-pak, to create a growing vessel with a rectangular opening. Thoroughly wash the inside of the tetra-pak and lose piece you cut out. With the pointed tip of a corkscrew, pierce several holes in the bottom of the tetra-pak to allow for any excess water from the soil to drain.

2.    Fill the tetra-pak half full with organic potting soil. Lightly moisten the soil using the water spray bottle. Place the petra-pak in some kind of tray to catch any moisture.

3.    Sprinkle the broccoli seeds evenly across the top of the soil. Moisten the seeds and soil with another light spray of water.

4.    Using the side of the tetra-pak that you cut out as lid, place it directly on top of the seeds, weighing it down with stone or a small wooden block. This will both block out the light (mimicking the conditions of seeds buried in soil), and will also help the roots to grow down into the soil helping the broccoli stalks to grow straight upwards. Two to three times a day, remove the weight and lid and moisten the seeds with the spray bottle of water, until the seeds have begun to sprout and push up around the lid. At this stage the shoots will be a light yellow, as they will not have been exposed to sunlight. Note that you may notice a fluffy white substance growing around the base of the sprouts. This is not mold, but rather a part of the root hairs.

5.    Once the shoots are about half to one inch (1-2 cm) high and the roots are growing firmly into the soil you can remove the weight and lid and place the tetra-pak in direct sunlight. Within hours the shoots will begin to turn green as the plant creates chlorophyll from sunlight. Continue to spray the shoots several times a day for a further 4-5 days until they are ready to harvest, when they are about 4 inches (10 cm). Harvest the stalks using a pair of scissors and place in an airtight glass jar lined with paper towel or a clean kitchen cloth and store in the refrigerator, for about a week.


This is a Nourish the Planet recipe, part of a collaborative series by Patricia Wells and Emily Buchanan.
© 2020 – All rights reserved. Please do not reproduce without permission.

Find our more here about why we created this series.

Nourish the Planet: Chickpea Crêpes

 
PAN+FRY+Chickpea+Crepe_D5A7935.jpg
 

The humble chickpea (also known as garbanzo beans) with its gnarly and knobbled exterior, is perhaps a surprising Nourish the Planet champion. It’s the quiet star of traditional dishes around the world from middle eastern hummus to Indian curries and closer to home, the crêpes from the south of France made from chickpea flour, known as socca. Like other dried legumes, chickpeas have a small carbon footprint, but a rich nutrient profile – high in fibre, protein, vitamins and minerals as well as antioxidant polyphenols which protect us against disease. Their rich, creamy and nutty texture makes them truly versatile and these earthy, full-flavored crêpes are easy to throw together and the toppings are only as limited as your imagination.  Here we’ve garnished them with a fresh goat’s milk cheese flecked with lemon zest, zucchini ribbons bathed in lemon juice and olive oil and scattered with crunchy pine nuts and some basil oil.

Chickpea Crêpes

Makes two large crêpes   |   Equipment: A 10-inch (25 cm) nonstick crêpe pan (see Note) or a seasoned cast-iron pan with a non-stick surface; a silicone pastry brush (optional); a spatula.

Ingredients

1 scant cup (about 100 g) chickpea flour (garbanzo bean flour)
1/2 teaspoon fine sea salt
2 tablespoons extra-virgin olive oil

Method

1.    In a bowl, combine the flour and salt and whisk to remove any lumps. Add 1 cup (250 ml) water and whisk again until smooth. If time allows, let the mixture rest for one hour at room temperature.

2.     Heat 1 tablespoon of the olive oil in the pan over medium heat until shimmering. Making sure that the pan is properly preheated, so that the batter sizzles when it hits the pan,  will give you a more golden result and the crepe will be less likely to stick. Using the pastry brush, brush the oil evening across the surface of the pan so it is evenly distributed. Pour half of the batter (just over 1/2 cup/135 ml) into the hot pan, swirling it around to cover the bottom of the pan. Cook until the underside is golden, and the batter on the top side is dry and perforated with small holes, about 2–3 minutes. With the spatula, very carefully flip the crêpe and cook the other side until the crêpe is cooked through, 1 to 2 minutes more. Transfer the first crêpe to a plate. Repeat to make the second crêpe.

NOTE
Crêpe pans have a sloped edge. To determine the size of the pan, measure from lip to lip at the widest diameter at the top of the pan.


This is a Nourish the Planet recipe, part of a collaborative series by Patricia Wells and Emily Buchanan.
© 2020 – All rights reserved. Please do not reproduce without permission.

Find our more here about why we created this series.

Nourish the Planet: Green Bean and Baba Ghanoush Salad

 
Charred Green Bean+BG Salad photo credit David Japy.jpg
 

And suddenly, like that, July is upon us! The markets in France are bursting with color and the abundance of the summer harvests. As the barbecue invitations roll in and we begin to gather again (albeit carefully, for those that can), it seems more important than ever to reflect on what we put on our plates and what kinds of systems we are supporting as we build back after the Covid crisis. Eating seasonal produce and supporting local farmers ensures a more resilient food system for everyone, particularly those whose practices nurture and support natural ecosystems and biodiversity.

This here is a favorite summer salad from My Master Recipes, one that is on high rotation at both our tables every summer. The base is Baba Ghanoush, an earthy eggplant-based dip that is a classic of Levant cuisine. It makes for a great plant-forward option for barbecuing, as the eggplant is best cooked over an open flame until the skin is deeply charred and collapses leaving the flesh soft and smoky. Topped with Chinese-style fried green beans and scattered with fresh herbs and orange zest, it’s satisfying enough to be a meal all on its own.

GREEN BEAN AND BABA GHANOUSH SALAD

2 servings as a main salad or 4 servings as a side dish | Equipment: A two-pronged fork; tongs; a food processor or a blender; a small, sharp knife or a serrated grapefruit spoon;  5-quart (5 l) pasta pot, fitted with a colander; a large, heavy-duty skillet

Ingredients

For the Baba Ganoush
1 fresh eggplant, (about 250 g), rinsed and dried
1 plump, fresh, cloves garlic, peeled, halved, green germ removed if present
1 1/2 tablespoons tahini (sesame paste)
3 tablespoons freshly squeezed lemon juice, or to taste
1/4 teaspoon fine sea salt

For the beans
2 tablespoons coarse sea salt
8 ounces (250 g) haricots verts, rinsed and trimmed at the stem end only
1 tablespoon extra-virgin olive oil
2 tablespoons sliced almonds
1 tablespoon best-quality almond oil, such as Le Blanc brand
1 handful (4 tablespoons tightly packed) fresh parsley leaves
4 tablespoons fresh chives, loosely packed, chopped
Fine sea salt
Grated zest of 1 organic orange

Method

1.     With a two-pronged fork, prick the eggplants all over. Place them directly over an open gas flame, hot coals, or outdoor grill. Using tongs to constantly turn the eggplant, cook until the entire skin is blackened, blistered, and has collapsed in on itself and the flesh is very soft. Remove the eggplant from the heat and place in a paper bag. Allow to cool for 10 minutes.

2.     When cool, gently peel the skin away from the flesh with a small, sharp knife or a serrated grapefruit spoon. Be careful not to allow any pieces of the skin into the mix.

3.     Place the garlic in a food processor or a blenderfood processor or blender and chop. Add the tahini, lemon juice and salt, and process to blend. Add the eggplant pulp and process just for a few seconds, to blend ingredients. The mixture should remain rather chunky. Note: The Baba Ghanoush can be prepared up to 3 days in advance, stored in an airtight container in the refrigerator.

4.     Prepare a large bowl of ice water.

5.     Fill the pasta pot with 3 quarts (3 l) of water and bring to a rolling boil over high heat. Add the coarse sea salt and the beans, and blanch, uncovered, until crisp-tender, about 2 minutes, counting from when the water comes back to the boil. (Cooking time will vary, according to the size and age of the beans.) Immediately remove the colander from the water, allow the water to drain from the beans, and plunge the colander with the beans into the ice water so they cool down as quickly as possible. (The beans will cool in 1 to 2 minutes. If you leave them longer, they will become soggy and begin to lose flavor). Drain the beans and wrap them in a thick kitchen towel to dry. (The beans can be cooked up to 4 hours in advance. Keep them wrapped in the towel and refrigerate, if desired.)

6.     In the skillet, heat the olive oil over high heat until shimmering. Add the cooked green beans and pan fry, moving the beans around with a wooden spoon so as to cook evenly, until blistered and beginning to char and blacken, about 3 minutes. Remove from the heat.

7.     Toast the sliced almonds: In a small skillet toast the sliced almonds over moderate heat, shaking the pan regularly until the nuts are fragrant and evenly toasted, 2 to 3 minutes. Watch carefully! They can burn quickly. Transfer the nuts to a large plate to cool. (Store in an airtight container at room temperature for up to 1 week.)

8.     At serving time, toss the beans with the almond oil, parsley and chives. Season to taste with the salt. On a serving platter, spread the Baba Ghanoush in a generous layer. Top with the beans and herbs. Scatter with the sliced almonds and the orange zest. Serve at room temperature.


This recipe was first published in My Master Recipes and is part of Nourish the Planet, a collaborative series by Patricia Wells and Emily Buchanan. © 2020 – All rights reserved. Please do not reproduce without permission.

Find our more here about why we created this series.

Nourish the Planet: Grits Crackers

 
Grtis Crackers.jpg
 

This recipe came about one day at lunch while eating my Spicy Polenta Crackers. I suggested to my husband, Walter, that maybe they could be improved with coarsely ground polenta. His response was “Why not try grits?” – which turn out to be inspired. The resulting crackers were full of the crunch, saltiness and spice we love, and for such small quantities of ingredients these really do deliver on flavor.

Making your own snacks is such a nourishing way to eat, avoiding all the dubious ingredients that make store-bought versions shelf stable. And so much better than the Ritz crackers of our youth!

Grits Crackers

Makes about 50 crackers | Equipment: A food processor; a rolling pin; a 1 1/2-inch (3 cm) round pastry cutter; two baking sheets lined with a silicone sheet or baking parchment

Ingredients

1/2 cup (40 g) spelt flour or all-purpose flour
1/4 cup (40 g) yellow, stone-ground grits
1/2 teaspoon coarse sea salt
1/4 teaspoon baking soda
1/4 teaspoon chipotle, ancho chili or Espelette powder
1/2 cup (45 g) finely grated Pecorino cheese
1 1/2 tablespoons (20 g) chilled salted butter, cubed
About 3 tablespoons buttermilk, shaken to blend

Method

1. Position two racks in the oven. Preheat the oven to 375°F (190°C).

2. In the bowl of the food processor, combine the flour, grits, salt, baking soda, pepper, and cheese. Process to blend. Add the butter and process just until the mixture resembles coarse corn meal. Slowly add the buttermilk and process just until the dough forms a ball. You may not need all the buttermilk, stop the food processor when the mixture forms a ball. Transfer the dough to a sheet of parchment paper set on a work surface. Place a second sheet of parchment on top of the ball and, with your palms, flatten the ball. With the rolling pin, roll the dough into a rectangle about 8 by 10 inches (20 x 25 cm). Using the biscuit cutter, cut out rounds of dough and arrange them side by side on the baking sheet. The dough does not expand in baking, so the rounds can be placed quite close to one another. Any leftover bits of dough can be rolled into a ball and used again. Repeat with the rest of the dough.

3. Place the baking sheets in the oven and bake until the crackers are golden and crisp, 8 to 10 minutes. Once cool, transfer to an airtight container. The crackers can be stored for up to two weeks.

Note: If you can’t find grits, substitute with polenta, coarse polenta or cornmeal. The result will be slightly less crunchy.


This is a Nourish the Planet recipe, part of a collaborative series by Patricia Wells and Emily Buchanan.
© 2020 – All rights reserved. Please do not reproduce without permission.

Find our more here about why we created this series.

Nourish the Planet: Two No-churn Dairy-free Ice Cream Recipes


Tomorrow is the official start of summer! We are looking forward to long, hot summer days, punctuated with cool, refreshing frozen treats.

One of the top ways that we can eat better for ourselves without harming the planet is to avoid highly processed foods, particularly those that contain cow’s milk from intensive feedlot farms – yes, unfortunately that probably includes your favorite tub of ice cream. Supply chains can often be murky and frustrating to understand, so why not skip the headache of it all and make your own homemade ice cream this summer? When it’s this easy, there’s no excuse, you don’t even need an ice cream machine! The first recipe here is a bright and tangy rhubarb and strawberry ice cream using coconut milk for creaminess and a bit of coconut oil for texture. There’s no getting away from the fact that no-churn ice cream is slightly icy but there are plenty of upsides to make it worthwhile. The ice cream bars are a real crowd-pleaser and the perfect make-ahead treat for summer parties and kids snacks.

While coconut milk is a great replacement for cow’s milk as a crop that requires little water or other resources to produce, there are issues around virgin forest being cleared for coconut farms and questionable working conditions on some farms. Try to seek out fair trade brands that source from sustainable farms. This also applies to other coconut products like desiccated coconut and coconut oil.

Rhubarb, Strawberry and Coconut (No-churn) Ice Cream

Rhubarb and strawberries are natural spring companions.The rhubarb season in France is pretty short, so we like to freeze the fruit at the height of the season, pre-cut into small batons, so that we can enjoy it for just a little longer.

Equipment : kitchen foil, a blender or a food processor, a freezer-proof dish with a lid

Ingredients

5 stalks (about 7 ounces, 200 g) fresh or frozen rhubarb (thawed if frozen)
2/3 cup (7 ounces, 200 g) fresh or frozen strawberries, green tops trimmed if fresh
2 tablespoons coconut sugar
1 3/4 cup (400 ml) sustainably sourced full-fat coconut milk
4 tablespoons maple syrup
4 tablespoons expeller-pressed coconut oil, melted
2 teaspoons vanilla extract
1/8 teaspoon salt

Method

  1. Centre a rack in the oven. Preheat the oven to 350°F (180°C).

  2. Place the rhubarb, strawberries, and coconut sugar in a medium sized oven-proof dish and cover with foil. Roast until soft enough so you can easily pierce the rhubarb with a tip of a knife, about 30-35 minutes.

  3. In the blender, place the coconut milk, maple syrup, coconut oil, vanilla extract, salt and the roasted rhubarb and strawberries. Blend until completely smooth. Transfer to the freezer-proof dish with the lid and place in the freezer to set, for at least 6 hours. Stirring the mixture every half an hour with help to break up any crystals that form but isn’t essential. Serve when just frozen. If left overnight to set, the ice-cream will likely have frozen to very hard. For a scoopable texture, allow to thaw slightly, scoop out and reblend in the blender, then either eat straight away soft-serve style or return it to its container and allow to set until firm for a couple of hours.

Variation

If you don’t want to turn the oven on a hot summer’s day, skip the roasting and replace the rhubarb with 10 ounces (300 g) grams raspberries, strawberries or mixed berries. Fresh are wonderful, but frozen can really help speed up the freezing time.


RASPBERRY AND COCONUT

(NO-CHURN) ICE-CREAM BARS

These store brilliantly, pre-cut and wrapped in parchment paper, ready to be pulled from the freezer anytime you need them and devoured in the sunshine.

The buckwheat groats aren’t essential, but they do add a nice crunchy texture to the base. If you can’t find them, simply add extra 2 tablespoons of hazelnuts. We’ve used raw cacao powder which hasn’t been heated and so retains a lot the nutrients that get lost in processing. If tricky to get hold of replace with regular cocoa powder.

Makes 12 ice-cream bars | Equipment : a food processor or a blender, 10x4-inch (25x10-cm) loaf tin, biodegradable parchment paper

Ingredients

For the base
3/4 cup hazelnuts
2 tablespoons buckwheat groats
3 tablespoons desiccated coconut
2 tablespoons raw cacao powder
1/4 teaspoon ground cardamom (optional)
1/8 teaspoon salt
7 large plump dates, such as medjool or mazafati, pits removed
1 tablespoon expeller-pressed coconut oil

For the ice-cream
1 3/4 cup (400 ml) sustainably farmed coconut milk
1/4 cup organic honey or maple syrup
1 1/2 cups fresh or frozen raspberries
2 tablespoons almond butter
4 tablespoons coconut oil, melted
1/8 teaspoon salt
1 teaspoon lemon juice
1/2 cup mixed frozen berries

Method

1.     Centre a rack in the oven. Preheat the oven to 350°F (180°C).

2.     Place the hazelnuts in a small oven-proof tray and roast until beginning to color slightly, about 5 minutes. Remove from the oven and set aside. Once they are cool enough to touch, rub the hazelnuts vigorously between your palms to remove the skins – don’t worry if some small bits of skin remain.

3.     Place the hazelnuts in the bowl of the food processor and process until beginning to form fine crumbs. Be careful not to over blend or it will start to become hazelnut butter and will release too much oil. Add the buckwheat groats and desiccated coconut and process again so that the mixture resembles coarse sand. Add the cacao powder, cardamom (if using) and salt, and process again to combine. Finally add the dated and coconut oil and process until well combined and the mixture begins to come together. When squeezed together in the palm of your hand, the mixture should hold together.

4.     Line the loaf tin with the parchment paper so that the edges hang generously over the sides, creating flaps. This will make it easier to remove the ice-cream once frozen.

5.     Transfer the mixture into the lined pan, pressing down with the back of a spoon to flatten it evenly across the base. Place in the freezer to chill. 

6.     In the food processor or blender, combine the coconut milk, maple syrup, raspberries, almond butter, coconut oil, salt and lemon juice and process until completely smooth. Note that using a blender tends to give you a smoother result.

7.     Remove the loaf pan from the freezer and pour the mixture over the base. Return to the freezer to set, stirring every half hour of so for 1-2 hours, being careful not to disturb the biscuit base. As the mixture begins to thicken as it freezes, add the frozen mixed berries and stir gently to evenly distribute. It’s best to add the berries at this stage to ensure that they are suspended in the ice cream and don’t all fall to the base. Return to the freezer until completely hard, about 4-6 hours more.

8.     To remove from the pan, gently slide a knife between the pan and the parchment paper. Lift the ice-cream out of the pan using the parchment paper flaps. Place on a clean chopping board and slice into 12 servings. Serve immediately, or store in the freezer, individually wrapped in small pieces of parchment paper.


This is a Nourish the Planet recipe, part of a collaborative series by Patricia Wells and Emily Buchanan.
© 2020 – All rights reserved. Please do not reproduce without permission.

Find our more here about why we created this series.

Nourish the Planet: Honey and Lemon Frozen Yogurt

 
Lemon+yogurt+sorbet-2.jpg
 

Summertime is almost officially upon us. And with France having been unseasonably warm this spring, we dusted off our ice cream makers early to play around with making ice cream a little more planet-friendly and kinder on our health at the same time. We have ditched the cream for sheep’s milk yogurt and swapped out sugar for organic honey (using honey from my own hives!) to create a tangy yet still creamy frozen-yogurt style ice cream. It couldn’t be easier to make and we’ve included 3 variations for whatever seasonal fruit you have on hand. These recipes really require an ice cream maker to prevent the yogurt from crystallizing as it freezes. But don’t worry, if you don’t have one, we’re going to be posting some no-churn (non-dairy) ice cream recipes next week!

 When used sparingly, sheep’s milk yogurt from an organic, small scale farm is an interesting alternative to industrial cow’s milk as it contains a higher amount of milk solids meaning it uses half as much milk to produce the same amount of end product. Sheep that are grazed in a sustainable farm system can actually help to regenerate soil health on land that is not suitable for growing crops, another reason why choosing your source is important.

HONEY AND LEMON FROZEN YOGURT

Makes 1 quart (1 l) 12 servings | Equipment: An ice-cream maker; 12 ice cream bowls, chilled in the freezer

Ingredients

1 quart (1 l; 1000 g) full-fat plain Greek-style organic sheep’s milk yogurt
1/4 teaspoon fine sea salt
1/2 cup organic honey (see note)
2 tablespoons freshly squeezed lemon juice
Freshly grated zest of one organic lemon, for garnish

Method

In a large bowl, combine all the ingredients and whisk until well combined. (The mixture can be prepared up to 1 day ahead before freezing.) Transfer to the ice-cream maker and freeze according to the manufacturer’s instructions. Eat like soft serve or transfer to an airtight container and chill in freezer for 4 to 5 hours. At serving time, garnish with lemon zest.

Note

If the honey is very firm, place in a pan on low heat until liquefied. Let cool before combining with the yogurt.


Variations

PEACH FROZEN YOGURT

5 peaches (15 lb; 500 g), halved, blanched in boiling water to remove skin
½ cup (100 g) organic unrefined muscovado cane sugar
2 cups (250 g) full-fat plain Greek-style sheep’s milk yogurt
2 teaspoons peach liquor (optional)

Skin and quarter the peaches, discarding the pit. In a medium saucepan, combine the peaches and sugar and cook over moderate heat until the peaches are soft and the mixture well combined, about 10 minutes. Set aside to cool. Just before churning the mixture, add the peach liquor and yogurt. Transfer to the ice-cream maker and freeze according to the manufacturer’s instructions.


STRAWBERRY FROZEN YOGURT

1 pound (500 g) fresh strawberries, rinsed and hulled
½ cup organic unrefined muscovado cane sugar
2 teaspoons kirsch (cherry liqueur) optional
2 cups (250 g) full-fat plain Greek-style sheep’s milk yogurt
1 teaspoon freshly squeezed lemon juice

In a bowl, combine the berries, sugar, and kirsh. Let stand for 1 hour. In a blender, puree with the yogurt and lemon juice. Refrigerate at least 1 hour. Transfer to the ice-cream maker and freeze according to the manufacturer’s instructions.


CHERRY FROZEN YOGURT


1 pound (500 g) cherries, pitted
½ (125 ml) cup water
½ (125 ml) cup liquid organic honey
1 teaspoon freshly squeezed lemon juice
1 teaspoon kirsch (cherry liqueur), optional
2 cups (250 g) full-fat plain Greek-style sheep’s milk yogurt

In a saucepan, combine the cherries, water and honey and cook over low heat until the cherries are very soft. Transfer to the small bowl of a food processor and process until smooth. Combine with the lemon juice, kirsch, and yogurt. Chill. Transfer to the ice cream maker and freeze according to manufacturer’s instructions.


This is a Nourish the Planet recipe, part of a collaborative series by Patricia Wells and Emily Buchanan.
© 2020 – All rights reserved. Please do not reproduce without permission.

Find our more here about why we created this series.

Nourish the Planet: Miso and Ginger Glazed Eggplant

 
Miso Glazed Eggplant (c) Jeff Kauck.jpg
 

Eggplants have just come back into season in France, signaling a long summer season of roasting, grilling, simmering and steaming these burnished purple beauties. They are endlessly versatile and their creamy, smoky flesh make them an excellent stand-in for meat, especially when caramelized under intense heat. If you’re looking to cut down your meat consumption and want to replace it with something hearty and satisfying, then you can’t do much better than this eggplant roasted to silken perfection and glazed with a punchy, umami-rich ginger and miso dressing. Make a double batch of the dressing and keep it in your fridge for a quick ready-made sauce to toss over steamed green beans – or any vegetable really!

Miso is a great staple ingredient to have in your refrigerator – it lasts up to a year, adds depth of flavor to sauces, dressings, marinades and soups, is rich in protein, promotes healthy digestion and circulation and, because it is a fermented food, is great for your gut health.

Traditionally miso is made from crushed boiled soybeans that are mixed with either wheat, barley or rice, and salt and fermented with a yeast-like mold or starter called koji for several months and sometimes up to 3 years. There are numerous types of miso, however the general rule is the darker the miso, the stronger the flavor. Light or white miso is made with rice koji and fermented for a shorter period making it sweeter and good for making dressings. Darker miso is often made with barley or bean koji and has a more intense flavor, making a good base for winter soups. Here we have used a darker miso whose strong flavor is a good match for eggplant’s tender creamy flesh.

Miso and Ginger Glazed Eggplant
(Dengaku Eggplant)

4 servings   |   Equipment: A baking sheet.

Ingredients

4 small, firm, fresh eggplants (each about 8 ounces; 250 g), washed but not peeled
2 tablespoons olive oil
2 tablespoons sake or mirin
2 tablespoons dark miso (such as barley or brown rice)
1 tablespoon grated fresh ginger
1 tablespoon brown rice vinegar, preferably organic
1 tablespoon sesame seeds, toasted
2 tablespoons finely minced fresh chives

Method

1. Center a rack in the oven. Preheat the oven to 425°F (220°C).

2. Trim and discard the stem end of the eggplants. Halve them lengthwise. Lightly score the flesh in a crisscross pattern. Brush the flesh and skin lightly with the oil. Place the eggplant halves, cut side up, on the baking sheet. Place in the oven and bake until completely soft and golden brown, about 30 minutes.

3. While the eggplant is roasting, combine the sake, miso, grated ginger and vinegar in a small bowl. Whisk until smooth.

4. When the eggplant is cooked through, remove from the oven and brush the cut surface with the miso glaze. Return to the oven for just 2-3 minutes until the glaze begins to bubble and caramelize.

5. Remove from the oven and sprinkle with sesame seeds and chives. Serve warm.

Note: As high heat destroys the beneficial bacteria in miso, make sure to buy unpasteurized miso. For this recipe, if you want to retain the natural probiotics in the miso, simply glaze the eggplant and don’t return it to the oven.  


This is a Nourish the Planet recipe, a collaborative series by Patricia Wells and Emily Buchanan.
© 2020 – All rights reserved. Please do not reproduce without permission.

Find our more here about why we created this series.

Nourish the Planet: Pistachio and Lemon Lace Cookies

 
Pistachio and Lemon Lace Cookies 2-2.jpg
 

We defy you to not fall in love with these addictive, crispy lace-like cookies. They are quick and easy to make, with little clean up, and are the perfect accompaniment to summer sorbets or as a sidebar to a cup of coffee. Pistachios are Nourish the Planet heroes as they have a smaller water footprint than nuts like almonds, farmers can control pests with owl boxes, the shells can be burned to generate electricity, and the hull can be used for cattle feed. Nuts that fall outside the canvas during harvesting can be used as natural compost. The muscovado sugar (one of the least refined cane sugars available) gives these little gems a luxurious toffee-like richness due to its molasses content, and the spelt flour, an ancient grain, is a healthy choice over the everyday all-purpose wheat flour. As for butter, make sure it is from pasture-raised cows, not feedlot.

Pistachio and Lemon Lace Cookies

Makes about 24 cookies  |   Equipment: 2 baking sheets, lined with parchment paper

Ingredients

5 tablespoons (75 g) salted butter
1/3 cup (70 g) organic muscovado sugar
2 tablespoons Invert Sugar Syrup (recipe below)
1/3 cup (60 g) spelt flour
¼ teaspoon fine sea salt
1/4 cup (25 g) coarsely ground organic pistachio nuts
Coarsely grated zest from 1 organic lemon
1 teaspoon Homemade Vanilla Extract

Method

1. Arrange two baking racks in the oven. Preheat the oven to 350°F (175°C).

2.  In a medium saucepan over low heat, combine the butter, sugar and syrup. With a small whisk, whisk regularly until the butter is melted and the sugar has dissolved. Increase the heat to medium, whisking regularly until the mixture comes to a boil. Once boiling, remove the pan from the heat. Whisk in the flour and salt until well incorporated and the batter begins to thicken. Whisk in the nuts, lemon zest, and vanilla.

3.  With a 1 teaspoon measuring spoon, drop 12 teaspoons of batter onto each of the baking sheets, leaving plenty of room for the batter to spread. Transfer the baking sheets to the oven and bake until the cookies are a  deep, golden brown, 10 to 12  minutes.

4.  Remove the baking sheets from the oven and set aside for at least 15 minutes. Once the cookies are cool and firm, carefully transfer them to an airtight container. Store up to 1 week at room temperature.


Invert Sugar Syrup

This homemade substitute for corn syrup is thick and golden and helps create a smoother mouthfeel and controls crystallization in frozen yogurt, sorbets and ice creams. It can also be used to hold fragile confections together, like the above above lace cookies. It’s a cinch to make and stores in the refrigerator for up to 6 months.

 Makes about 1 3/4 cups (435 ml)   |   Equipment: A 2-quart (2 l) stainless steel pan

Ingredients

2 1/4 cups (450 g) unrefined organic cane sugar
2 teaspoons freshly squeezed lemon juice
1 cup (250 ml) water

Method

In the saucepan, combine the sugar, lemon juice and water and bring to a boil over high heat. Reduce the heat to low and simmer, whisking from time to time, until the mixture is slightly thick and viscous, like corn syrup or liquid honey, 8 to 10 minutes. The mixture should not darken or caramelize. Be aware that the liquid will thicken as it cools. I prefer to err on the runny side rather than risking a syrup that is too thick and nearly impossible to pour. Transfer to a heatproof container with a cover and let cool.


This is an original recipe created for Nourish the Planet, a collaborative series by Patricia Wells and Emily Buchanan. © 2020 – All rights reserved. Please do not reproduce without permission.

Find our more here about why we created this series.

Nourish the Planet: Tomato Chips

 
Tomato chips-2.jpg
 

It would be hard to improve on the zerowaste concept here, where the main ingredient all too often ends up in the compost or, worse yet, the garbage. We  mostly prefer vegetables (and technically in this case fruit) unpeeled and in their whole and natural state, but when peeling a tomato is called for, hold onto those skins to create tomato chips! Roasted briefly, they turn crisp and flavorful, ideal as a fun summer snack or as a sidebar to a main meal. In this version the peeled strips of tomato skin are paired with a favorite Italian pecorino pepato cheese, fresh oregano from the garden, and a touch of olive oil. But really you can experiment with whatever fresh or dried herbs you have on hand. For a vegan version simply skip the cheese altogether.

So why is food waste a climate change issue? According to the United Nations, if food waste was a country, it would be the third biggest greenhouse gas emitter. This is because a staggering 30-50% of the food we produce ends up in landfills where it releases large amounts of methane, a potent greenhouse gas, when it breaks down. And then there's all the wasted resources from its land use, production and transportation. By shopping more intentionally, using all parts of the vegetables and fruit we buy and by being clever with leftover ingredients, we can almost completely eliminate waste.


Tomato Chips

8 servings  |    Equipment: A serrated tomato peeler; a baking sheet lined with parchment paper (preferably compostable)

Ingredients

2 pounds (1 kg) large organic beefsteak tomatoes
3 ounces (90 g) pecorino pepato cheese, finely grated
2 tablespoons fresh or dried oregano
2 tablespoons organic extra-virgin olive oil
Fine sea salt, for garnish
Ground piment d’Espelette or ground mild chili pepper, for garnish

Method

1.   Center a rack in the oven. Preheat the oven 400°F (200°C).

2.   Arrange a dish cloth on a work surface. To make the tomatoes easier to peel, quarter them lengthwise. With the peeler, peel the skin lengthwise into long strips. Place the tomato skins on the cloth to absorb an excess moisture. The dryer the skins are, the better they will crisp up in roasting. In a bowl, toss them thoroughly with the cheese, oregano, and olive oil. Arrange the dressed skins side by side on the baking sheet.

3. Place the baking sheet in the oven and roast until the skins are crisp, 10 to 12 minutes. Watch carefully, and do not allow them to turn too dark, as the cheese can burn and turn bitter. Remove  from the oven and season lightly with salt and chili pepper. Serve warm or at room temperature.


This is an original recipe created for Nourish the Planet, a collaborative series by Patricia Wells and Emily Buchanan. © 2020 – All rights reserved. Please do not reproduce without permission.

Find our more here about why we created this series.