Nourish the Planet: Homemade Harissa

 
DSC02799.jpg
 

We often end up buying pantry staples from the store because making our own can seem complicated and time consuming. Yet processed food can be energy-intensive to produce and often has questionable ingredients in order to keep it shelf stable. This beautifully simple homemade harissa is a great example of how making your own can be quick and easy, leaving you with a lighter carbon footprint and a condiment that tastes far better than its store-bought equivalent.

For the uninitiated, harissa is a fiery and fragrant Middle-Eastern condiment, that can be used to transform timid sauces and marinades into flavor bombs with it’s warming aromatic heat and toasted spices. And for the bold, can be used as a condiment all on its own to spice up vegetables and meat alike. The recipe couldn’t be simpler and stores forever in the fridge, meaning you get real bang for you effort (in more ways than one). There are endless uses for harissa, but two favorites uses are to spice up a honey and fennel seed marinade for roasted eggplant, and to add to sheep’s milk yogurt to created a fresh, punchy sauce for vegetables, meat, or even fries. All three recipes below!

Homemade Harissa

Makes about 1 cup (250 ml) | Equipment: A small food processor

Make this and you’ll never go back to the store-bought version again!

Ingredients


5 plump, fresh garlic cloves, halved lengthwise, green germ removed if present
3/4 cup (185 ml) sunflower oil
2 tablespoons Italian tomato paste
4 tablespoons toasted cumin seeds, ground (see note)
3 tablespoons ground cayenne pepper
3 tablespoons sweet or hot paprika
1 tablespoon fine sea salt

Method


1. In the bowl of the food processor, mince the garlic. Add the remaining ingredients and process to a thick paste. Store in a glass jar in the refrigerator for several months.

NOTE: Toasting cumin helps intensify its exotic flavor. In a small saucepan or skillet, dry toast the seeds over a medium heat until fragrant, about 2 minutes. Transfer the seeds to a plate to cool. In a spice grinder or mortar and pestle, grind the seeds to a fine powder.


Roasted Eggplant with Harissa, Fennel Seeds and Honey

4 to 6 servings | An electric spice grinder or mortar and pestle; a roasting pan or a rimmed baking sheet


We could write a love poem to the beautiful and elegant eggplant with it’s burnished purple skin and creamy meaty flesh that becomes smoky and earthy under intense heat. Paired with harissa, fennel seeds and a touch of honey, it is all at once heady, spicy, sweet and aromatic. Worthy of being at the centre of any plate.

Ingredients

1 1/2 teaspoons fennel seeds
1 1/2 teaspoons Homemade Harissa
1 plump, fresh, garlic clove, halved lengthwise, green germ removed if present, finely minced
1/2 teaspoon sea salt
1 1/2 teaspoons intensely flavored honey, such as mountain or buckwheat
6 tablespoons (100 ml) extra virgin olive oil
1 large eggplant or 2 small, slender ones (about 1 pound; 500 g total)
Fresh, minced, flat-leaf parsley or mint, for garnish

Method

1. Center a rack in the oven. Preheat the oven to 400°F (200°C).

2. In a small saucepan or skillet, dry toast the fennel seeds over medium heat until fragrant, about 2 minutes. Transfer to a dish to cool, then grind to a fine powder in the spice grinder or mortar and pestle.

3. In a large bowl, whisk the harissa, garlic, salt, ground fennel seeds, honey and oil until well combined.

4. Trim the ends of the eggplant but do not peel. Slice the eggplant in half lengthways. Slice each half lengthwise into 5 slices,, then crosswise into 4, to make bite size pieces (remembering that they will reduce in size when they lose moisture during roasting). In a large bowl, combine the eggplant and the harissa dressing, and toss to coat evenly.

5. Spread the dressed eggplant evenly on the baking sheet taking care not to over crowd the pan. Place in the oven and roast until golden brown, about 25 minutes. For even browning, toss the eggplant once or twice during roasting. Serve warm, garnished with mint or parsley.


Harissa Yogurt-Sauce

Makes 2 cups (500 ml)

This borderline addictive condiment goes well with practically anything. It is refreshing with a touch of spice and completes any roasted, steamed or raw vegetable, is perfect as a dip for classic or sweet potato fries or as a garnish on soups and stews.

Ingredients

1 cup (250 ml) sheep’s milk yogurt (preferably from a sustainable source)
1 plump, fresh garlic clove, halved, green germ removed if present, and finely minced
1/2 teaspoon fine sea salt
1/4 teaspoon Homemade Harissa

Method

In a small bowl, combine all the ingredients. Let sit for at least 15 minutes for the garlic to mellow.


Nourish the Planet is a collaborative series by Patricia Wells and Emily Buchanan.
© 2020 – All rights reserved. Please do not reproduce any of these recipes without permission.

Find our more here about why we created this series.

Nourish the Planet: Use-Everything Stocks + Radish Leaf Soup

 
DSC02716.jpg
 

In our view, a green kitchen is one that uses all possible parts of the ingredients that come into it. Food waste has a huge environmental impact, one report from the Food Climate Research Network estimates that it is as high as 30-50% of all food we produce globally. Think of all the amazing dishes we could make, and the money we could save, if we were just a little more creative with off cuts and kitchen scraps. Chicken stock is a mainstay of my kitchen, in Emily’s it’s veggie scrap stock. We’re sharing both of our recipes with you, and a brilliant zero-waste spring soup that can use either.


Chicken Stock

Chicken stock is an essential in my kitchen – no matter how bare the cupboard may be, I can always fashion a meal in a jiffy, using this rich and golden broth as a base. It’s a brilliant way to use make use of the entire chicken, not just the tender flesh. In this recipe, I use a whole, raw chicken and simmer it for one hour. The bird is then removed from the pot, the cooked meat taken off the bones, and the carcass and skin are returned to the pot to simmer for another few hours. The resulting stock is rich and fragrant, and this preparation also means that I have plenty of super-tender poached chicken for adding to soups and salads. If you have roasted a chicken and are looking to use the carcass, see the variation notes on making stock with just bones. I put a huge emphasis on chicken that is pasture-raised from a small scale farm, believing that it’s worth the extra money and if used wisely can be stretched over many meals.

Makes 3 quarts (3 litres) | Equipment: A 10-quart pasta pot fitted with a colander; a fine-mesh skimmer; dampened cheesecloth.

Ingredients

2 large onions, halved lengthwise but not peeled
4 whole cloves
1 farm-fresh chicken, about 5 pounds
Pinch of salt
4 carrots, scrubbed but not peeled, cut into 1-inch pieces
1 head of garlic, halved but not peeled
4 ribs celery
1 leek (white and tender green parts), halved lengthwise, washed, and cut into 1-inch pieces
1 ounce trimmed and peeled fresh ginger
12 whole white peppercorns
1 Bouquet garni: Several bay leaves, celery leaves, sprigs of thyme, and parsley, encased in a wire-mesh tea infuser


Method

1. Spear the onion with a long-handled, two-pronged fork, and hold them directly over a gas flame (or directly on an electric burner) until scorched. Stick a clove into each of the onion halves. (Scorching the onions will give the broth a richer flavor. The onion skin also serves to “dye” the stock a rich, golden color.)

2. Place the chicken in the pasta pot and fill with 5 quarts of cold water. Add the onions, salt, carrots, garlic, celery, leek, ginger, and white peppercorns, and bouquet garni. Bring to a gentle simmer, uncovered, over medium heat. Skim to remove any scum that rises to the surface. Add additional cold water to replace the water removed and continue skimming until the broth is clear.

3. After about 1 hour, removed the chicken from the pot. Remove the chicken meat, removing the skin. Return the skin and the carcass to the pot. Continue cooking at a gentle simmer for 2 1/2 hours more.

4. Line a large colander with a double layer of dampened cheesecloth and place the colander over a large bowl. Ladle -- do not pour -- the liquid into the sieve, to strain off any remaining fat and impurities. Discard the solids. Measure. If the stock exceeds 3 quarts, return to moderate heat and reduce. Transfer the stock to covered containers.

5. Immediately refrigerate the stock, and spoon off all traces of fat that rise to the surface. The stock may be refrigerated for 3 days, or can be frozen for up to 3 months.

Variations

Use 2 whole chicken carcasses rather than a whole, raw chicken (chicken bones freeze wells so you can save bones as you go until you have enough to make a stock). The resulting stock will not have the same clean, fresh flavor as that make with a while chicken, but it is worthy nonetheless. One can also use about 4 pounds of inexpensive chicken necks, backs or even feet to prepare the stock. As with saving the bones, try collecting the skins, roots and ends of onions, garlic, leeks, carrots and ginger to add to the stock as well. Store them in a container in the freezer until you have collected enough to add to the stock.


Veggie Scrap Stock

Creating something new from what you might normally throw away feels a little bit like kitchen magic. They might not be much to look at, but onion and garlic skins, carrot and ginger peelings, leek roots and greens and tough fennel stalks hold a ton of flavor and nutrition and can be easily transformed into also sorts of delicious treats with a little bit of imagination.  A favorite way to use up these normally discarded scraps is to create a fragrant vegetable broth to use as the base for soups, risottos, curries and stews. Simply  keep a container in your freezer, adding your peelings every time you cook, until you have accumulated enough to make a batch of stock. What could be more simple, economical and resourceful? 

As with any vegetable stock, stay away from cruciferous vegetables such as cauliflower, broccoli and cabbage whose flavors tender to be too overpowering. Go for sweeter vegetables such as onions, garlic, carrots, pumpkins, leeks, fennel and even pea pods. Include any roots, skins, seeds and tough ends. To balance out the sweet notes I like to add in umami-rich ingredients such as mushroom stalks, dried mushrooms (like shiitake or cep/porcini), Parmesan rinds (which keep for months in the freezer) and kombu – the thick Japanese seaweed. The resulting flavor is earthy, slightly sweet with a touch of umami, light years better than any flavor you can get from a commercial stock cube and with none of the nasty additives.                

Note that this is only a guide and you can make any quantity of stock for the amount of scraps you have. The below recipe makes approximately 1.5 liters of stock.

Ingredients

8–10 cups veggie scraps, rinsed
1 onion (with skin) quartered
2 carrots, roughly chopped
4 garlic cloves, halved (but with skins on) and green germ removed
2-3 shiitake mushrooms
1 piece of kombu
10 whole peppercorns
1 teaspoon sea salt

Method

Place all the ingredients in a large pot, cover with water, and simmer, partially covered, for about 15-30 minutes, depending on how strong you want your stock to be. Strain and store the stock in an airtight container in the fridge for up to 3 days or in the freezer for several months.


Radish Leaf Soup

If you’ve been throwing away the leaves from your bunches of radishes (or turnips!), stop now! The tender leaves are completely edible and full of flavor and are a wonderful ingredient to add to a spring soup. The leaves tend to loose their freshness quickly so if you are not planning on making this soup immediately after buying, remove the leaves and stalks from the radishes, rinse them and quickly blanch them in boiling water for one minute. Run under cold water to cool, then squeeze out the excess water and store them in an airtight container in the freezer.

Ingredients

3 tablespoon extra-virgin olive oil
1 medium onion, peeled and cut into half moons
Fine sea salt
1 bunch radish leaves, rinsed
2 medium zucchini, trimmed and coarsely chopped (about 1 pound)
2 bintje potatoes, peeled and coarsely chopped (about 1/2 pound)
3 cups homemade veggie scrap stock or chicken stock
Sheep’s milk yogurt, fresh herbs or micro-greens,
and thinly sliced radishes, for garnish

Method

1. In a stock pot, sweat the onions and salt in the olive oil. Add the radish leaves, zucchini, potatoes, and stock. Bring to a boil then reduce to a simmer for 10 minutes or until the potatoes are cooked through.

2. Transfer the mixture to a blender and blend until smooth. Taste for seasoning. Serve garnished with swirls of yogurt, herbs and radishes.


Nourish the Planet is a collaborative series by Patricia Wells and Emily Buchanan.
© 2020 – All rights reserved. Please do not reproduce any of these recipes without permission.

Find our more here about why we created this series.

Nourish the Planet: Hearty, Healthy Multigrain Yeast Bread

 
Multigrain+bread.jpg
 

To complete our Nourish the Planet bread trifecta, here is a hearty and sustaining yeast-leavened bread recipe. If you haven’t yet taken the plunge to make your own starter and sourdough or are looking for a quicker way to make a home-baked loaf, a bread risen with dry active yeast is a good place to start. The rise time is short, and while you won’t have the same lactic flavors of a classic sourdough, the combination of wholewheat, rye and spelt flours and mix of seeds give this loaf an earthy complexity that is deeply nourishing.

So why is bread an issue for the environment? The commercial refined flour that ends up in our bread, pasta and baked goods is produced in huge mono cultures (bad for biodiversity), requires large amounts of commercial fertilizer (energy intensive), pesticides and herbicides (bad for soil and the health of the local ecosystem) and the processing of the wheat not only strips most of the beneficial nutrients but is also very energy intensive. When we bake bread using ancient grains such as rye and spelt, and wholegrain wheat grown on small scale farms that respect the environment, not only does it taste so much better, but it is supporting a much more equitable and resilient food system.

Hearty, Healthy Multigrain Yeast Bread

Makes one 3-pound  (1.5 kg) loaf   |   Equipment: A heavy-duty mixer fitted with a flat paddle; a scale; a large bowl or linen-lined basket lined (banneton) ; a cloth; a shaker filled with flour for dusting; baking parchment; a pizza paddle; a baking stone; a razor blade; an instant-read thermometer

Ingredients

1 teaspoon active dry yeast
3 cups (750 ml) warm water
2 cups (280 g) white bread flour
2 cups (280 g) light whole wheat bread flour
1 cup (140 g) rye flour
1 cup (140 g) spelt or épeautre flour
1 cup (150 g) mixed seeds: equal parts sesame, flax, and sunflower seeds
2 tablespoons malt flakes or malt powder (optional) (see Note)
1 tablespoon plus 1 teaspoon coarse sea salt

Method

1.  In the bowl of the heavy-duty mixer fitted with a flat paddle (not the bread attachment), combine the yeast and 1/4 cup of warm water. Mix at low speed to dissolve the yeast. Set aside to proof, about 10 minutes. Add the remaining 2 3/4 cups water and mix. Add the flour, cup by cup, mixing just until the dough is hydrated. This should take 1 to 2 minutes. The dough should be sticky, thicker than a batter but not so dense that the dough could easily be kneaded. Knead at lowest speed for 5 minutes. The dough should be extremely sticky and wet, with web-like, visible strand of gluten.

 2.  Add the malt flakes, salt, and grains to the dough, mixing at low speed just until all the ingredients are well-incorporated, 1 to 2 minutes. The dough will be sticky. Line the bowl or basket with a clean cloth and dust the cloth generously with flour. Carefully transfer the dough to the flour-dusted basket.  Cover and let rise until the dough has risen slightly, about 2 hours.

3.   About 20 minutes before baking the bread, place a baking stone in the oven and preheat the oven to 425°F (220°C).

 4.  Place a sheet of parchment paper on a pizza paddle. Turn the dough out onto the pizza paddle. Score the loaf with a razor blade. Carefully transfer the dough on the parchment onto the baking stone. Bake for 20 to 25 minutes, or until the loaf is evenly browned, and until the bread reaches an interior temperature of 200°F (95°C). Watch carefully, since ovens vary: If the bread seems to be browning too quickly, reduce the heat.


5.  Transfer the bread to a wire rack to cool. The bread continues to bake as it cools so resist the temptation to cut the bread before it is thoroughly cooled, at least 4 hours. (If you do, it may tear, with an uneven texture.)  Store the bread at room temperature in a cloth towel or cloth bag, slicing off only as much as you need at a time. The bread will stay fresh for 1 week.

NOTE

Malt flakes or malt powder can be found in health food stores.

VARIATION

For a festive touch of color and sweetness add about 3/4 cup (4 ounces; 125 g) dried cranberries, 1 cup (4 ounces; 125 g) slivered almonds, and 1/3 cup ( 4 ounces; 125 g) pistachios, adding at the same time as the coarse sea salt.


This is a Nourish the Planet recipe, a collaborative series by Patricia Wells and Emily Buchanan. © 2020 – All rights reserved. Please do not reproduce without permission.

Find our more here about why we created this series.

Nourish the Planet: Amazing All-Grain Bread

 
All+Grain+MNR+bread-2.jpg
 

This amazingly simple and delicious bread was originally created by Canadian cookbook author and nutritionist Sarah Britton. She calls it The Life-Changing Loaf of Bread, and it truly is a miraculous creation, a wholesome mixture of grains and seeds, held together by little more than pysllium husks. As it is not actually bread in the traditional sense, there is no kneeding required and the most difficult part of making this wonder is gathering and measuring the ingredients. At a time when supermarket shelves are increasingly devoid of flour (hopefully a sign that people are learning to bake their own bread!), this is a great alternative. It is also a chance to get more nuts, seeds and whole grains into your diet, key ingredients in a healthy, plant-forward, planet-friendly diet.

The below recipe is only a slightly adapted version of the original. We have opted to replace the ghee or coconut oil with local olive oil, which has a lower carbon footprint, and have omitted the maple syrup from the recipe as we found it perfectly balanced without it. Don’t skip the psyllium powder however as this is a crucial ingredient holding the seeds and grains together.

This base recipe lends itself to all sorts of variations. We’ve had a lot of fun turning it into a fruit loaf by swapping out the hazelnuts for pistachios, adding half a cup of chopped apricots and figs, adding back in the tablespoon of maple syrup or even better, local honey, a teaspoon of ground cinnamon and 1/2 teaspoon of ground cardamom.

For a savory twist that produces a slightly lighter, springier loaf, swap out the 1/2 cup of flaxseeds for 1 cup of sprouted lentils.

Amazing All-Grain Bread
(or The Life Changing Loaf)

Makes 1 loaf | Equipment: A 1 quart (1 l) nonstick baking pan, lined with parchment; a baking sheet

Ingredients

1 cup (135 g) sunflower seeds
1/2 cup (90 g) flax seeds
1/2 cup (65 g) hazelnuts, coarsely chopped
1 1/2 cups (145 g) rolled oats
2 tablespoons chia seeds
3 tablespoons psyllium husk powder (see note)
2 teaspoons fine sea salt
3 tablespoons extra-virgin olive oil
1 1/2 cups (350 ml) water

Method

1. In a large bowl, combine all the dry ingredients, stirring well. In a measuring cup, combine the oil and water. Add the liquid to the dry ingredients and mix for about 1 minute, until the dry ingredients absorb the liquid and the mixture is cohesive. (At first you will be convinced that the dry ingredients will never evenly absorb all the liquid. Be patient and keep mixing until the grains have fully absorbed the liquid.)

2. Transfer the dough to the prepared pan, smoothing out the top with the back of a spatula. Set aside at room temperature for at least 2 hours and up to 12 hours.

3. About 20 minutes before baking the bread, center a rack in the oven. Preheat the oven to 350°F (175°C).

4. Place the loaf pan in the oven and bake for 20 minutes. Remove the bread from the loaf pan, remove and discard the baking parchment, and return the bread to the baking sheet. Return to the oven and bake until the bread is deep golden brown, about 40 minutes more. Let cool completely before slicing. Store loosely in a fabric bag for up to 2 days or freeze up to 2 weeks. Do not store in a closed plastic bag, for the bread is very moist.

NOTE: Because this bread contains no flour or yeast, the psyllium husk powder is used as a binding agent. It is the fiber-rich covering of a seed from a plant grown in Asia that can absorb more than ten times its weight in water.


Nourish the Planet is a collaborative series by Patricia Wells and Emily Buchanan. Find our more here about why we think it’s important.

Nourish the Planet: Sourdough Bread


There is nothing more life affirming than being able to bake your own bread. Perhaps it’s because it has such a long tradition of sustaining people using two such simple ingredients: flour and water. Many people are intimidated by the process, but once you’ve made your own bread we promise, you’ll never look back.

Making your own bread has so many benefits. As well as the deep satisfaction of pulling a golden crusted loaf from the oven and sharing it with friends and family, making your own loaf from scratch allows you to be in control of the ingredients, a wonderful way to support farmers that grow their grains organically and use production methods that promote healthy soil and biodiversity. If it’s available to you, buying locally grown and milled flour heavily cuts down on transport emissions too, making it extra planet-friendly.

To make naturally leavened bread you must use a starter. While it’s a fairly simple process to create your own starter, it does take a little patience in the initial stages as you “feed” it daily with flour and water. As it harvests the natural yeasts from the surrounding air it becomes bubbling and alive, a fascinating process in itself of science and alchemy. Many recipes require you to discard part of the starter every time you feed it, which is hugely wasteful or requires you to cook several other recipes using your starter discards. We don’t find any of this necessary and the below starter recipe, which does not use this technique, results in a lively, active starter in just five days.

In a time when we are being asked to slow down and stay home, what better time is there to learn how to bake our own bread?

SOURDOUGH STARTER

 Ingredients

2 cups (280 g) white bread flour (preferably organic)


Method

 1.     In a 1 quart (1 l) container, combine 1/4 cup (60 ml) of room temperature water and 1/2 cup (70 g) of the flour and stir until the water absorbs all of the flour and forms a soft dough. Cover loosely with a cloth and set aside at room temperature for 24 hours. The mixture should rise slightly with visible bubbles starting to form and may take on a faintly acidic aroma. Repeat this for 3 more days, each day adding an additional 1/4 cup (60 ml) of water and 1/2 cup (70 g) of flour to the dough.  Each day the starter should rise slightly with bubbles starting to form and should become more acidic in aroma. By day 5 you should 1 pound (500 g) of lively starter. If you are in doubt, add 1 teaspoon of dry active yeast when combining the starter and water.

SOURDOUGH LOAF

Makes one 3-pound (1.5 kg) loaf  

EQUIPMENT: An airtight container; a large bowl or linen-lined basket lined (banneton) ; a cloth; a shaker filled with flour for dusting (optional); a large bowl; a heavy-duty mixer fitted with a flat paddle (not the dough hook); a kitchen scale; a flat cast-iron grill pain or baking steel; a baking peel or wooden chopping board lined with baking parchment, a razor blade or very sharp knife; an instant-read thermometer, a baking rack.

Ingredients

1 pound (500 g) sourdough starter
7 cups (980 g) white bread flour (preferably organic)
2 tablespoons malt flakes or malt powder (optional)
1 tablespoon plus 1 teaspoon coarse sea salt


Method

1.     Line the bowl or basket with a clean cloth and dust the cloth generously with flour.

 2.     In the bowl of the heavy-duty mixer combine the starter and 3 cups (750 mls) room temperature water and mix on low speed to dissolve the starter. Add the flour, cup by cup, mixing just until the dough is hydrated.  This should take 1 to 2 minutes. The dough should be sticky, thicker than a batter but not so dense that the dough could easily be kneaded.  Mix at the lowest speed for 5 minutes. The dough should be extremely sticky and wet, with web-like visible strands of gluten.

 3.     Remove 1 pound (500 g) of the dough and transfer it to the airtight container and reserve as a starter for your next loaf (there is no need to feed your starter from this point on, simply store it, refrigerated in the airtight container, for up to 3 days. It can also be frozen almost indefinitely. Thaw at room temperature for 24 hours before the next baking).

 4.     Add the malt flakes, salt to the remaining dough in the mixer, mixing at low speed just until all the ingredients are well-incorporated, 1 to 2 minutes. The dough will be sticky.

 5.     Carefully transfer the dough to the flour-dusted basket.  Cover and let rise until the dough has risen slightly, about 6 hours. (To guage how the dough is rising, leave the starter on the counter in its airtight container. If the starter is rising nicely – with big air bubbles throughout – you can be assured that your bread dough is rising as well).

6.     About 20 minutes before baking the bread, place the baking steel or cast-iron pan on a rack in the lower third of the oven and preheat the oven to 425°F (220°C) .

 7.     Carefully turn the dough out onto the parchment-lined pizza paddle or chopping board. Score the top of the loaf with a razor blade. Carefully slip the dough, still on the baking parchment onto the grill pan or baking steel and bake for about 25 minutes, or until the loaf is evenly browned. Continue baking until the bread reaches an interior temperature of 200°F (93°C), 20 minutes more. Check the temperature by piercing the center of the loaf with the thermometer. Watch carefully, since ovens vary: If the bread seems to be browning too quickly, reduce the heat.

 8.     Transfer the bread to the baking rack to cool. The bread continues to bake as it cools so resist the temptation to cut the bread before it is thoroughly cooled, at least 4 hours. (If you do, it may tear, with an uneven texture.)  Store the bread at room temperature in a cloth towel or cloth bag, slicing off only as much as you need at a time. The bread will stay fresh for 1 week.

VARIATIONS:

light wholewheat sourdough loaf

For a heartier loaf, substitute 3 cups (420 g) of the white flour for the following:

 1 cup (140 g) light whole wheat bread flour
1 cup (140 g) rye flour
1 cup (140 g) spelt flour

 
multigrain sourdough loaf

For a multigrain loaf with wholegrain goodness:

Add 1 ½ cups (about 200g) mixed seeds (equal parts sesame, flax and sunflower seeds).


cranberry, pistachio and almond sourdough loaf

 Add 3/4 cup (4 ounces / 125 g) dried cranberries, 1 cup (4 ounces / 125 g) slivered almonds, and 1/3 cup (4 ounces / 125 g) pistachios, at the same time as the coarse sea salt.


TIPS:

  • Be sure to keep your starter pure, nothing but water and flour. If the last loaf has not rise as you want, it is ok to add 1 teaspoon or less of active dry yeast when adding water to the levain, until your starter is lively and bubbly. As an insurance policy, you can add a touch of yeast to the dough when you thaw a batch of frozen starter.

  • Before you begin, measure everything. A dough scraper can be particularly handy. Be sure to dust your bowl or your linen-lined basket (banneton) with plenty of flour, measure out all the flours, have a clean container for your levain and so on. Your hands will get sticky and the more you do in advance while your hands are clean, the better! 

  • Your first several loaves may not rise very much. Do not be discouraged and just forge on ahead! You can adjust rising time, from 6 hours to 24 hours, depending upon your schedule and the vitality of the starter. If you bake every few days, the starter will get more and more active and the bread will rise more quickly and will of course be lighter.

  • A starter can virtually be kept forever. When baking bread daily, keep the starter on the counter, in a securely covered bowl, at room temperature. If you won’t be making bread for several days, refrigerate in a covered container. And if you won’t be making bread for several weeks, freeze the starter in a covered container.

  • There is no getting away from it: Sourdough is a messy affair, with sticky dough  that, well, wants to stick to everything in sight, including the bowls, the spatulas, your cloths, your arms. I clean up immediately after preparing the dough, making sure nothing has time to stick too much. I also reserve a sponge just for cleaning up, since it usually gets matted with bits of dough.

  • A great zero waste tip if you eat fresh mozzarella is to reserve the liquid that comes in the packet to preserve the cheese. Its faintly lactic flavors adds a special touch to the final loaf. Combine with the water in the recipe to make the 3 cups (750 ml) needed for a loaf. Do not use 100% mozzarella liquid as it can create a rather funky-tasting bread!


The original version of this recipe was published in My Master Recipes. All rights reserved, please do not reproduce without permission.

Nourish the Planet is a collaborative series by Patricia Wells and Emily Buchanan. Find our more here about why we think it’s important.

Sourdough photos © David Japy

Nourish the Planet: Lemon and Olive Oil Tart

 
Lemon+Olive+Oil+Tart.jpg
 

With this Nourish the Planet recipe we’ve taken my classic lemon tart recipe and given it a planet-friendly makeover, swapping out water-thirsty almonds for hazelnuts (which have a much lighter water footprint), butter for olive oil in the pastry and sugar in the lemon curd for my own organic honey. In the end, small changes can make a big difference. The pat in the pan pastry is truly "as easy as pie” and the lemon curd filling is a bright and fragrant contrast to the earthy crust. The garnish of sliced kumquats, lemon thyme, and a dusting of sumac is inspired by the exquisite lemon tart from the talented Moko Hirayama, co-chef with her husband Omar Koreitem at the popular Paris restaurant Mokonuts, in the 11th arrondissment. 

EQUIPMENT: A food processor; a 10-inch (26 cm) tart pan with a removable bottom; a baking sheet; a fine-mesh sieve; a 3-quart (3 l) saucepan.

INGREDIENTS

OLIVE OIL PASTRY
2 tablespoons hazelnuts
1 cup plus 2 tablespoons (160 g) unbleached, all-purpose flour
1/3 cup (40 g) organic, lemon-scented cane sugar
1/2 teaspoon fine sea salt
1/3 cup (80 ml) extra-virgin olive oil
1 large egg, free-range and organic

LEMON AND OLIVE OIL CURD
1/3 cup (125 ml) freshly squeezed lemon juice, preferably organic
½ cup (125 ml) light, liquid, organic honey
1 tablespoon cornstarch
2 large eggs, free-range and organic
2 large egg yolks, free-range and organic
Grated zest of 2 lemons, preferably organic
1/3 cup (80 ml) light-flavored extra-virgin olive oil

GARNISH
Minced fresh thyme leaves, very thin rounds of limequats, kumquats, or lemons cut into thin rounds on a mandoline, a fine sprinkle of sumac powder (see Note)

METHOD

1. Center a rack in the oven. Preheat the oven to 400°F (200°C).

 2. In the food processor, grind the hazelnuts to a powder. Add the flour, sugar, and salt, and process to blend. In a bowl, whisk together the olive oil and egg. Pour the mixture through the tube of the food processor and pulse just until the mixture comes together into a rough ball.

3. Place the dough in the center of the tart pan. Work outward from the center and press evenly to cover the bottom and sides of the pan. Working around the edge, use your fingertips to press the dough firmly into the corners of the pan. Go around the edge once more, pressing the dough up the sides and into the fluted edge. Use your thumb to level off the top edge. To help make for a level bottom and sides of crust, line the bottom of the tart with baking parchment. Using a metal measuring cup, smooth the bottom and sides by pressing gently and evenly. Remove the parchment paper. Place the tart shell on a baking sheet.  Place the baking sheet in the oven and bake until golden brown, 12 to 15 minutes. Transfer to a rack to cool.

 4. Prepare the Lemon and Olive Oil Curd. Place the sieve over a bowl.

5. In the saucepan, whisk together the lemon juice, honey, cornstarch, eggs, and egg whites. Make sure everything is thoroughly mixed. Place the saucepan over medium-low heat and bring a gentle boil, whisking regularly but not constantly,  for about 7 minutes. Watch carefully, and do not allow the eggs to scramble. Remove the saucepan from the heat and strain through the sieve, discarding the contents of the sieve, which may contain bits of cooked egg white. Whisk in the lemon zest. Whisk in the olive oil, whisking vigorously until smooth and well combined.

6. Pour the lemon curd into the cooled pastry shell, spreading gently and evenly, shaking the pan lightly to smooth out the top. For best flavors, the tart should be consumed within 24 hours. Remove the tart from the tin and cut into 8 wedges. Garnish with minced thyme leaves, thin slices of citrus, and ground sumac.

Ingredient note

The sumac bush, native to the Middle East, produces deep red berries, which are dried and ground into a fine, colorful powder. Ground sumac pairs well with lemons, since on its own has a tangy, citrusy flavor.

Nourish note

Don’t toss the egg whites! They will keep in the fridge for 2-4 days and in the freezer for up to 12 months and can be used for meringues, pavlovas, mousses and other desserts.


This is an original recipe created for Nourish the Planet, a collaborative series by Patricia Wells and Emily Buchanan. © 2020 – All rights reserved. Please do not reproduce without permission.

Find our more here about why we created this series.

Nourish the Planet: Fregola, White Bean and Pumpkin Minestrone

(c) David Japy.jpg

This hearty and satisfying soup is a great way to start embracing more seasonal vegetables and plant-based meals. It contains many of our favorite colorful and healthy winter vegetables, including carrots, celery, and pumpkin, but you can really swap out the vegetables for whatever you can find locally and in season. During the summer months when fresh white beans, known in France as cocos blanc are in season, we shell the beans and freeze them to have on hand come winter. Of course, dried ones will work just fine if that’s what you have available to you. As a novel pasta variation try fregola, the Sardinian specialty made from semolina dough and toasted in the oven. If this is tricky to find just go for any small pasta shape that you like the texture of. Let this simmer away on top of the stove, serve with a crusty sourdough bread and you will be duly rewarded!

ingredients

2  medium onions, trimmed, halved lengthwise, and cut into thin half moons

1 head garlic, cloves peeled, halved, green germ removed if present

1 leek, white and tender green part only, rinsed, quartered, and thinly sliced

4 tablespoons extra-virgin olive oil

Fine sea salt

3 carrots, scrubbed and cut into thin slices

4 celery ribs, rinsed and cut into thin slices

4 cups (2 pounds; 1 kg) peeled and cubed pumpkin

1 pound (500 g) fresh white beans (or dried, see Note)

Two 14-ounce (400 g) cans diced Italian tomatoes in juice

2 quarts (2 l) cold water

1 cup (170 g) fregola

method

  1. In the Dutch oven, combine the onions, garlic, and leek, oil, and salt to taste. Stir to coat with the oil. Sweat – cook, covered, over low heat – until soft.

  2. Add the  carrots, celery, pumpkin, beans, tomatoes, water, and 2 teaspoons of salt. Bring just to a simmer over moderate heat. Simmer, covered (so as not to reduce the liquid) until the vegetables are soft and beans are cooked through, about 45 minutes.

  3. Add the fregola and simmer until the pasta is cooked through, about 15 minutes more. Taste for seasoning. Serve in the warmed, shallow soup bowls.

MAKE AHEAD NOTE: The soup can be prepared and stored in airtight containers in the refrigerator for up to 3 days or frozen for 1 month.

NOTE: If using dried beans, rinse them, place them in a large heatproof bowl, cover with boiling water, and set aside for at least 1 hour, preferably overnight. Drain the beans, discarding the water.  

VARIATIONS: Try brightening the soup up with a quick, non-garlic pesto, blending basil leaves with a touch of olive oil and salt in a blender, adding a dollop at serving time.

This recipe was first published in My Master Recipes.


Nourish the Planet is a collaborative series by Patricia Wells and Emily Buchanan. Find our more here about why we think it’s important.

A Cool Summer Gazpacho

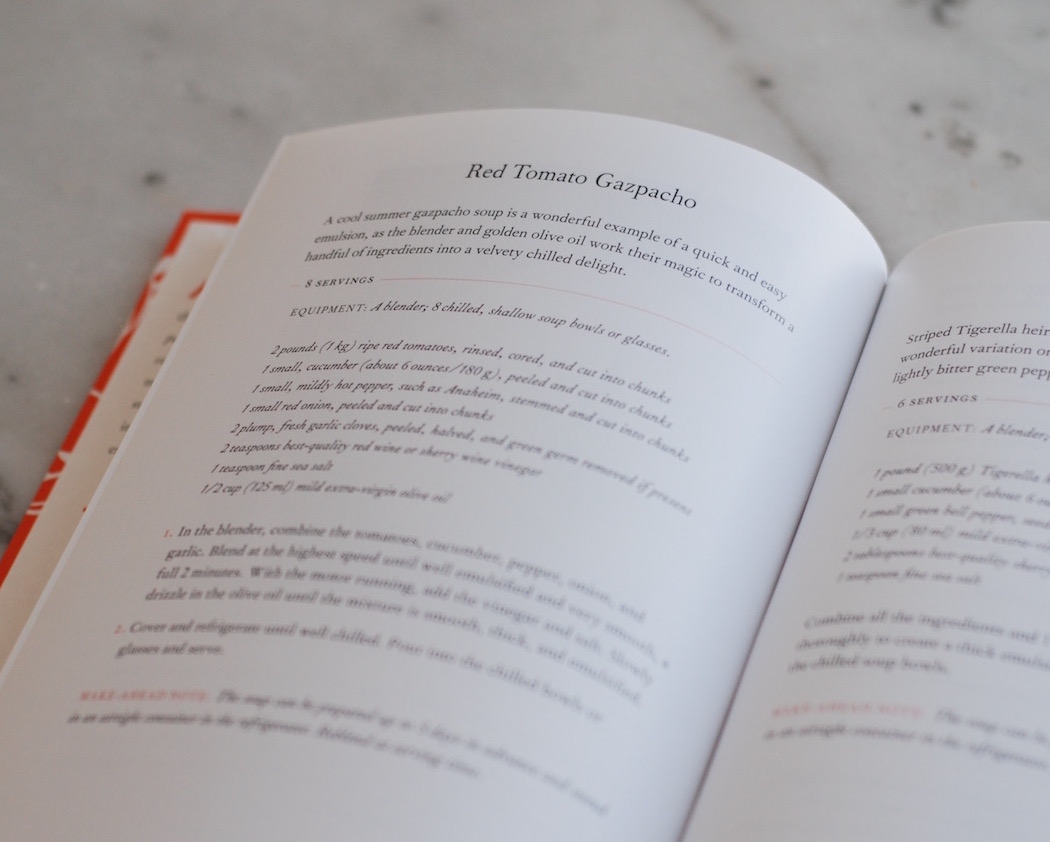
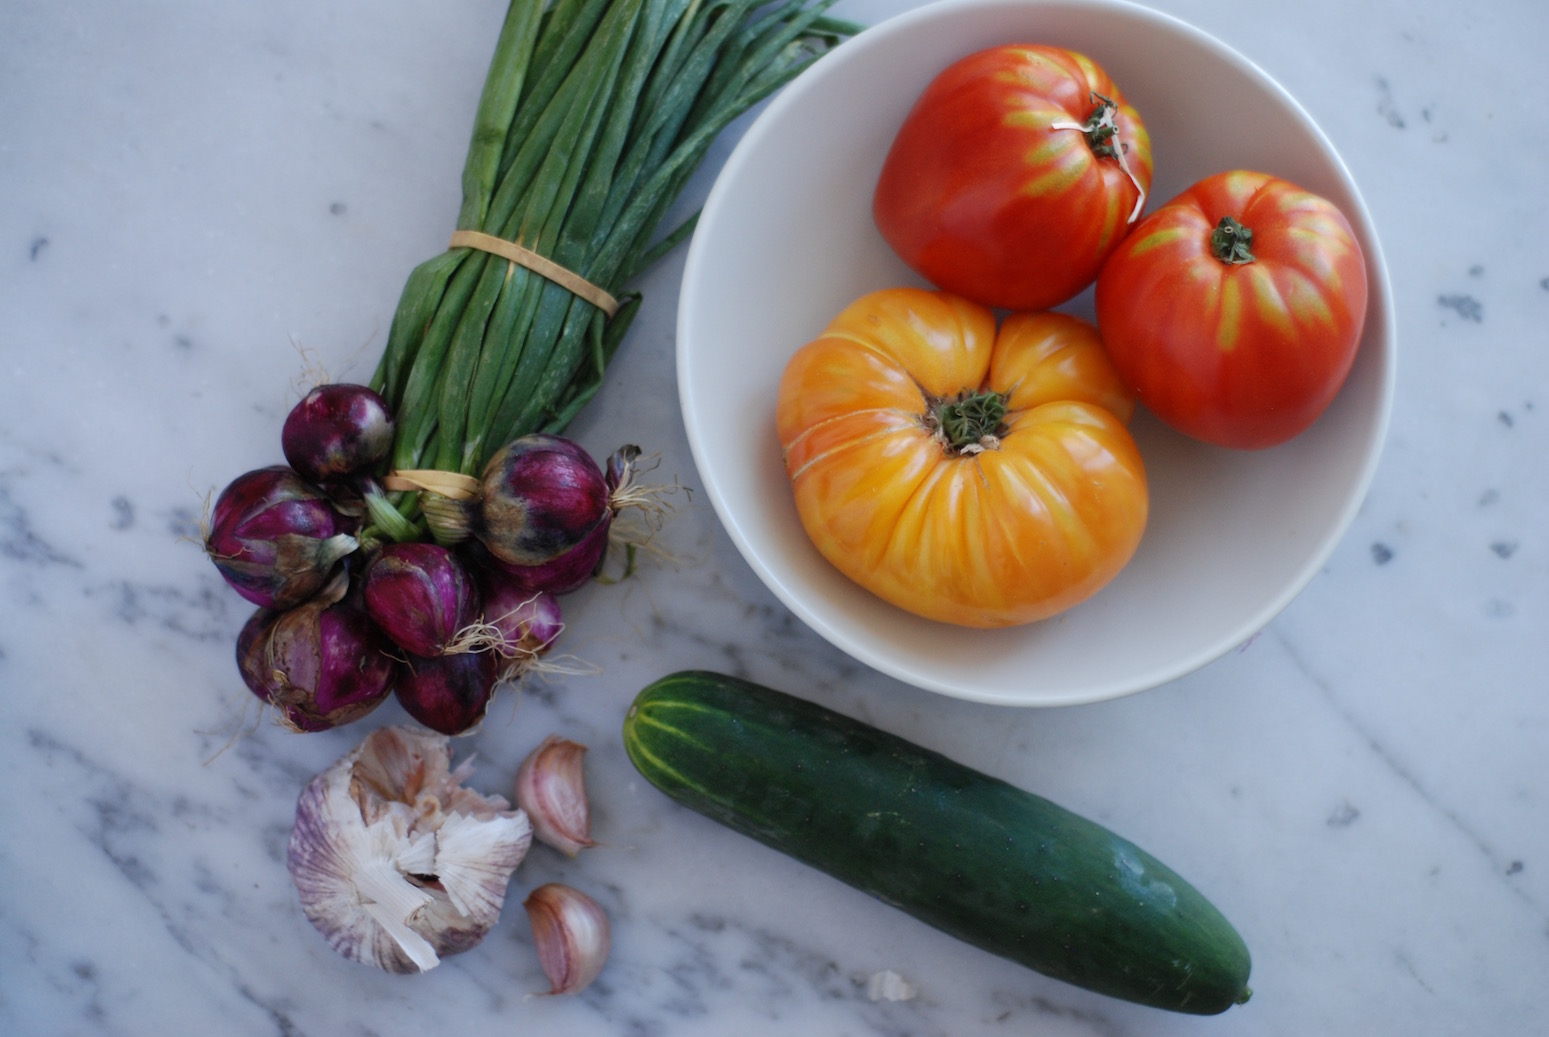
Summer arrived right on time this year in Paris and Provence and temperatures have recently been soaring into the high 90s. When temperatures are this high, I always reach for a recipe where I don't have to turn on an oven, and this one is a favorite as it's so cooling and so very simple to prepare. This is a slight variation on the emulsified soups master recipe, Red Tomato Gazpacho from My Master Recipes. An essential element of the book is to encourage you to first understand the fundamental techniques behind each recipe so that you are then free to switch out ingredients to create endless variations on the original. Recently, I couldn't resist using one of the gorgeous yellow ananas tomatoes from the market, and with all this hot weather the coriander in the garden has shot into flower, so I grabbed a handful to make use of my abundant stock. The result was a soup the color of a cantaloupe (not unlike the cover color of My Master Recipes!), flecked with green. What else do you need on a warm, summer's evening?!

Red Tomato Gazpacho

8 servings   |   Equipment: A blender, food processor or immersion blender 8 chilled, shallow soup bowls or glasses.

2 pounds (1 kg) ripe red tomatoes, rinsed, cored, cut into chunks  
1 small cucumber (about 6 ounces; 180 g) peeled, cut into chunks
1 small mildly hot pepper such as Anaheim, stemmed, cut into chunks
1 small red onion, peeled, cut into chunks
2 plump, fresh garlic cloves, peeled, halved, green germ removed if present
2 teaspoons best-quality red wine or sherry wine vinegar
1 teaspoon fine sea salt
1/2 cup (125 ml) mild extra-virgin olive oil

1.    In the blender, combine the tomatoes, cucumber, pepper, onion, and garlic. Blend at highest speed until well emulsified and very smooth, a full 2 minutes. With the motor running, add the vinegar and salt. Slowly drizzle in the olive oil, until the mixture is smooth, thick and emulsified.

2.    Cover and refrigerate until well chilled. Pour into chilled bowls or glasses to serve.
 
MAKE AHEAD NOTE: The soup can be prepared up to 3 days in advance and stored in an airtight container in the refrigerator. Re-blend at serving time.


This recipe was first published in My Master Recipes. All rights reserved. Please do not reproduce without permission.


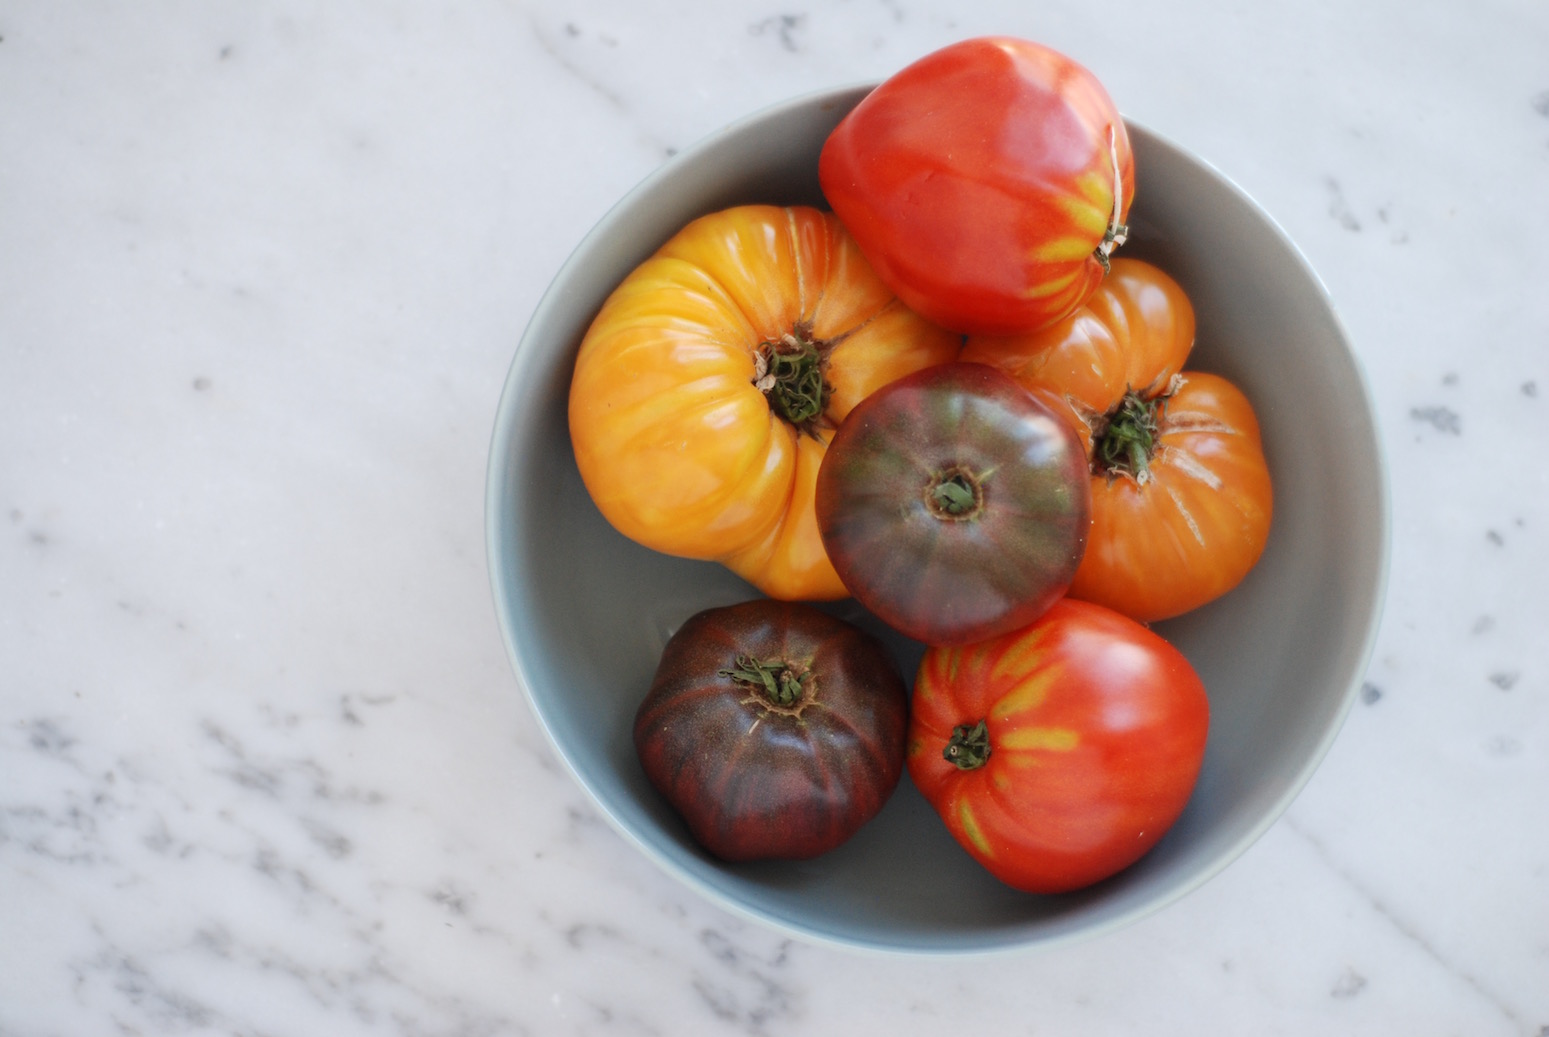
Taste of the week: Heirloom tomato platter

This has been a rough year for our vegetable garden, and while my heirloom tomatoes usually supply enough for an army, right now they are struggling to produce their usual bounty. Meagre as the offerings may be,  the tomatoes that are growing have tons of flavor. Some favorite varieties — such as kaki coing, black prince, noire de crimée, and striped germain — offer intense pleasure. At every meal, I slice up a rainbow selection,  shower them with a touch of fleur de sel, homemade lemon vinaigrette, and tiny leaves of basil from my amazing basil “trees” in the courtyard.

This simple platter is a favorite way to enjoy a tomato's fresh juicy sweetness. Here I have topped the tomato slices with ruffles of the firm Swiss cheese Tête de Moine, shaved with a special machine called a girolle, but any cheese of choice can be used here.

Heirloom Tomato Platter

6 servings   |   Equipment: A cheese girolle, a mandolin or a very sharp knife; a large serving platter.

Tomato Platter

6 ripe heirloom tomatoes (about 1 1/4 pounds; 625 g), preferably of varied colors

6 thin ruffles of Tête de Moine cheese, created with a cheese girolle if available (see Note)
A handful of fresh herbs, such as green basil, purple basil, shiso and Delfino cilantro, rinsed and patted dry
About 2 tablespoons Lemon-Olive Oil Dressing (below)
Fleur de sel


Lemon-Olive Oil Dressing

About 1 1/4 cups (310 ml) Equipment: A small jar with a lid.

1/4 cup (60 ml) freshly squeezed lemon juice
Fine sea salt    
1 cup (250 ml) extra-virgin olive oil

Arrange the tomatoes in overlapping layers on the serving platter. Garnish with the cheese and herbs. Drizzle the dressing over all and season lightly with fleur de sel.

Note: A cheese girolle can be found in my amazon store, . If you do not have a girolle, cut the cheese into paper-thin slices with a mandoline or a very sharp knife.


Place the lemon juice and salt in the jar. Cover and shake to dissolve the salt. Add the oil and shake to blend. Taste for seasoning. (Store in the refrigerator for up to 1 week.) Shake again at serving time to create a thick emulsion.

Taste of the week: Fig and almond tart

Picking figs is one of the greatest joys of my Provençal garden. I love the pure luxury of grabbing a plump ripe fig straight from a branch, tearing it open to reveal its ruby red seeded heart, and then devouring it right there beneath the tree's leafy canopy.

We have several varieties of fig trees on our property and they are such industrious little producers that I often have more figs than I know what to do with. Which is how I came to develop this recipe. My favorite is the ronde de Bordeaux, small figs with a deep purple, almost black exterior and a vibrant red interior, that are ideal for tarts and jams. I love to serve this tart with roasted fig sorbet.

Fig and Almond Tart

8 servings   |   Equipment:  A 10-inch (25 cm) tart pan with a removable bottom; a rolling pin; a baking sheet lined with baking parchment; a food processor.

A 14-ounce (400 g)all-butter puff pastry, thawed if frozen (see Note)
1 cup (80 g) almond meal (see Note)
5 tablespoons (2 1/2 ounces; 75 g) unsalted butter, at room temperature
1/3 cup (65 g) unrefined cane sugar, preferably organic, and vanilla scented
2 tablespoons (20 g) unbleached, all-purpose flour
1 egg yolk, preferably organic and free-range
1 tablespoon fig jam
35 to 40 (1 3/4 pounds; 875 g) small purple figs, stems trimmed
Confectioners’ sugar, for dusting

NOTES: •    In our tests, we have preferred Dufour brand frozen puff pastry, available at most specialty supermarkets. See www.dufourpastrykitchens.com. Be sure to leave ample time for thawing frozen dough, at least 6 hours in the refrigerator.

Almond meal (sometimes called almond flour) is made from whole, unblanched (skin-on) almonds. For this recipe, whole, unblanched almonds can be finely ground in a food processor. Do not over-process or you may end up with almond butter.

1.    Fold the pastry in half, transfer it to the tart pan and unfold it. Without stretching the dough, lift it up at the edges so that it naturally falls against the rim of the pan. With your fingertips, very delicately coax the dough onto the rim. There should be a generous overhang. With the rolling pin, roll over the top of the tin, trimming off the overhanging pastry to create a smooth, well-trimmed shell.

2.    Center a rack in the oven. Preheat the oven to 400°F (200°C). Place the tart shell on the baking sheet.

3.    In the food processor, combine the almond meal, butter, sugar, flour, egg yolk, and fig jam and process to blend. Transfer the almond mixture to the pastry shell. Smooth out the top with a spatula. Place in the oven and bake just until the pastry firms up and begins to brown, and the almond mixture browns, about 10 minutes. Remove from the oven.

4.    Cut an X in the top of each fig and gently squeeze from the bottom to open the fruit like a flower. Arrange the figs, cut side up, side by side on top of the almond mixture.

5.    Return the tart pan to the oven and bake until the figs and the filling are dark and bubbly, 20 to 25 minutes. Remove from the oven and transfer to a rack to cool. While the tart is still warm, sprinkle with confectioners’ sugar. After about 10 minutes, carefully remove the tart from the sides of the pan, leaving it on the pan base. Serve warm or at room temperature, cut into wedges. This tart is best served the day it is baked.

The secret: Use ripe, but not overly ripe figs, which tend to give up too much liquid and turn the pastry soggy.

Tip: Figs freeze beautifully. Treat them as you would berries: Arrange the whole fruit stem side up, side by side on a baking sheet, and place in the freezer. Once frozen, transfer to a zippered plastic bag and freeze for up to 3 months. For use, thaw at room temperature.


This recipe was first published in The French Kitchen Cookbook: Recipes and Lessons from Paris and Provence.

All rights reserved. Please do not reproduce without permission.

Taste of the week: Tomato Tatins

Tomato Tatins © Jeff Kauck

Now that summer is in full bloom, it's a race against time to use all the tomatoes I have growing in my garden. This recipe, which I developed in my farmhouse kitchen with good friend Jeffrey Bergman, is a favorite way to get tomatoes on my table. It's a deceptive recipe, quite simple to execute but with the marvellous outcome of 'did I really create this beauty?!'. The key here is the balance of sweet and acid. The shallots and vinegar, as well as the touch of caramel, are essential to creating a dish full of contrasting flavors.


Tomato Tatins

Serves 8   |     Equipment: Three baking sheets; eight 1/2 cup (125 ml) ramekins; a 3 1/2-inch (8.75 cm) pastry cutter.

Tomatoes

3 pounds (1.5 kg) small, firm, garden-fresh red heirloom tomatoes (about 15)
Fine sea salt
Extra-virgin olive oil spray

Pastry

A 14-ounce (400 g) homemade or purchased all-butter puff pastry, (thawed if frozen) (see Note)

Shallots

4 large shallots peeled, halved lengthwise, and cut into thin half-moons
2 teaspoons extra-virgin olive oil
1/2 teaspoon salt
1/2 teaspoon ground Espelette pepper or other mild ground chile pepper
2 tablespoons red wine vinegar

Caramel

1/2 cup (100 g) white, refined sugar (do not use dark, unrefined cane sugar)
4 teaspoons water
1/8 teaspoon freshly squeezed lemon juice


16 fresh basil leaves, plus more leaves for garnish
1/4 cup (25 g) freshly grated Parmigiano-Reggiano cheese


1.    Roast the tomatoes: Center a rack in the oven. Preheat the oven to 275°F (135°C).  

2.    Core the tomatoes and halve them crosswise (at the equator.) Arrange the tomatoes, cut side up, side by side, on the baking sheet. Sprinkle lightly with salt. Spray lightly with oil. Place the baking sheet in the oven and bake until the tomatoes have shrunk by about one-third, 1 1/2 to 2 hours. This is an important step to condense tomato flavor and reduce moisture. (The tomatoes can be baked up to 1 day in advance, stored in an airtight container, and refrigerated.)

3.    Prepare the pastry: With the pastry cutter, cut out 8 rounds of pastry. Arrange the rounds side by side on a baking sheet. With a fork, prick the pastry. (The pastry rounds can be prepared up to 8 hours in advance. Cover and refrigerate.)

4.    Prepare the shallot mixture: In a small saucepan, combine the shallots, oil, and 1/2 teaspoon of salt. Stir to coat the shallots with the oil. Sweat – cook, covered, over low heat, stirring frequently, until the shallots are soft and translucent – about 5 minutes. Add the Espelette pepper and the vinegar. Increase the heat to medium high and cook until the vinegar has evaporated, but the mixture remains moist. Taste for seasoning. (The shallots can be prepared up to 1 day in advance, stored in an airtight container and refrigerated.)

5.    Prepare the caramel: In a medium saucepan, combine the sugar, water, and lemon juice and bring to a boil over high heat. Reduce heat to medium and cook undisturbed until sugar begins to caramelize, about 1 minute.  Pay close attention as the caramel will deepen in color quickly at this stage.  Swirl the pan gently and cook until the caramel is a deep amber, about 1 minute more.  Spoon a generous tablespoon of the caramel into the ramekins and tilt the ramekins so that the caramel evenly coats the bottom. (This can be done up to 8 hours in advance. Store at room temperature.)


6.    Bake the tatins: About 30 minutes before baking the tatins, center a rack in the oven. Preheat the oven to 375°F (190°C).

7.    Arrange the caramel-coated ramekins side by side on a baking sheet. Place 2 or 3 tomato halves, cut side up, into each ramekin. Press down on the tomatoes so that they fit snugly into the ramekins. Spoon the shallot mixture on top of the tomatoes. Place 2 basil leaves on top of the shallots.  Sprinkle with the cheese.

8.    Place a round of chilled pastry on top of each ramekin and tuck the dough around the tomatoes. Place the baking sheet in the oven and bake until the pastry is puffed and golden and the tomatoes are bubbling around the edges, 25 to 35 minutes. Remove the baking sheet from the oven and transfer the ramekins to a rack to cool for at least 2 minutes.

9.    Carefully invert each tatin onto an individual salad plate. Serve slightly warm or at room temperature, garnished with basil leaves. (The tatins can be prepared up to 8 hours in advance, stored at room temperature.)


Note: In our tests, we have preferred Dufour brand frozen puff pastry, available at most specialty supermarkets. See www.dufourpastrykitchens.com (I have no affiliation with this brand, this is purely a personal preference).

Be sure to leave ample time for thawing frozen dough, at least 6 hours in he refrigerator.


This recipe was first published in The French Kitchen Cookbook. Buy the book here.

All rights reserved. Please do not reproduce without permission.

Taste of the week: Cobb Salad

My Cobb Salad  © Jeff Kauck

In mid summer, it is a fresh, crunchy salad that will get me through the day. This American classic is a favorite with the crunch of the iceberg and scallions, the soft richness of the avocado, the saltiness of the bacon, the sweetness of the tomato, the bite of the blue cheese – this salad has it all!  And it is beautiful to boot.


My Cobb Salad: Iceberg, Tomato, Avocado, Bacon, Blue Cheese. and Scallions 

4 servings

2 1/2 ounces smoked bacon, rind removed, cut into matchsticks (3/4 cup)
1 head iceberg lettuce, chopped
2 ripe heirloom tomatoes, cored, , peeled, seeded and chopped
1 large, ripe avocado, halved, pitted, peeled, and cubed
4 ounces chilled blue cheese (preferably Roquefort), crumbled (1 cup)

4 small spring onions or scallions, white part only, trimmed, peeled and cut into thin rounds
Lemon-Yogurt Dressing (below)
Coarse, freshly ground black pepper


1.    In a large, dry skillet, brown the bacon over moderate heat until crisp and golden, about 5 minutes. With a slotted spoon, transfer the bacon to several layers of paper towel to absorb the fat. Blot the top of the bacon with several layers of paper towel to absorb any additional fat. Set aside.


2.    In a large shallow bowl, combine the bacon, lettuce, tomatoes, avocado, blue cheese, and spring onions. Toss with just enough Lemon-Yogurt Dressing to lightly and evenly coat the ingredients. Season with plenty of coarse, freshly ground black pepper and serve.

Yogurt-Lemon Dressing

Makes about 3/4 cup   |   Equipment: A small jar, with a lid.   

1/2 cup plain low-fat yogurt
2 tablespoons freshly squeezed lemon juice
1/4 teaspoon Lemon Zest Salt or fine sea salt

In the jar, combine the yogurt, lemon juice and salt. Cover with the lid and shake to blend. Taste for seasoning.  The dressing can be used immediately. (Store the dressing in the refrigerator for up to 1 week. Shake to blend again before using.)  

This recipe was first published in Salad as a meal. Buy the book here.

All rights reserved. Please do not reproduce without permission.

Taste of the week: Yveline's chilled cucumber and avocado soup with avocado sorbet

                                              Chilled Cucumber and Avocado Soup  ©Jeff Kauck

On hot weather days, is there anything better than a cold, no-cook soup? This zesty and refreshing recipe is a favourite that my friend and neighbor Yveline came up with. It's now a perenial favorite at our summertime lunch table.


Yveline’s Chilled Cucumber and Avocado Soup

Serves 8   |    Equipment: A blender or a food processor.  

1 large European cucumber (about 1 pound; 500 g), chopped (do not peel)
2 large ripe avocados, halved, pitted, peeled, and cubed
2 cups (500 ml) chicken or vegetable stock (best quality you can find, or homemade if you can)
1 cup (45 g) chopped cilantro leaves
1 teaspoon fine sea salt   
Grated zest and juice of 1 lime, preferably organic
Avocado Sorbet (recipe below; optional)

1.    In the blender or food processor combine the cucumber, half of the cubed avocado, the stock, 3/4 cup (34 g) of the cilantro and the salt, and process to blend. Taste for seasoning. Chill for at least 1 hour and up to 24 hours.

2.    At serving time, garnish with the remaining 1/4 cup cilantro, the rest of the avocado, the lime juice and zest.  If using, ass a spoonful of the sorbet to each bowl.

Note: Using a blender rather than a food processor will give you a much smoother, more velvety consistency.


Avocado Sorbet

8 servings   |   Equipment: A blender or a food processor; an ice cream maker.

2 large, ripe avocados, halved, pitted, and peeled
2 cups (500 ml) Greek-style plain whole-milk yogurt
2 teaspoons freshly squeezed lime or lemon juice
1/4 teaspoon ground Espelette pepper or other mild chile pepper
1/4 teaspoon fine sea salt
1 teaspoon honey
2 tablespoons invert sugar syrup or light corn syrup

1.    Combine all the ingredients in the blender or food processor. Blend until completely smooth, 1 to 2 minutes. Taste for seasoning. Chill completely.

2.    At serving time, transfer the chilled mixture to the ice cream maker and freeze according to the manufacturer’s instructions. For best results, serve the sorbet as soon as it is frozen.


These recipes were first published in The French Kitchen Cookbook. Buy the book here.

All rights reserved. Please do not reproduce without permission.

Taste of the week: Chicken fricassée with fennel, capers, artichokes, and tomatoes

This recipe is a one-pot wonder, ideal for week night family dinners, or casual get togethers with friends. It's a rustic and hearty dish, yet the artichokes and fennel give it a lift of sophistication. It requires minimal effort to throw together, and can easily be made in advance and reheated at serving time. Serve with rice, pasta or polenta


Chicken Fricassée with fennel, capers, artichokes and olives

6 servings   |    Equipment: A large, deep skillet or Dutch oven, with a lid.

1 farm-fresh chicken (3-4 pounds; 1.5-2 kg), preferably organic and free range,  cut into 8 serving pieces, at room temperature
Fine sea salt
Coarse, freshly ground black pepper
3 tablespoons extra-virgin olive oil
2 onions, peeled, halved and thinly sliced
2 fennel bulbs, trimmed and thinly sliced   
1 cup (250 ml) white wine
1 28-ounce (794 g) can diced Italian tomatoes in juice
1 cup (115 g) green Picholine olives, pitted
1 cup (115 g) brine-cured black olives, pitted
1/4 cup (60 ml) capers in vinegar, drained
12 artichoke hearts marinated in olive oil, drained
Cooked rice, fresh pasta, or polenta for serving


1.    Liberally season the chicken on all sides with salt and pepper.

2.    In the large, deep skillet, heat the oil over moderate heat until hot but not smoking. Add the chicken pieces (in batches if necessary) and brown until they turn an even golden color, about 5 minutes. Turn the pieces and brown them on the other side, 5 minutes more. Carefully regulate the heat to avoid scorching the skin. When the pieces are browned, use tongs (to avoid piercing the poultry) to transfer them to a platter.

3.    Reduce the heat to low, add the onions and fennel to the skillet and sweat  – cook, covered, over low heat – until soft but not browned, about 10 minutes. Return the chicken to the skillet. Add the wine, tomatoes (with juices), olives, capers and artichokes. Cover and simmer over low heat until the chicken is cooked through. About 30 minutes. Taste for seasoning. Serve with rice, fresh pasta or polenta.


This recipe was first published in The French Kitchen Cookbook. Buy the book here.

All rights reserved. Please do not reproduce without permission.

Taste of the Week: Mini croque monsieur

            Ham and cheese squares   ©Jeff Kauck

I love to serve these small grilled ham and cheese squares, brightened by the tart crunch of a cornichon, as a fun palate opener when we have guests over. Assemble these baby croque monsieur sandwiches (not the classic version in the strictest sense as I have removed the bechamel sauce for a lighter summer touch) earlier in the day and then grill them at the last minute, when family and friends are gathering.


Ham and Cheese Squares (mini croque monsieur)

Makes 18 squares, to serve 6 to 8   |    Equipment: A toaster; a nonstick skillet; toothpicks.

4 slices Honey and Saffron Brioche or white bread (pain de mie) crusts removed
2 teaspoons French mustard
2 thin slices best-quality cooked ham, cut to fit 2 slices of the bread
About 1/4 cup (30 g) freshly grated Swiss Gruyère cheese or other hard cheese
1 tablespoon (15 g) clarified butter or unsalted butter
9 cornichons, halved lengthwise

1.    Toast the brioche or bread. Coat one side of each slice with the mustard. Place a slice of ham over the mustard on two sides of the slices. Sprinkle the cheese over the ham. Place the other slices of bread, mustard-coated side down, on top of the cheese.  

2.    In the skillet, melt the butter over low heat.  Brown the bread evenly on both sides, about 1 minute per side. Cut each sandwich into 9 even squares. Pierce each cornichon half with a toothpick and secure the toothpick to the grilled bread. Arrange on a serving platter and serve warm, offering guests cocktail napkins.

Wine suggestion: Grilled cheese and champagne? Why not? I love Pierre Moncuit’s blanc de blancs, a medium-bodied, clean, and always reliable offering that has a purity that matches just about any opening taste.


This recipe was first published in The French Kitchen Cookbook. Buy the book here.

All rights reserved. Please do not reproduce without permission.

Taste of the week: Ruby rhubarb bars

In France, rhubarb appears fleetingly in the markets in May and June, just in time to be paired with gariguette or charlotte strawberries, before disappearing for another year. In this dish however, rhubarb is the sole star, the shining tart crown atop a warm pastry crust.

Both green and red rhubarb can of course be used for this dish, but it's the red varieties that really leaves an impression visually if cooked properly. So often it can lose its gorgeous ruby hue as it cooks but the trick is not to precook the stems and instead bake them in extra-thin slices, so they cook quickly and retain their shape and bright red color.

Ruby Rhubarb Bars

Equipment: A 9 1/2  x 9 1/2-inch (24 x 24 cm) baking pan   |   baking parchment   |   a food processor.

Pastry
4 tablespoons (60 g) salted butter, chilled
1 cup (140 g) unbleached, all-purpose flour
1/3 cup (65 g) confectioners’ sugar
Grated zest of 1 lemon, preferably organic
1/2 teaspoon fine sea salt   
2 tablespoons plain nonfat yogurt

Topping:
3/4 cup (150 g) unrefined cane sugar, preferably organic, vanilla scented (see Note)
1/4 cup (40 g) unbleached, all-purpose flour
4 large egg whites, preferably organic and free range
3 cups (300 g) thinly sliced red rhubarb stalks, (about seven 10-inch; 26 cm)


1.    Center a rack in the oven. Preheat the oven to 400°F (200°C).
 
2.    Line the baking pan with two pieces of baking parchment, letting the parchment hang over the sides. (This will make it easier to remove the dessert once baked.)

3.    Prepare the pastry: In the food processor, combine all the pastry ingredients and process to blend. The mixture should be soft and pliable.

4.    Press the dough evenly into the bottom of the baking pan. Place the pan in the oven and bake until firm, about 12 minutes.

5.    While the pastry is baking, prepare the topping: In a bowl, combine the sugar, flour, and egg whites and whisk to blend. Add the rhubarb and stir to coat it evenly with the egg-white mixture.

6.    Remove the pan from the oven and spoon the rhubarb mixture over the warm pastry. Return the baking pan to the oven and bake until the topping is firm and golden, 35 to 40 minutes. Remove from the oven and let cool. Remove from the pan and cut into 16 squares. Serve at room temperature. (Store in an airtight container at room temperature for up to 3 days.)

Note: to make vanilla-scented sugar: Flatten 1 or several moist vanilla beans. Cut them in half lengthwise. With a small spoon, scrape out the seeds and place them in a small jar; reserve the seeds for another use. Fully dry the vanilla bean halves at room temperature. Place the dry halves in a large jar with a lid, and cover them with sugar. Tighten the lid and store for several weeks to scent and flavor the sugar. Use in place of regular sugar when preparing desserts.

Taste of the Week: honey and saffron brioche

                                   © Jeff Kauck

I have rarely seen students so enthused and bursting with pride as their airy brioche puffs to grandeur in the oven, arriving shiny and golden to the table just moments later. There is great triumph in baking perfection, and after a class, e-mails, photos, tweets and Facebook notations attest to the students prowess in the kitchen. In my kitchens, I use honey rather than sugar as a sweetener. The reasons are simple: honey just makes food taste better and for us it’s a homegrown product, produced from our bees that call Chanteduc and Provence home. When preparing this brioche, don’t omit the saffron: Infusing it in the warm milk dramatizes the intensity of these golden threads and adds an exotic flavor and aroma to the final product, not to mention the touch of color.

Note that you’ll need to start the brioche several hours before you plan to bake it.


Honey and Saffron Brioche

Makes 2 loaves, about 16 slices each   |   Equipment: A heavy-duty mixer fitted with a flat paddle; a dough scraper;  two nonstick 1-quart (1 l) rectangular bread pans.


Sponge:

1/3 cup (80 ml) whole milk, lukewarm
A generous pinch of best-quality saffron threads (about 1 heaping teaspoon, 30-40 filaments, or 0.3 gram)
1 package (2 1/4 teaspoons; 9 g) active dry yeast
1 tablespoon honey
1 large egg, free-range and organic, lightly beaten
2 cups (280 g) unbleached, all-purpose flour

Dough:

1/3 cup (80 ml) lavender honey, or other mild, fragrant honey
1 teaspoon fine sea salt
4 large, ultra-fresh eggs, free-range and organic, lightly beaten
1 1/2 cups (210 g) unbleached, all purpose-flour
12 tablespoons (6 ounces; 180 g) unsalted butter, at room temperature

Egg wash:

1 large, ultra-fresh egg,  organic and free-range, lightly beaten


1.    Prepare the sponge: In the bowl of the heavy-duty mixer fitted with the paddle, combine the milk, saffron, yeast, and honey and stir to blend. Let stand until foamy, about 5 minutes. Add the egg and 1 cup (140 g) of the flour and and stir to blend. The sponge will be soft and sticky. Sprinkle with the remaining 1 cup (140 g) flour, covering the sponge. Set aside to rest, uncovered, for 30 minutes. The sponge should erupt slightly, cracking the layer of flour.

2.    Prepare the dough: Add the honey, salt, eggs and the 1 1/2 cups (210 g) of the flour to the sponge. With the paddle attached, mix on low speed just until the ingredients come together, about 1 minute. Increase the mixer speed to medium and beat for 5 minutes.

3.    To incorporate the butter into the dough, it should be the same consistency as the dough. To prepare the butter, place it on a flat work surface, and with the dough scraper, smear it bit by bit across the surface. When it is ready, the butter should be smooth, soft, and still cool – not warm, oily, or greasy.

4.    With the mixer on medium-low speed, add the butter a few tablespoons at a time. When all of the butter has been added, increase the mixer speed to medium-high for 1 minute. Then reduce the speed to medium and beat the dough for 5 minutes. The dough will be soft and sticky.

5. First rise: Cover the bowl tightly with plastic wrap. Let the dough rise at room temperature until doubled in bulk, about 2 hours.

6. Chilling and second rise: Punch down the dough. Cover the bowl tightly with plastic wrap and refrigerate the dough overnight, or for at least 4 hours, during which time it will continue to rise and may double in size again.. After the second rise, the dough is ready to use.

7. To bake the brioche: Divide the dough into 12 equal pieces, each weighing about 2 1/2 ounces (75 g).  Roll each piece of dough tightly into a ball and place 6 pieces side by side in each bread pan. Cover the pans with a clean cloth and let the dough rise at room temperature until doubled in bulk, 1 to 1 1/2 hours.

8.  Center a rack in the oven. Preheat the oven to 375°F (190°C).

9.  Lightly brush the dough with the beaten egg. Working quickly, use the tip of a pair of sharp scissors to snip several crosses along the top of each pan of dough. (This will help the brioche rise evenly as it bakes). Place the pans in the oven and bake until the brioche loaves are puffed and deeply golden, 30 to 35 minutes.  Remove the pans from the oven and place on a rack to cool. Turn the loaves out once they have cooled.

The secret: Top-quality honey makes all the difference here. Honey not only enriches the flavor of this brioche, but also helps keep it moist.   

Note: The brioche is best eaten the day it is baked. It can be stored for a day or two, tightly wrapped. To freeze, wrap it tightly and store for up to 1 month. Thaw, still wrapped, at room temperature.  

Note: A reliable saffron source is The Spice House www.thespicehouse.com


This recipe was first published in The French Kitchen Cookbook. Buy the book here.

All rights reserved. Please do not reproduce without permission.

Taste of the week: Jerusalem artichoke soup

How can just three ingredients -- one of them salt -- taste so creamy, rich and delicious? 

Years ago when I was writing about vegetable recipes created by three-star chefs, Pierre Gagnaire demonstrated  this simple,  sublime, wintry Jerusalmen artichoke (also known as sunchoke) soup. Over time, I have turned the thick soup into a sauce for pasta; reduced it a bit for a fine vegetable puree; or thinned out the nutty liquid with stock, using it as a base for poaching oysters or scallops. If truffles are not available when making this soup, try a last-minute drizzle of fragrant hazelnut oil as garnish.   It’s your choice as to peel the artichokes or not. Peeling the gnarled, knobby vegetable is a tedious task, and I rather like the dots of peel that give character to the puree. Just be sure to scrub the vegetable well.   

Jerusalem artichoke soup

8 servings   |   Equipment: A blender or a food processor; 8 warmed, shallow soup bowls. 

2 quarts (2 l) whole milk
2 teaspoons fine sea salt
2 pounds (1 kg) Jerusalem artichokes (sunchokes), scrubbed and trimmed
2 tablespoons minced black fresh black truffles or minced truffle pelings, or 1 tablespoon best-quality hazelnut oil (such as Leblanc brand)  


1.    Rinse a large saucepan with water, leaving a bit of water in the pan. This will prevent the milk from scorching and sticking to the pan.  Pour the milk into the pan and add the sea salt.

2.    Peel the Jerusalem artichokes, chop coarsely and drop immediately into the milk. (This will stop the vegetable from turning brown as it is exposed to the air.) When all the Jerusalem artichokes are in the pan, place over moderate heat and simmer gently until soft, about 35 to 40  minutes. Watch carefully so the milk does not overflow the pan.

3.    Transfer the mixture in small batches to the blender or the food processor. Do not place the plunger in the feed tube of the  food processor or the blender or the heat will create a vacuum and the liquid will splatter. Purée until the mixture is  perfectly smooth and silky, 1 to 2 minutes (note that using a blender rather than a food processor will result in a much smoother texture). 

4.    Return the soup to the saucepan and reheat it gently. Taste for seasoning. Pour it into the warmed soup bowls and shower with the minced truffle, or drizzle with the hazelnut oil. 

A SOUP, A SAUCE, A VEGETABLE SIDE DISH: 
This soup can easily be transformed into a sauce for pasta or to serve as a vegetable side dish. Simple reduce the soup over low heat to desired thickness ,  5 to 10 minutes.


This recipe was first published in Simply Truffles. Buy the book here.

All rights reserved. Please do not reproduce without permission.

Taste of the week: Grilled polenta with tomato and onion sauce

I love this soothing, comforting dish for a quick weeknight meal, especially in winter. And of course the sauce can be dressed up any way you fancy, with whatever you have on hand. Add marinated artichokes, fennel seeds, capers  and olives, scatter fresh buffalo mozzarella over the piping hot sauce just before serving, or add sausage meat and rosemary for a meatlovers version. The possibilities are as endless as your imagination.


Grilled Polenta with Tomato and Onion Sauce

4 Servings   |   Equipment: A 1-quart (1 l) gratin dish, 4 warmed dinner plates.

3 cups (750 ml) 1 % milk
1/2 cup (125 ml) light cream or half-and-half
1 1/2 teaspoons fine sea salt
1/2 teaspoon freshly grated nutmeg
3/4 cup (135 g) instant polenta
1/2 cup (90 g) freshly grated Swiss Gruyère cheese, plus extra for garnish
1 large onion, peeled, halved lengthwise, and cut into thin half-rounds
1/4 cup (60 ml) extra-virgin olive oil
2 fresh or dried bay leaves
One  28-ounce (794g) can peeled Italian plum tomatoes in juice
Fresh, flat-leafed parsley leaves, for garnish


1.    In a large saucepan, bring the milk, cream, 1 teaspoon of the sea salt, and the nutmeg to a boil over medium heat. (Watch carefully, for milk will boil over quickly.) Add the polenta in a steady stream and, stirring constantly with a wooden spoon, cook until the mixture begins to thicken, about 3 minutes.

2.    Remove from the heat. Add half of the cheese, stirring to blend thoroughly.  The polenta should be very creamy and pourable. Pour it into the gratin dish. Even out the top with a spatula. Sprinkle with the remaining cheese. Let sit at room temperature for about 30 minutes to firm up. (Or store, covered and refrigerated, for up to 3 days.)

3.    Prepare the tomato garnish: In a large skillet, combine the onion, 2 tablespoons of the olive oil, and the remaining 1/2 teaspoon of sea salt and sweat – cook, covered over low heat until soft and translucent – about 5 minutes. With a large pair of scissors, cut the tomatoes in the can into small piece. Add the bay leaves and tomatoes and their juices and cook, covered, over low heat for about 15 minutes. Taste for seasoning.

4.    At serving time, heat the remaining 2 tablespoons of oil in a large skillet until hot but not smoking. Cut the polenta into 8 even squares. Sear each square on both sides until golden, about 2 minutes per side. Transfer the squares to the warmed plates, stacking the second slice at an angle over the first. Spoon the sauce all over. Garnish with parsley and cheese.

WINE SUGGESTION: An inexpensive everyday dish suggests an equally fine but gently priced wine. A favorite is Michel and Stephane Ogier’s La Rosine Syrah, a deep purple vin de pays from the hillsides north of the old Roman town of Vienne.

MAKE AHEAD NOTE: Both the tomato sauce and the polenta can be prepared up to 3 days in advance, then covered and refrigerated seperately. Reheat at serving time.

THE SECRET: When using whole, canned tomatoes, use a scissors to cut the tomatoes into small pieces, making for a still chunky yet finer sauce.


This recipe was first published in The French Kitchen Cookbook. Buy the book here.

All rights reserved. Please do not  reproduce without permission.

Taste of the week: Manchego, chorizo and paprika bread

                                               © Jeff Kauck

This anytime of year bread recipe is a quick and easy way to transport yourself to Spain. You can serve this warm out of the oven or at room temperature – I love it sliced and toasted, with more cheese and chorizo on top as an afternoon snack. Or, in the warmer months, it's the perfect picnic bread.


Manchego Chorizo and Paprika Bread

Makes 1 loaf (about 24 thin slices)  |   Equipment: A nonstick 1-quart (1 l) rectangular bread pan.

Oil, for oiling the pan

1 1/4 cups (180 g) unbleached, all-purpose flour

2 teaspoons baking powder

1/2 teaspoon fine sea salt

3 large eggs,  preferably organic and free-range, lightly beaten

1/3 cup (80 ml) extra-virgin olive oil

1/3 cup (80 ml) plain whole-milk yogurt

5 ounces (150 g) Spanish Manchego cheese, cut into 1/4-inch (1/2 cm) cubes

2 ounces (60 g) Spanish chorizo, cut into 1/4-inch (1/2 cm) cubes

1 teaspoon hot Spanish paprika

20 pimento-stuffed green olives

1.     Center a rack in the oven. Preheat the oven to 400°F (200°C). Lightly oil the bread pan.

2.     In a large bowl, combine the flour, baking powder, and salt. Mix to blend. In another bowl whisk together the eggs, oil, and yogurt.  In a third bowl, toss together the cheese, chorizo, paprika, and olives. Add the egg mixture to the flour mixture and stir to blend. Add the cheese mixture and stir to blend.  

3.     Pour the batter into the prepared pan. Smooth out the top with a spatula. Place the pan in the oven and bake until the bread is firm and golden, 25 to 30 minutes. Remove from the oven and place the pan on a rack to cool. Once it has cooled, unmold and serve it at room temperature, in thin slices.


Variations: Omit the cheese and chorizo and replace them with 1 tablespoon toasted ground cumin and 1 tablespoon toasted whole cumin seeds; or, for Curry Bread, omit the cheese and chorizo and replace with 1 tablespoon curry powder.


 This recipe was first published in The French Kitchen Cookbook. All rights reserved. Please do not reproduce without permission.